> ## Documentation Index
> Fetch the complete documentation index at: https://docs.hiveinspect.com/llms.txt
> Use this file to discover all available pages before exploring further.

# Automations

> Set up automated workflows and notifications in Hive

⏱️ **Estimated time:** \~5 minutes

## Video Tutorial

<Card title="Setting Up Automations for Inspections" icon="circle-play">
  <iframe width="100%" height="450" src="https://www.loom.com/embed/7d7c734426494275adfd1c584ee2ca43" frameborder="0" allowfullscreen />
</Card>

<Steps>
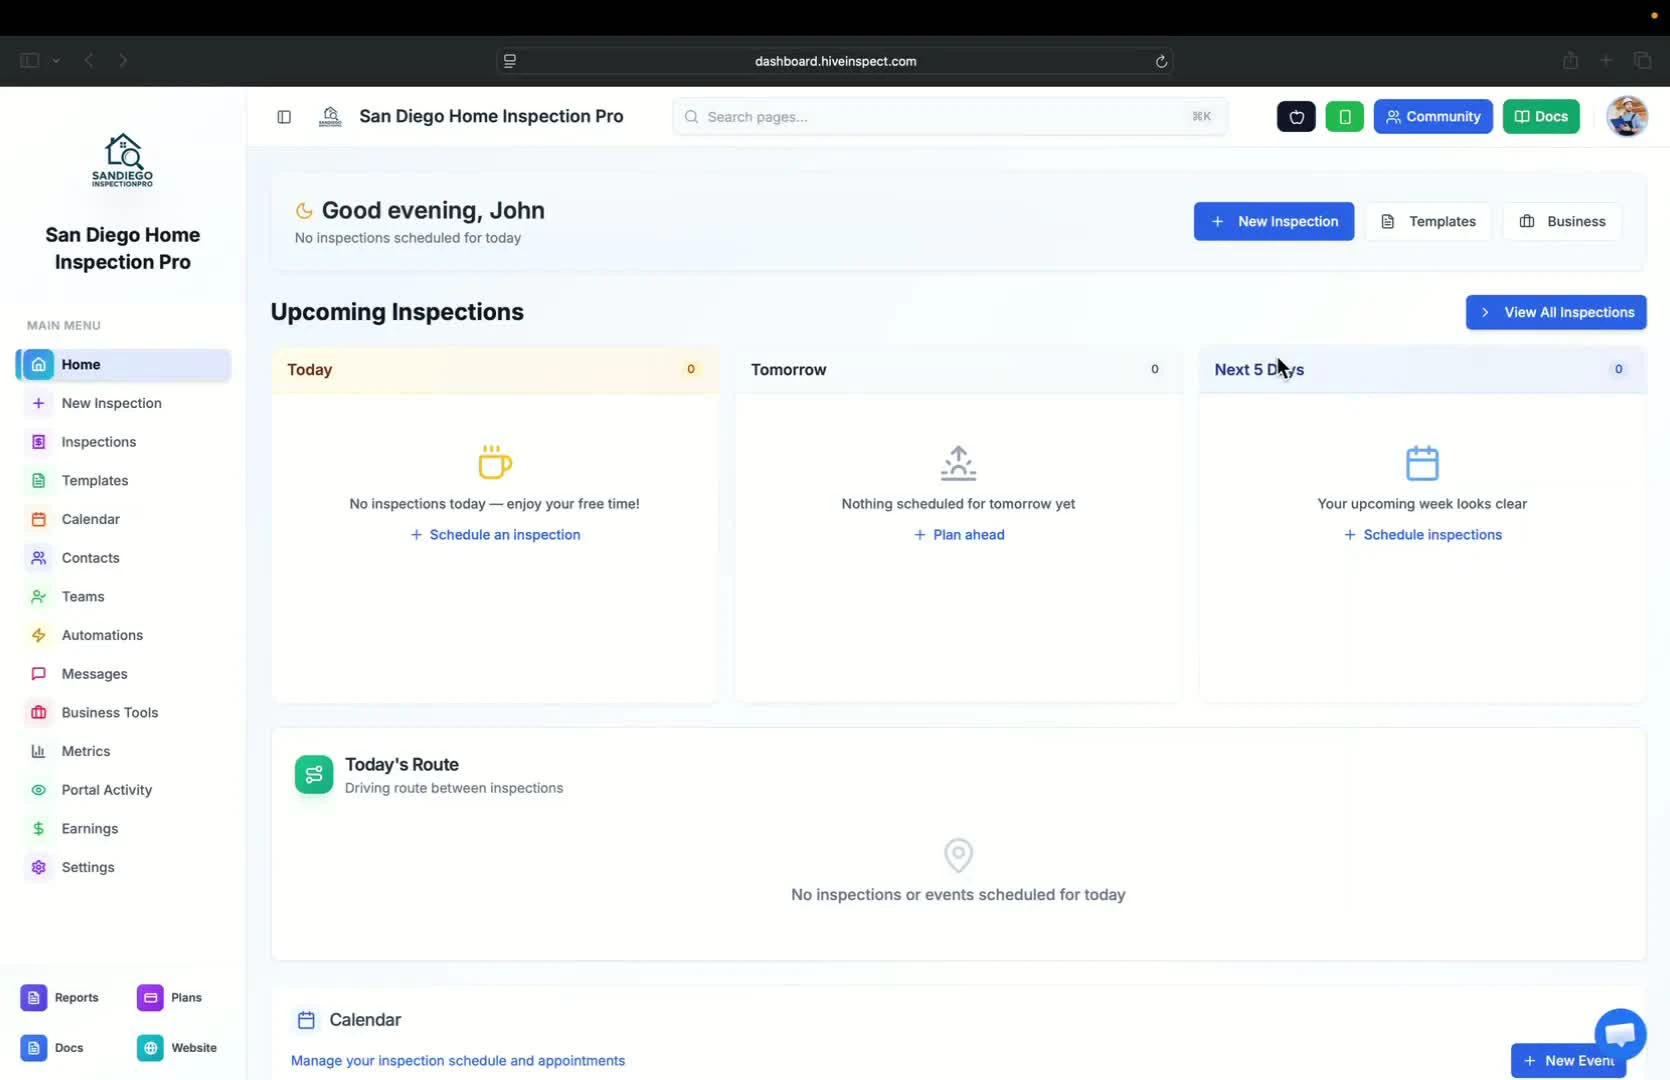
  <Step title="Set Up Automations Before Scheduling Inspections — 0:01">
    * Go to the Automation section
    * Ensure automations are set up before scheduling any inspections
    <img src="https://mintcdn.com/hiveinspect-43c85ed1/xYKGp_3A44kyTeKP/images/Automation-1.jpg?fit=max&auto=format&n=xYKGp_3A44kyTeKP&q=85&s=248d1fdd1d52746795e128f7002165ce" alt="Setting up automations before scheduling" width="1670" height="1080" data-path="images/Automation-1.jpg" />
  </Step>

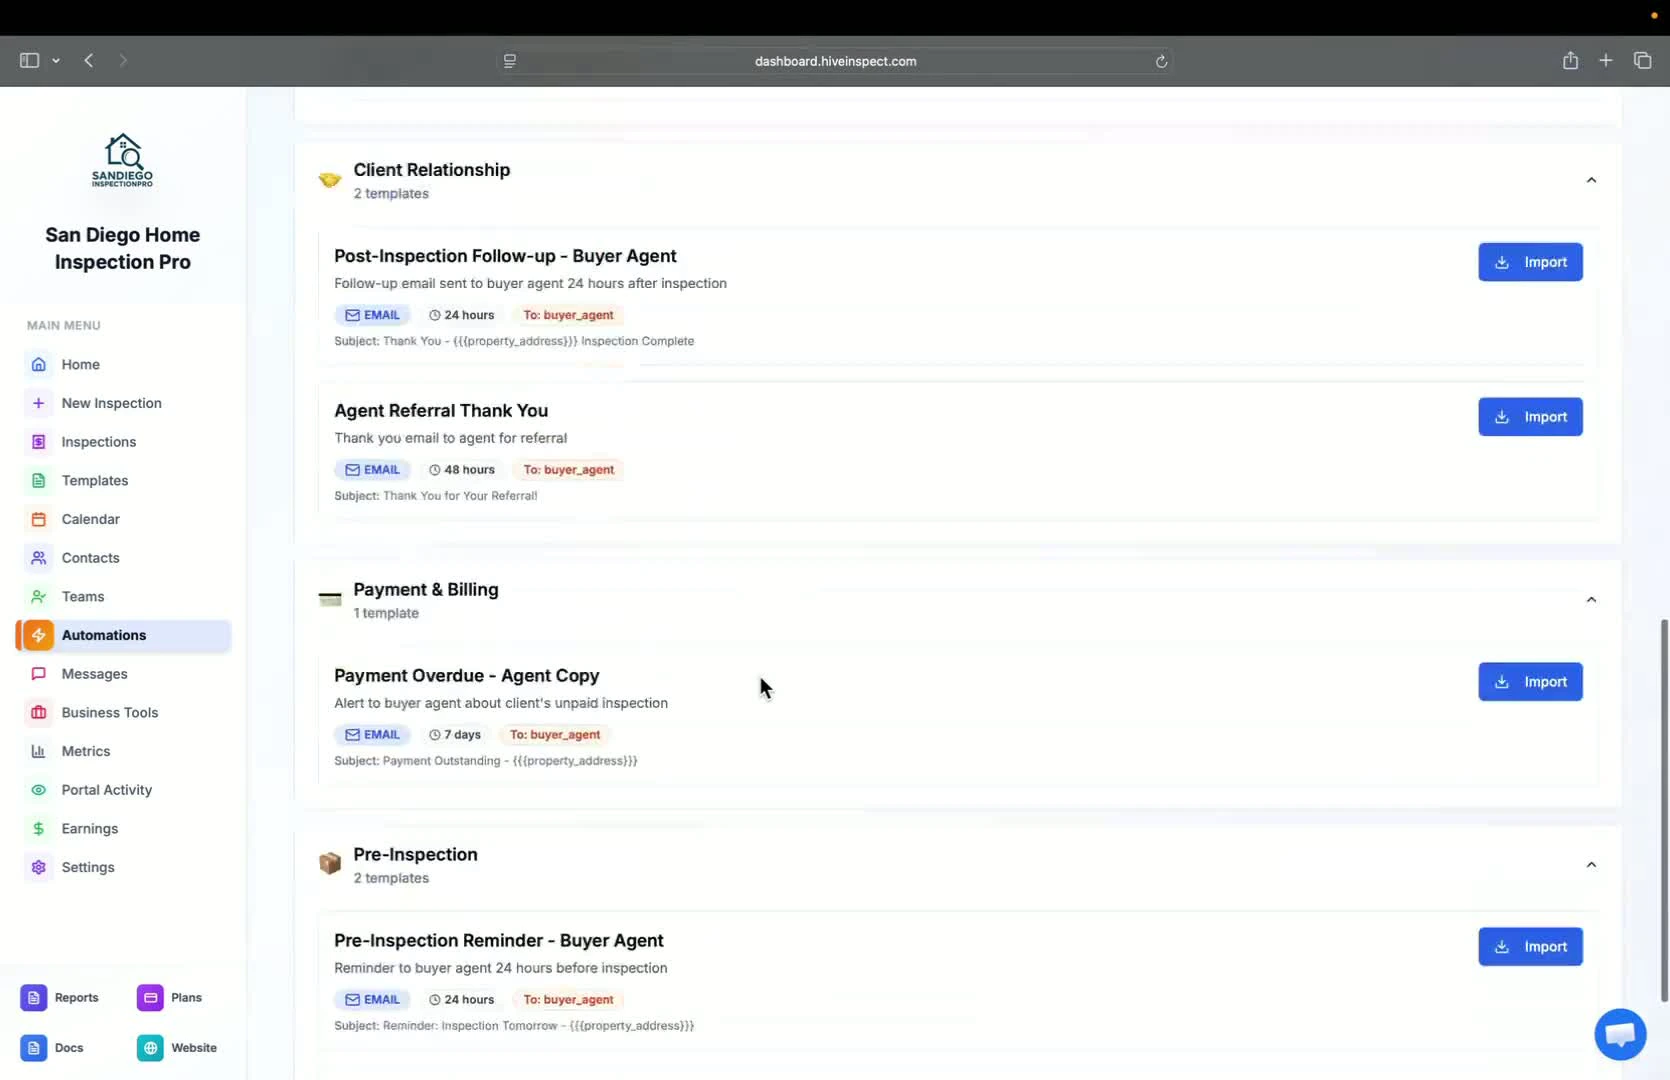
  <Step title="Choose Types of Communications — 0:31">
    * Select the type of communication you want to send (e.g., email, SMS)
    * Understand the trigger points for scheduling communications
    <img src="https://mintcdn.com/hiveinspect-43c85ed1/xYKGp_3A44kyTeKP/images/Automation-2.jpg?fit=max&auto=format&n=xYKGp_3A44kyTeKP&q=85&s=a689cee3240e4e0bf91f18ea14f472d1" alt="Choosing types of communications" width="1670" height="1080" data-path="images/Automation-2.jpg" />
  </Step>

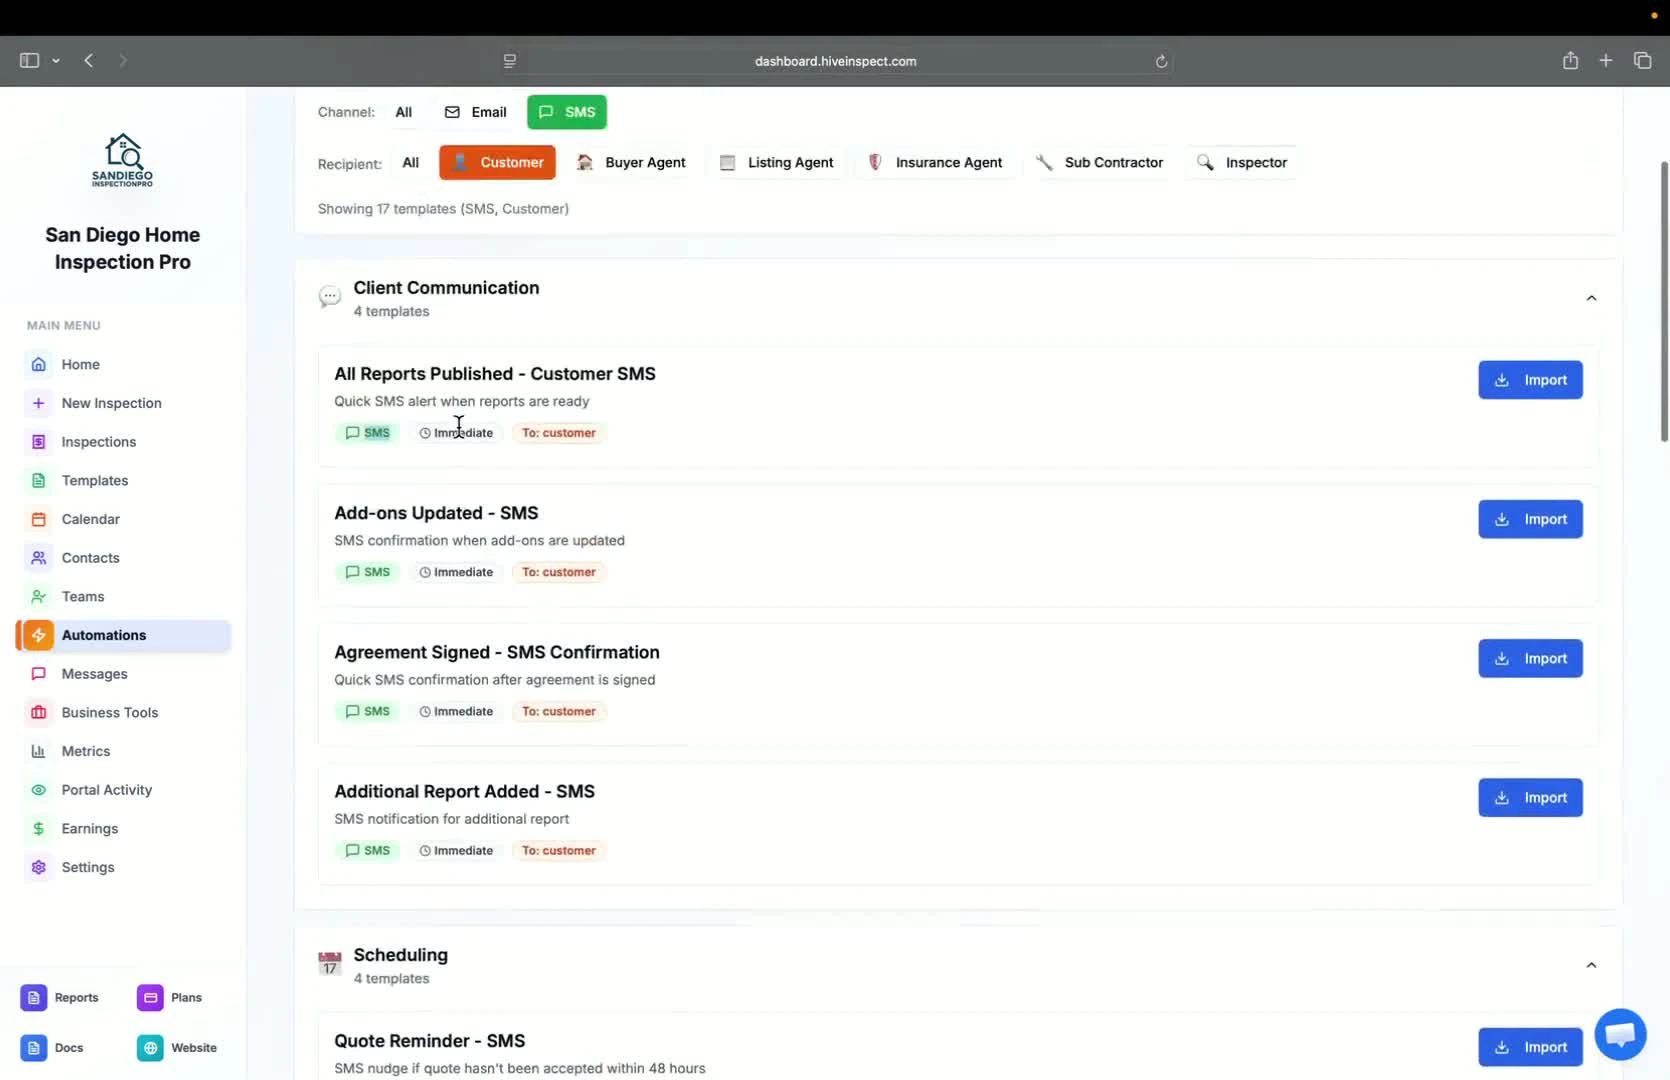
  <Step title="Import Automation Settings — 0:53">
    * Click **Import** to select services for the automation
    * Note: If no service is selected, the automation applies to all services
    <img src="https://mintcdn.com/hiveinspect-43c85ed1/xYKGp_3A44kyTeKP/images/Automation-3.jpg?fit=max&auto=format&n=xYKGp_3A44kyTeKP&q=85&s=d4d3dbebdb69aab44995e237e7f6029d" alt="Importing automation settings" width="1670" height="1080" data-path="images/Automation-3.jpg" />
  </Step>

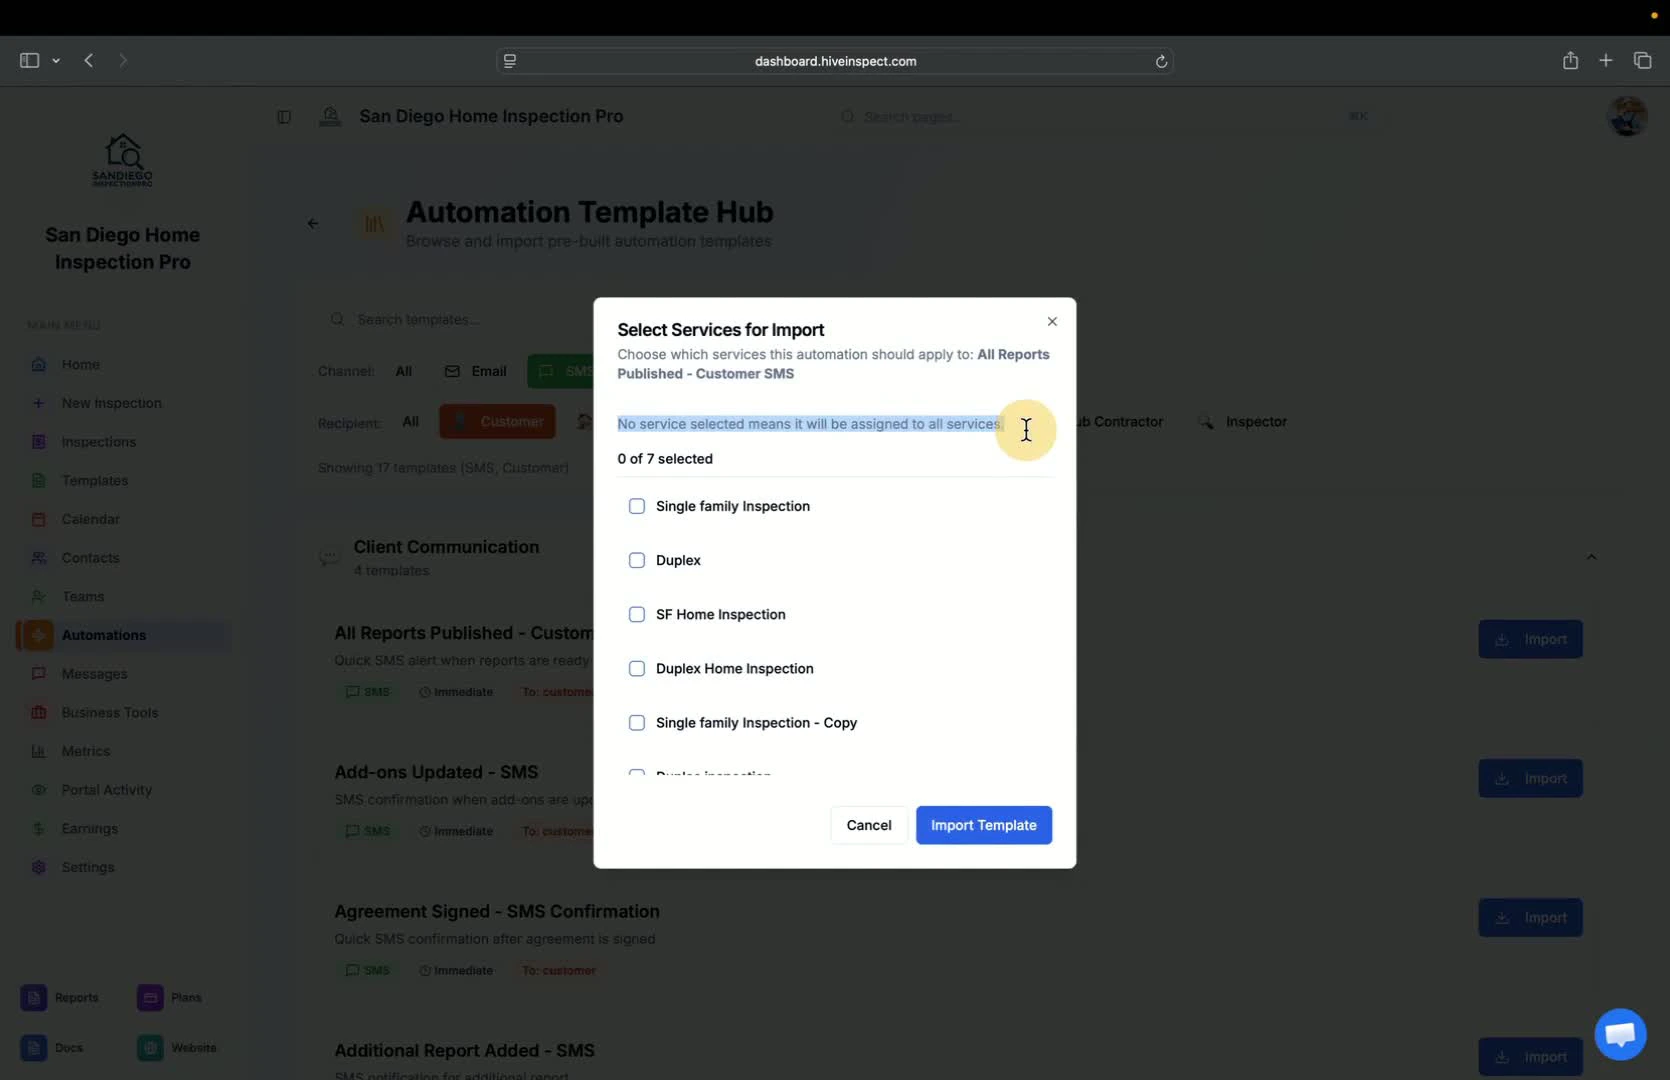
  <Step title="Select Specific Services (Optional) — 1:05">
    * If needed, select specific services for the automation
    * Avoid selecting services unless necessary to ensure future inspections are included
    <img src="https://mintcdn.com/hiveinspect-43c85ed1/xYKGp_3A44kyTeKP/images/Automation-4.jpg?fit=max&auto=format&n=xYKGp_3A44kyTeKP&q=85&s=bba6190737d1a71163c13287768146a2" alt="Selecting specific services" width="1670" height="1080" data-path="images/Automation-4.jpg" />
  </Step>

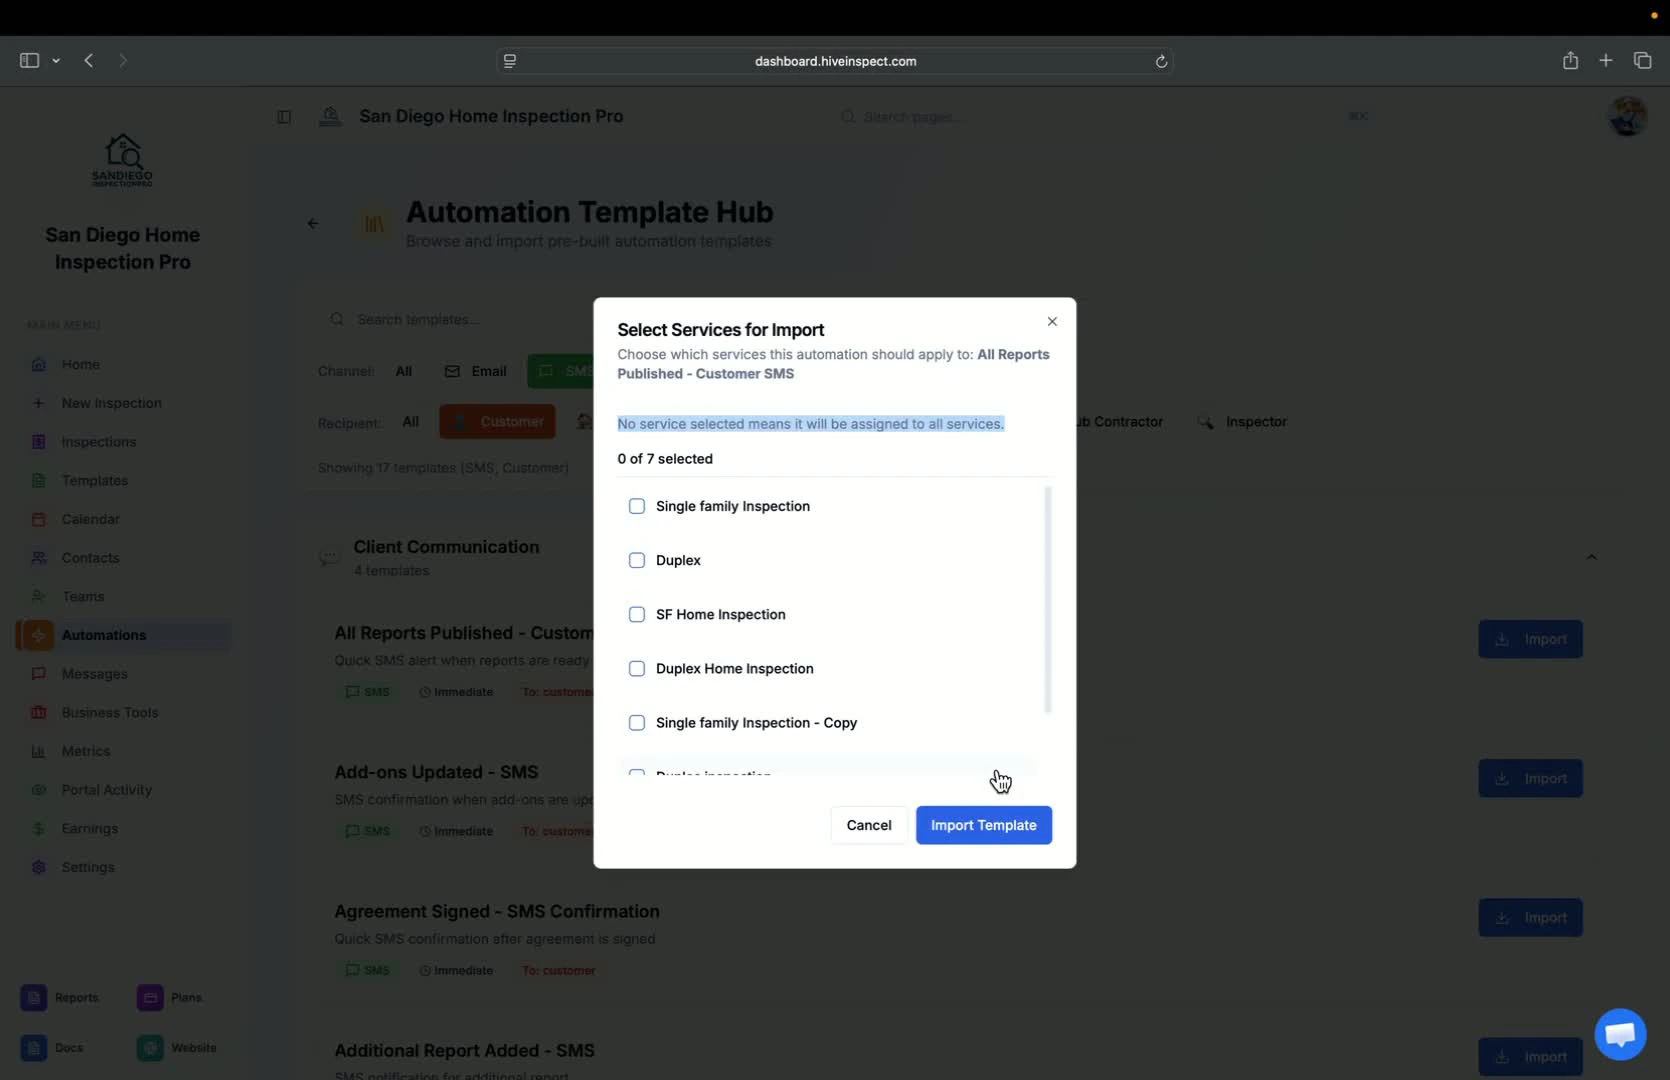
  <Step title="Edit Automation Details — 1:25">
    * Click **Edit** to modify the automation settings
    * Review trigger types, reference names, channels, and delays
    <img src="https://mintcdn.com/hiveinspect-43c85ed1/xYKGp_3A44kyTeKP/images/Automation-5.jpg?fit=max&auto=format&n=xYKGp_3A44kyTeKP&q=85&s=9b0c7bd0b1ae2f14a7dbef36fb8666f1" alt="Editing automation details" width="1670" height="1080" data-path="images/Automation-5.jpg" />
  </Step>

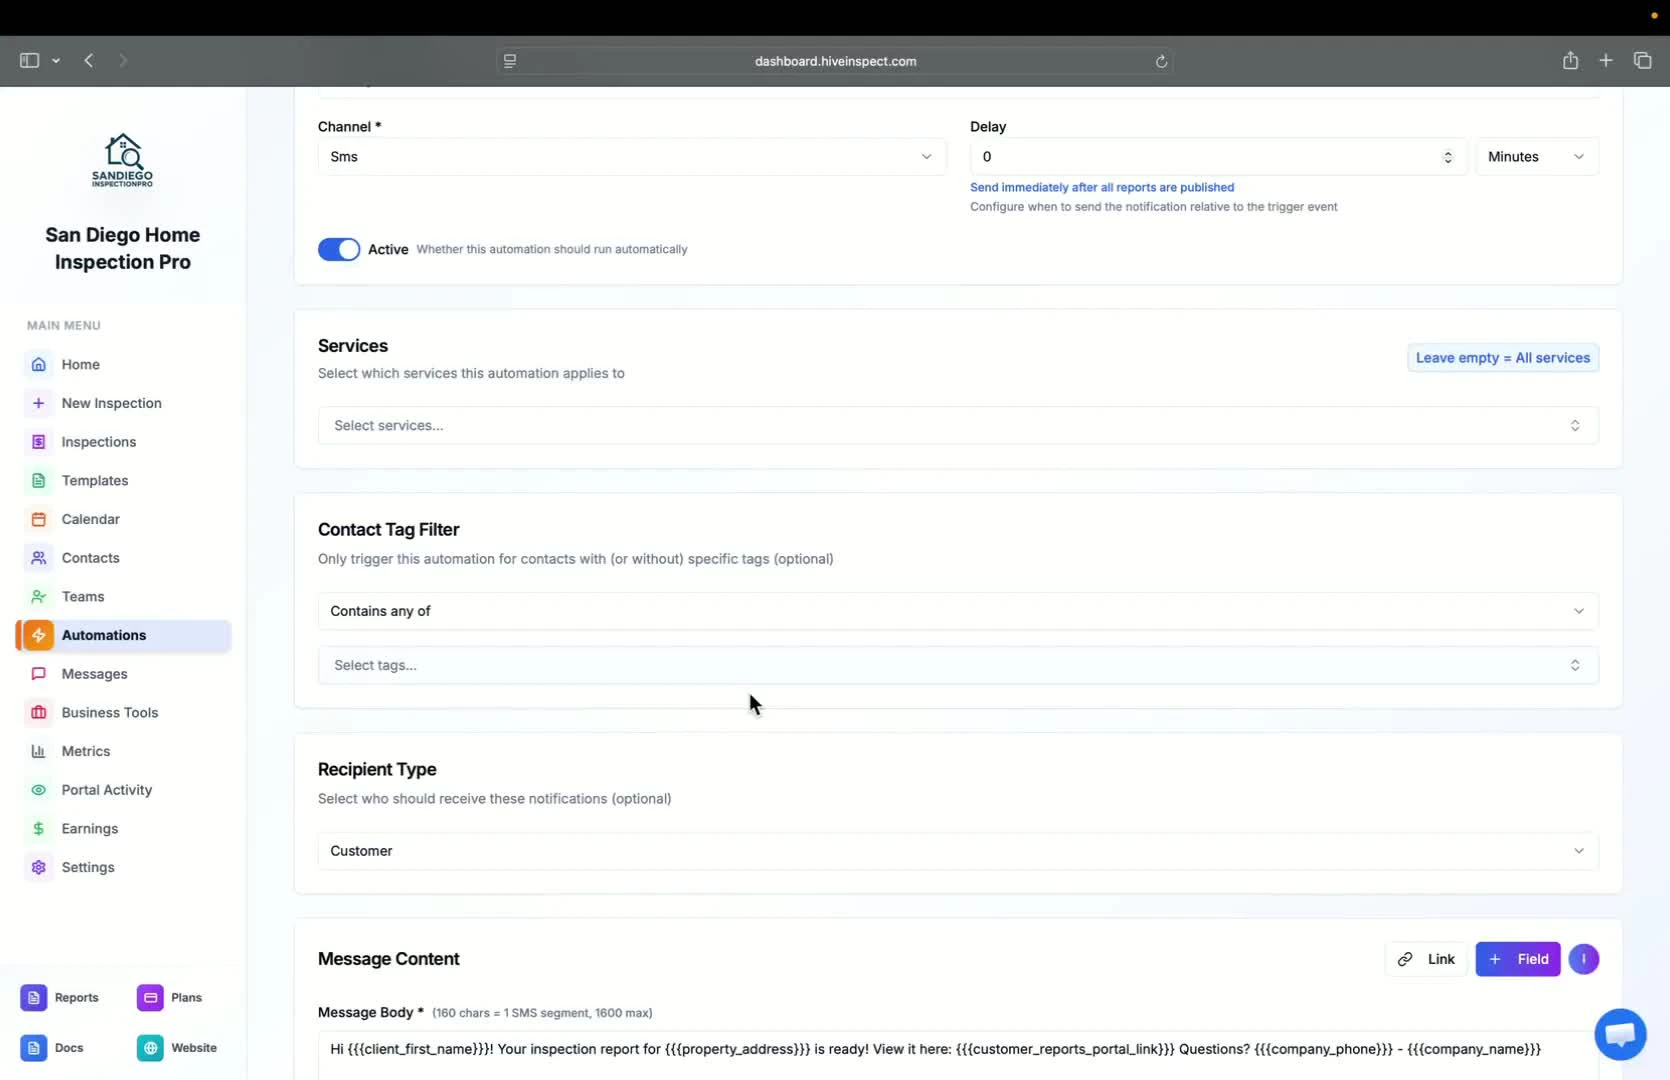
  <Step title="Set Filters for Specific Contacts — 2:04">
    * Use stack filters to exclude specific realtors or contacts from receiving messages
    <img src="https://mintcdn.com/hiveinspect-43c85ed1/xYKGp_3A44kyTeKP/images/Automation-6.jpg?fit=max&auto=format&n=xYKGp_3A44kyTeKP&q=85&s=2508285bf694e88d762d8ab4d7a0e530" alt="Setting filters for specific contacts" width="1670" height="1080" data-path="images/Automation-6.jpg" />
  </Step>

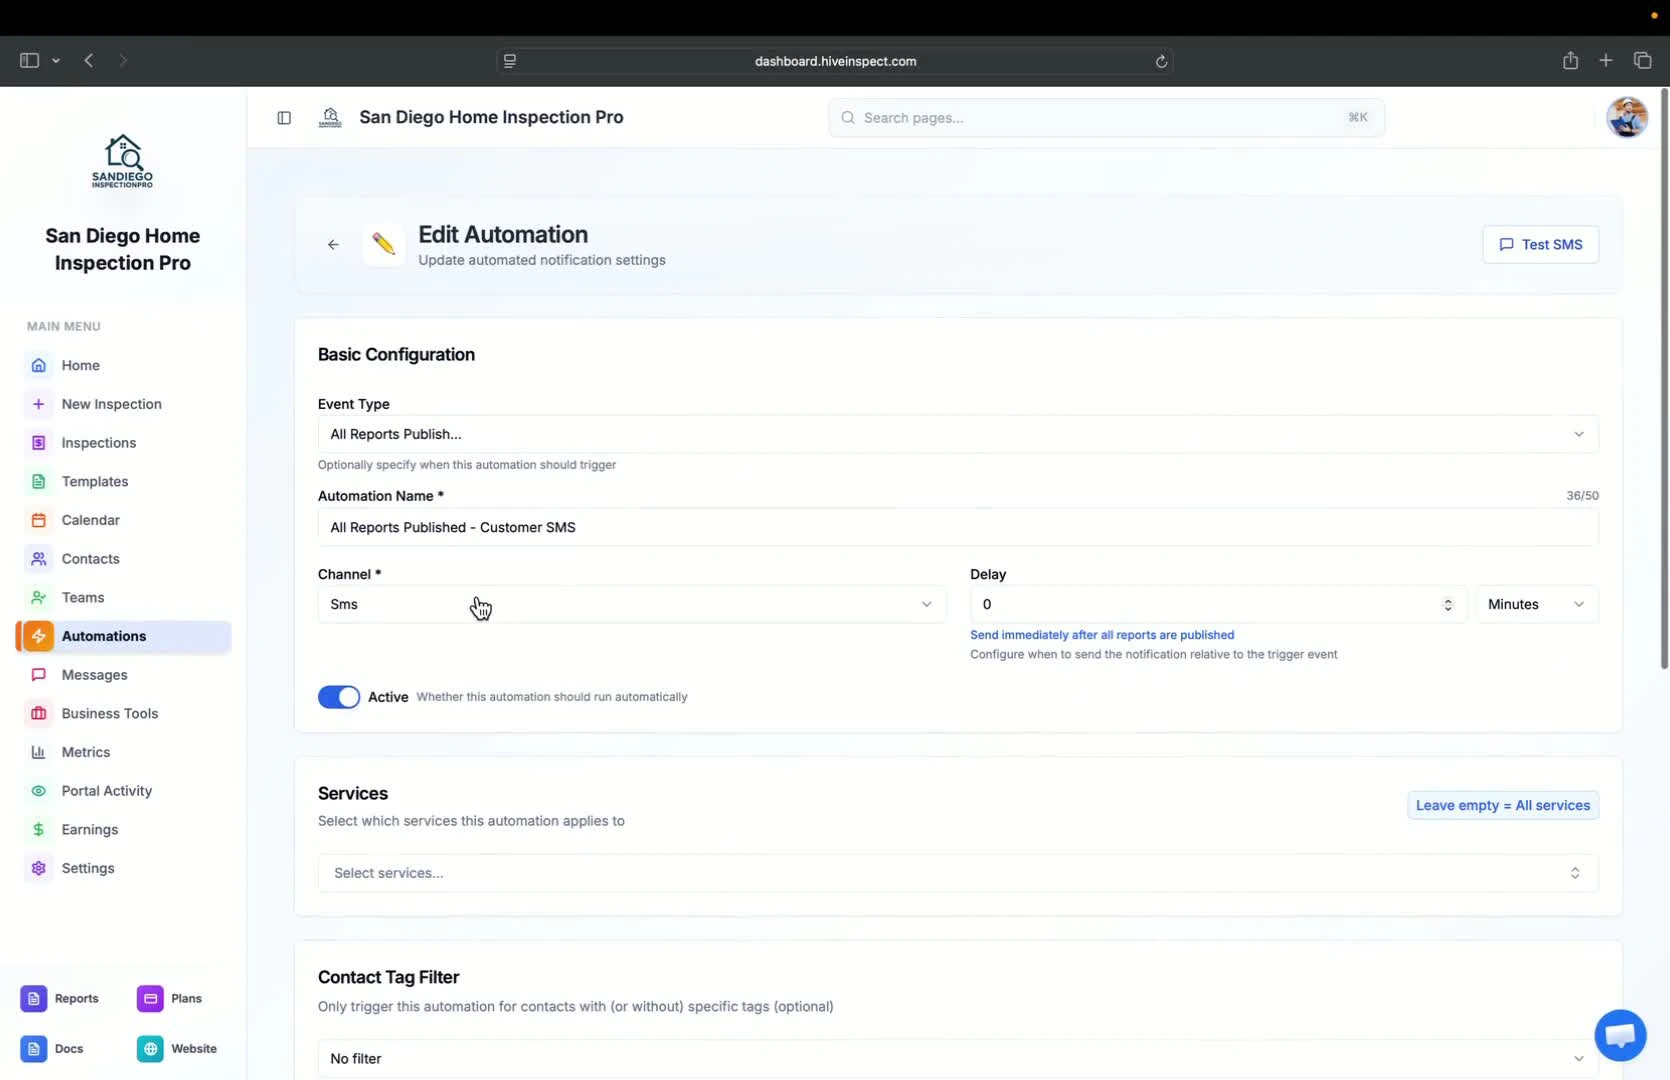
  <Step title="Customize Message Body — 2:14">
    * Edit the message body for emails and SMS
    * Use placeholders for personalized content
    <img src="https://mintcdn.com/hiveinspect-43c85ed1/xYKGp_3A44kyTeKP/images/Automation-7.jpg?fit=max&auto=format&n=xYKGp_3A44kyTeKP&q=85&s=64286e8a9d1dc3980d026040a9d48724" alt="Customizing message body" width="1670" height="1080" data-path="images/Automation-7.jpg" />
  </Step>

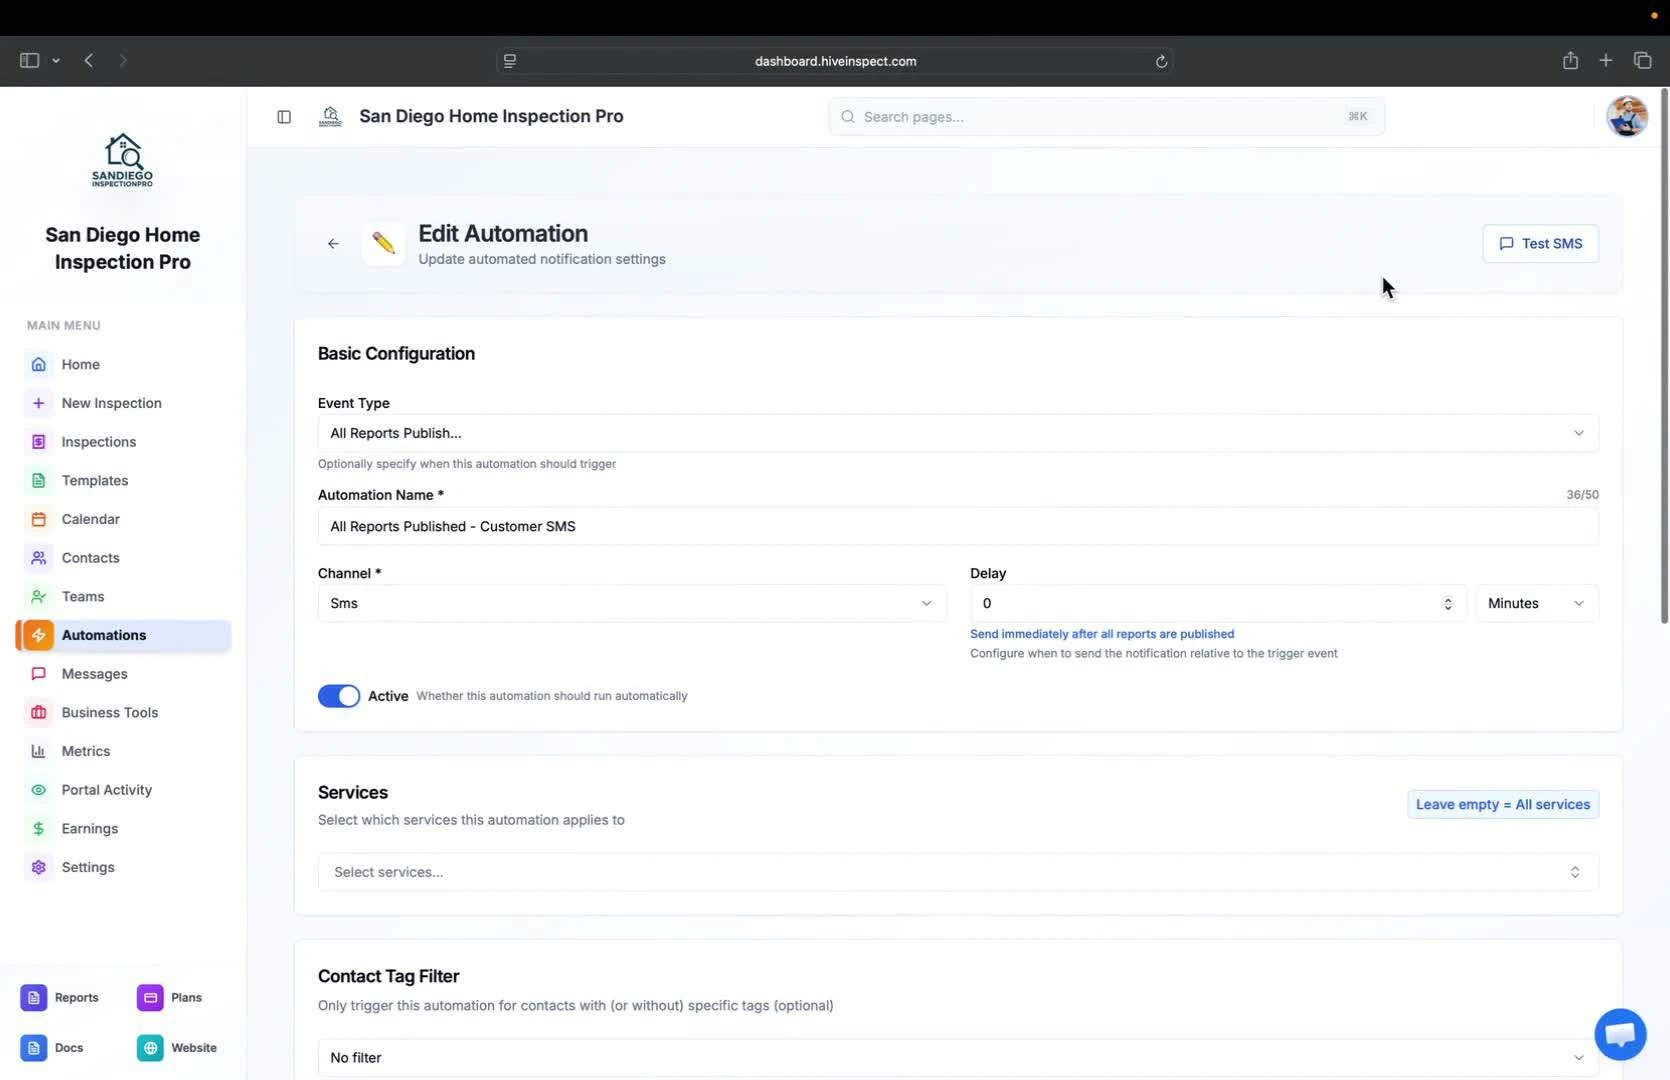
  <Step title="Test SMS and Email Messages — 2:44">
    * Use the **Test SMS** feature to see how messages will appear to customers
    * Send a test email to yourself to review the customer experience
    <img src="https://mintcdn.com/hiveinspect-43c85ed1/xYKGp_3A44kyTeKP/images/Automation-8.jpg?fit=max&auto=format&n=xYKGp_3A44kyTeKP&q=85&s=185e05a7582cbe3c66b21c5e19311679" alt="Testing SMS and email messages" width="1670" height="1080" data-path="images/Automation-8.jpg" />
  </Step>

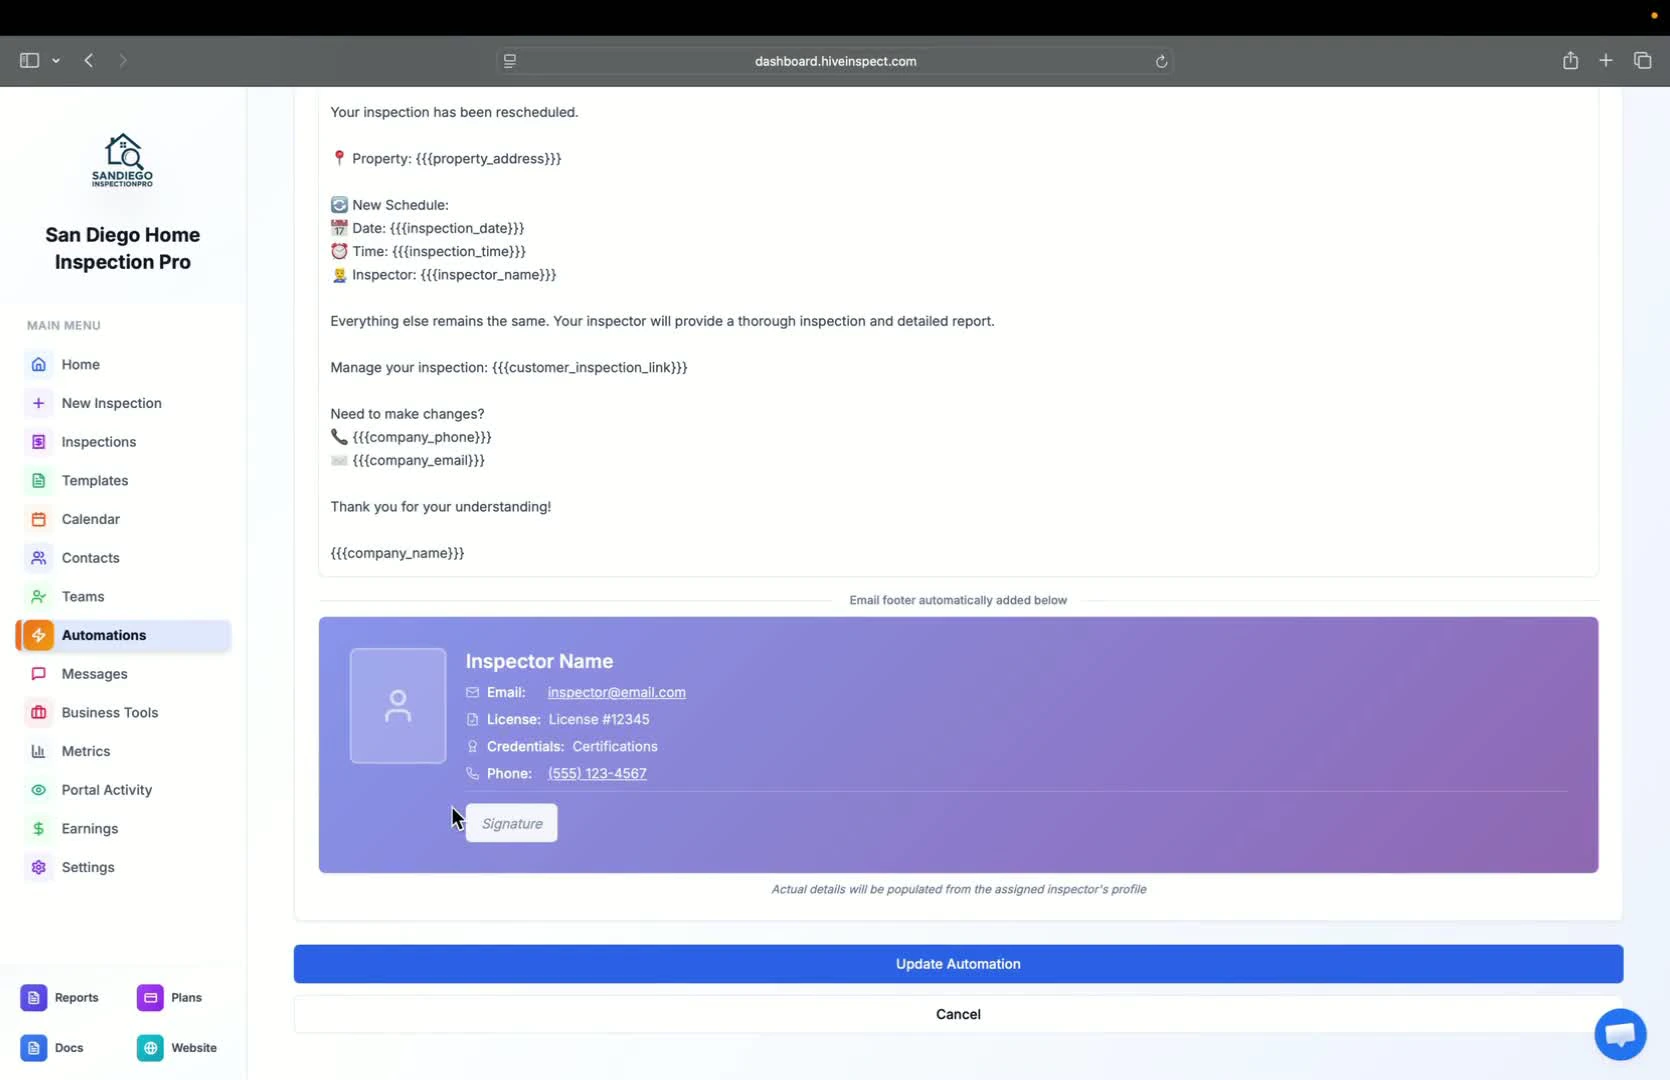
  <Step title="Automatic Inclusion of Footer Information — 3:17">
    * Default footer includes your license number, credentials, signature, and photo
    <img src="https://mintcdn.com/hiveinspect-43c85ed1/xYKGp_3A44kyTeKP/images/Automation-9.jpg?fit=max&auto=format&n=xYKGp_3A44kyTeKP&q=85&s=ae8f86ebbcdda578ce695cc75c8d8b34" alt="Automatic footer information" width="1670" height="1080" data-path="images/Automation-9.jpg" />
  </Step>

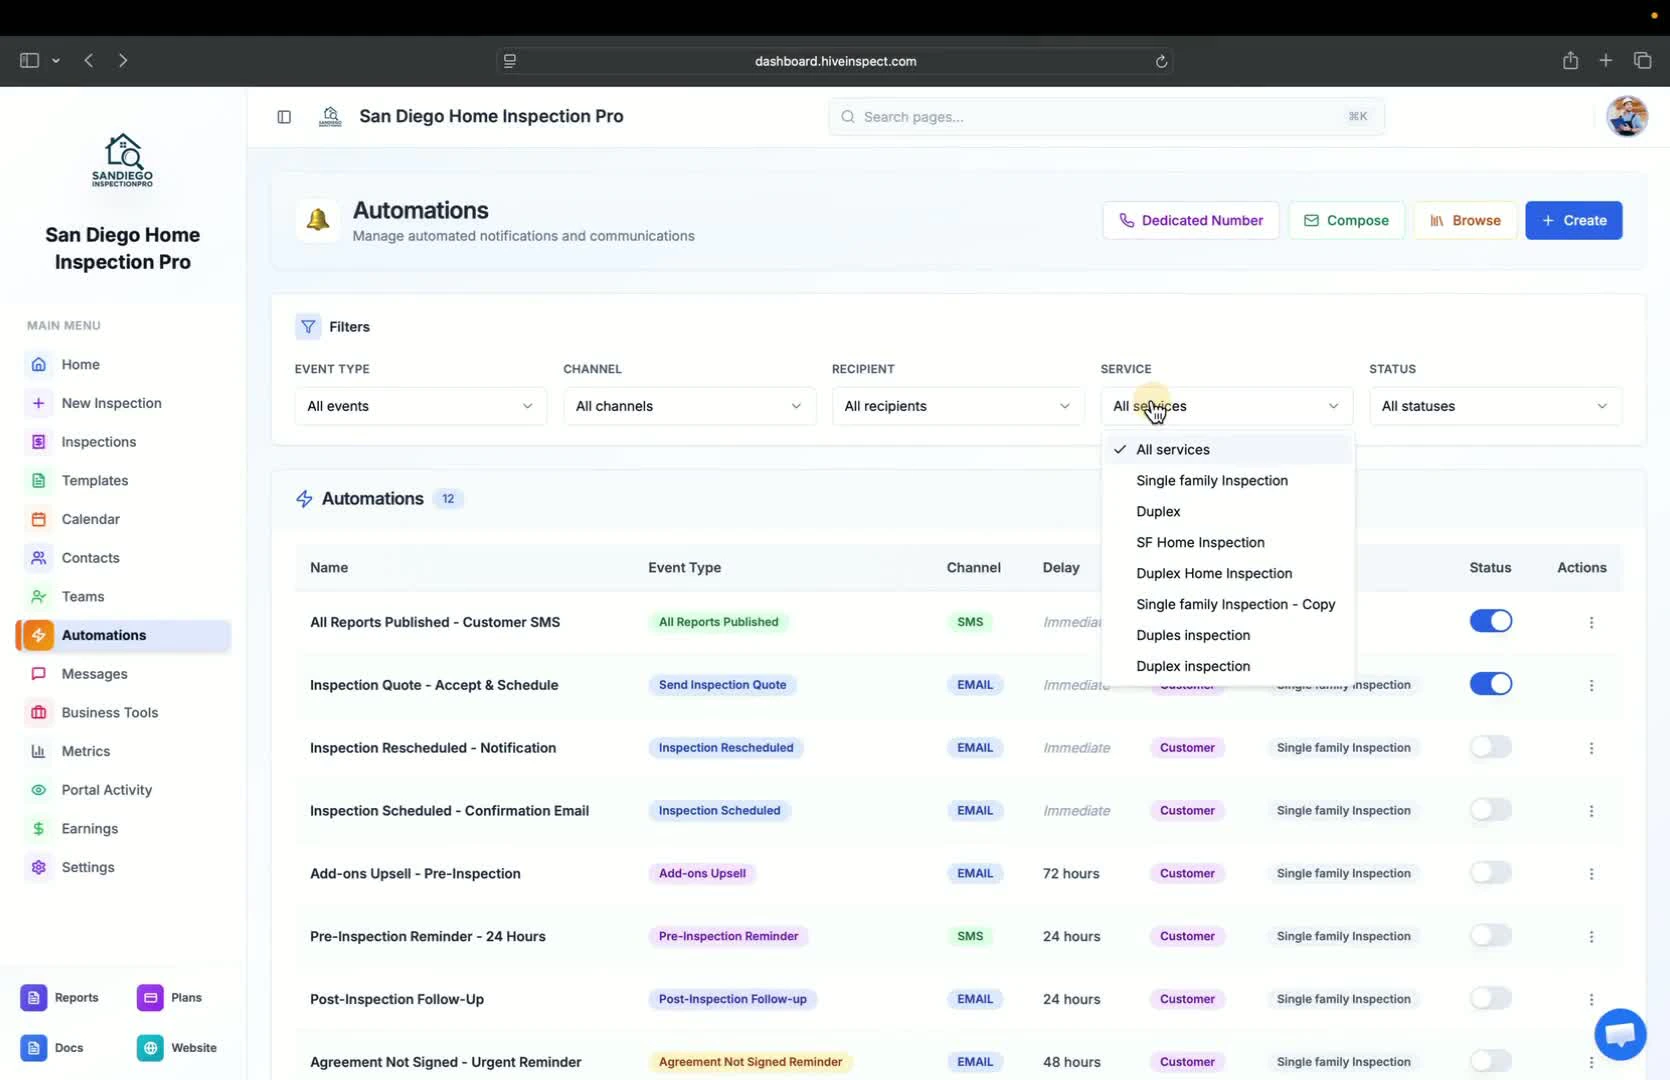
  <Step title="Duplicate Inspections and View Filters — 3:27">
    * Duplicate inspections as needed
    * Use filters to view all inspections and automations
    <img src="https://mintcdn.com/hiveinspect-43c85ed1/xYKGp_3A44kyTeKP/images/Automation-10.jpg?fit=max&auto=format&n=xYKGp_3A44kyTeKP&q=85&s=ceaf4096b228e35174ee1b5e4c8ca035" alt="Duplicating inspections and viewing filters" width="1670" height="1080" data-path="images/Automation-10.jpg" />
  </Step>

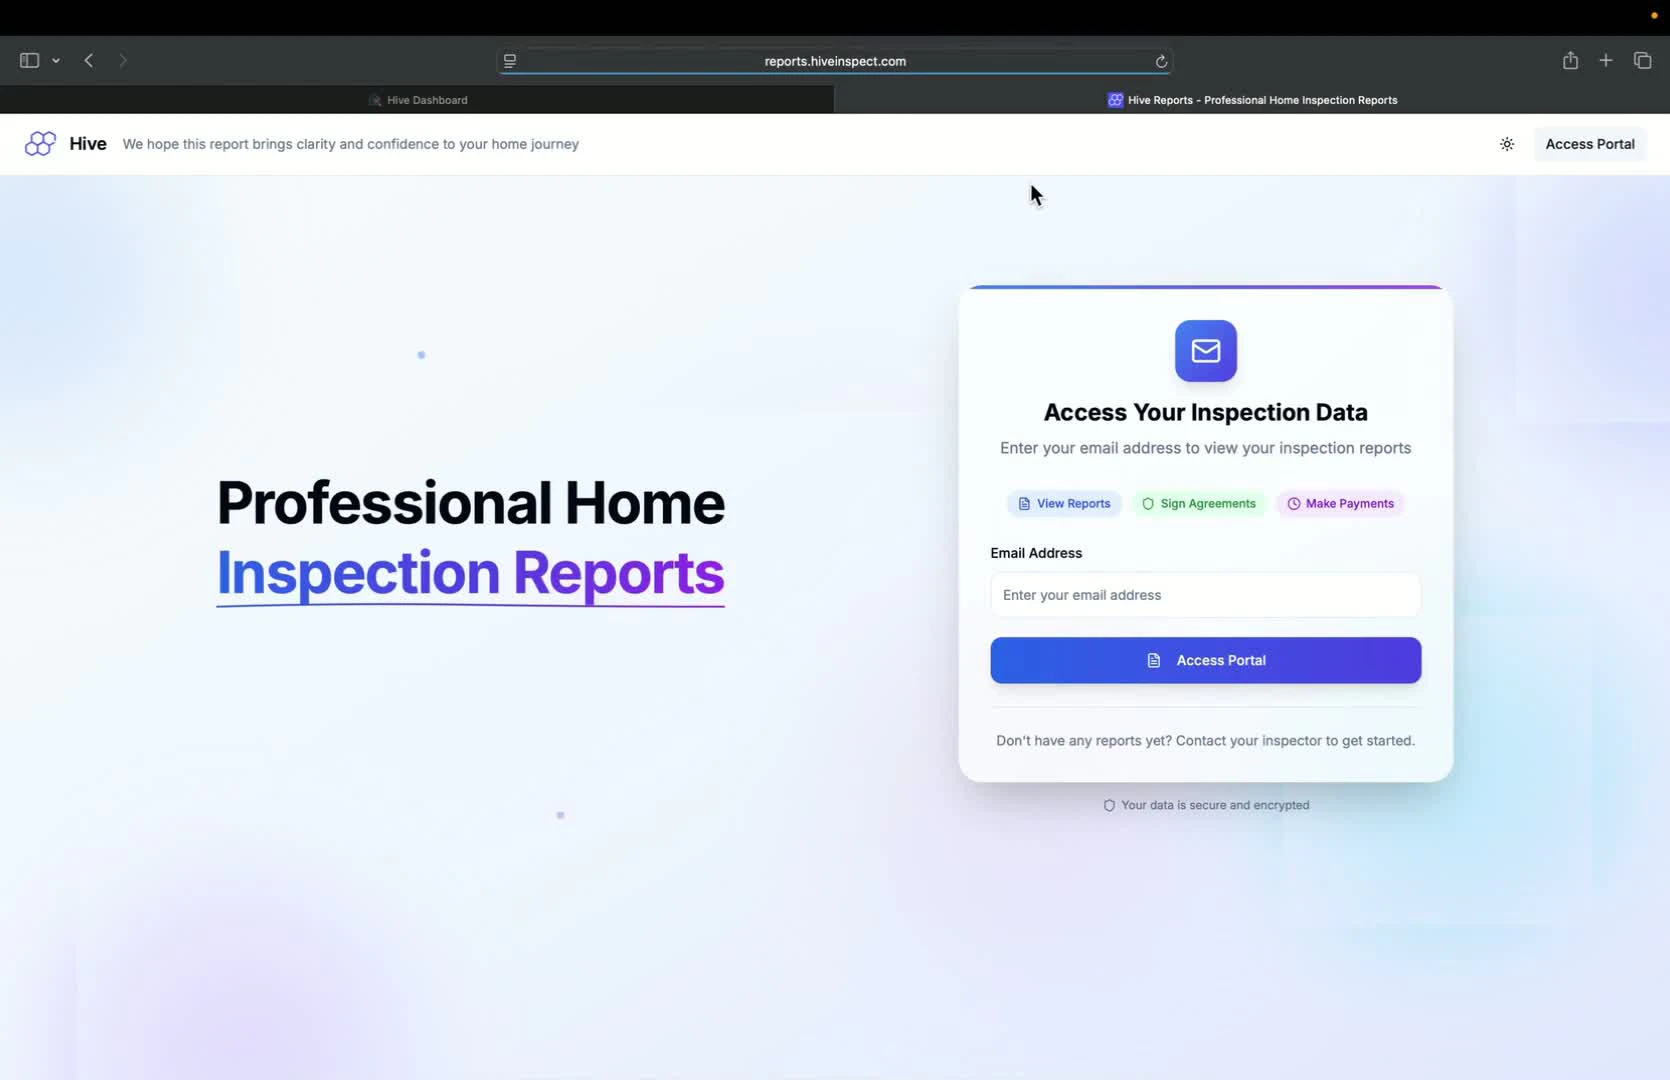
  <Step title="Access Customer Reports Portal — 3:58">
    * Use the reports button to access the customer portal
    * Customers can enter their email to access reports
    <img src="https://mintcdn.com/hiveinspect-43c85ed1/xYKGp_3A44kyTeKP/images/Automation-11.jpg?fit=max&auto=format&n=xYKGp_3A44kyTeKP&q=85&s=ef727526f01b36a6928f24e85ed9c2b2" alt="Accessing customer reports portal" width="1670" height="1080" data-path="images/Automation-11.jpg" />
  </Step>

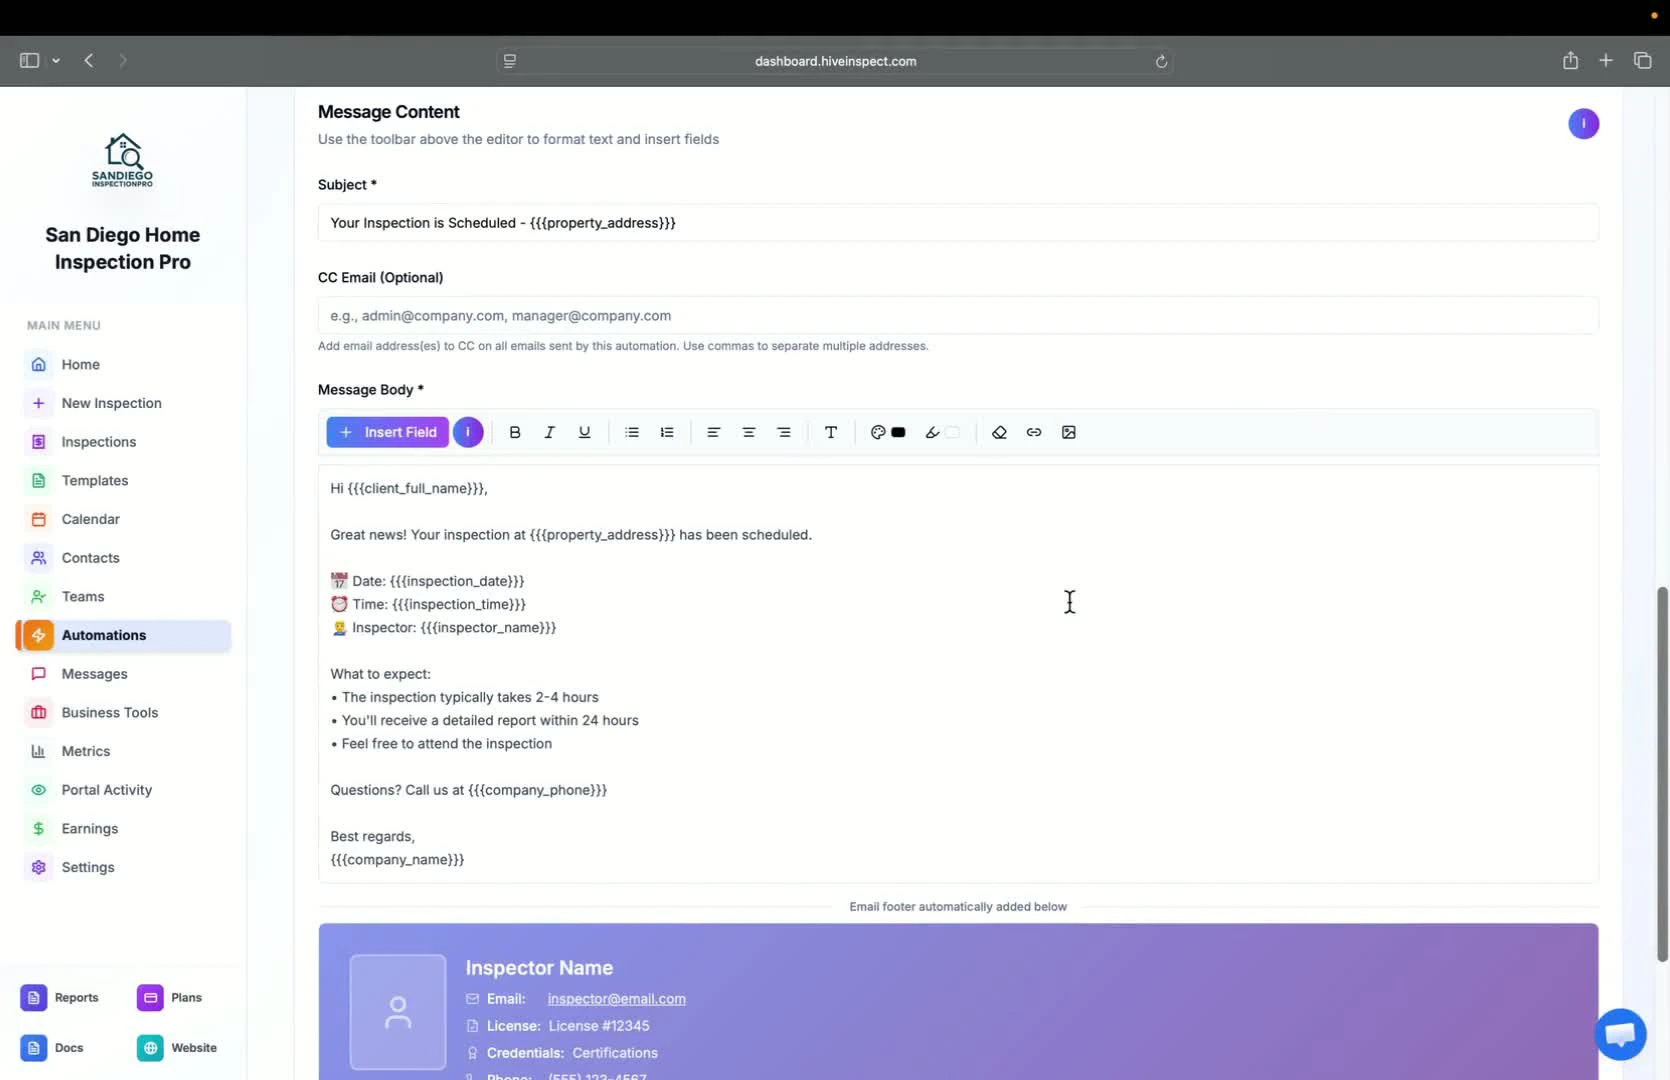
  <Step title="Embed Report Links in Automated Emails — 4:08">
    * Ensure the custom report placeholder is included in automated emails
    <img src="https://mintcdn.com/hiveinspect-43c85ed1/xYKGp_3A44kyTeKP/images/Automation-12.jpg?fit=max&auto=format&n=xYKGp_3A44kyTeKP&q=85&s=0fca3fea9f8c2c8d83f162e7000e0aa7" alt="Embedding report links in automated emails" width="1670" height="1080" data-path="images/Automation-12.jpg" />
  </Step>
</Steps>
