

In the dashboard: Business Tools → Report Customization → PDF Report → Cover Page Design → Custom
What a custom cover is
A custom cover replaces the first page of your report PDFs with your own design. You upload one image that fills the whole page, then place live fields on top of it: the property photo, your logo, the address, the client, your inspectors and the agents. Hive fills the fields in for each inspection.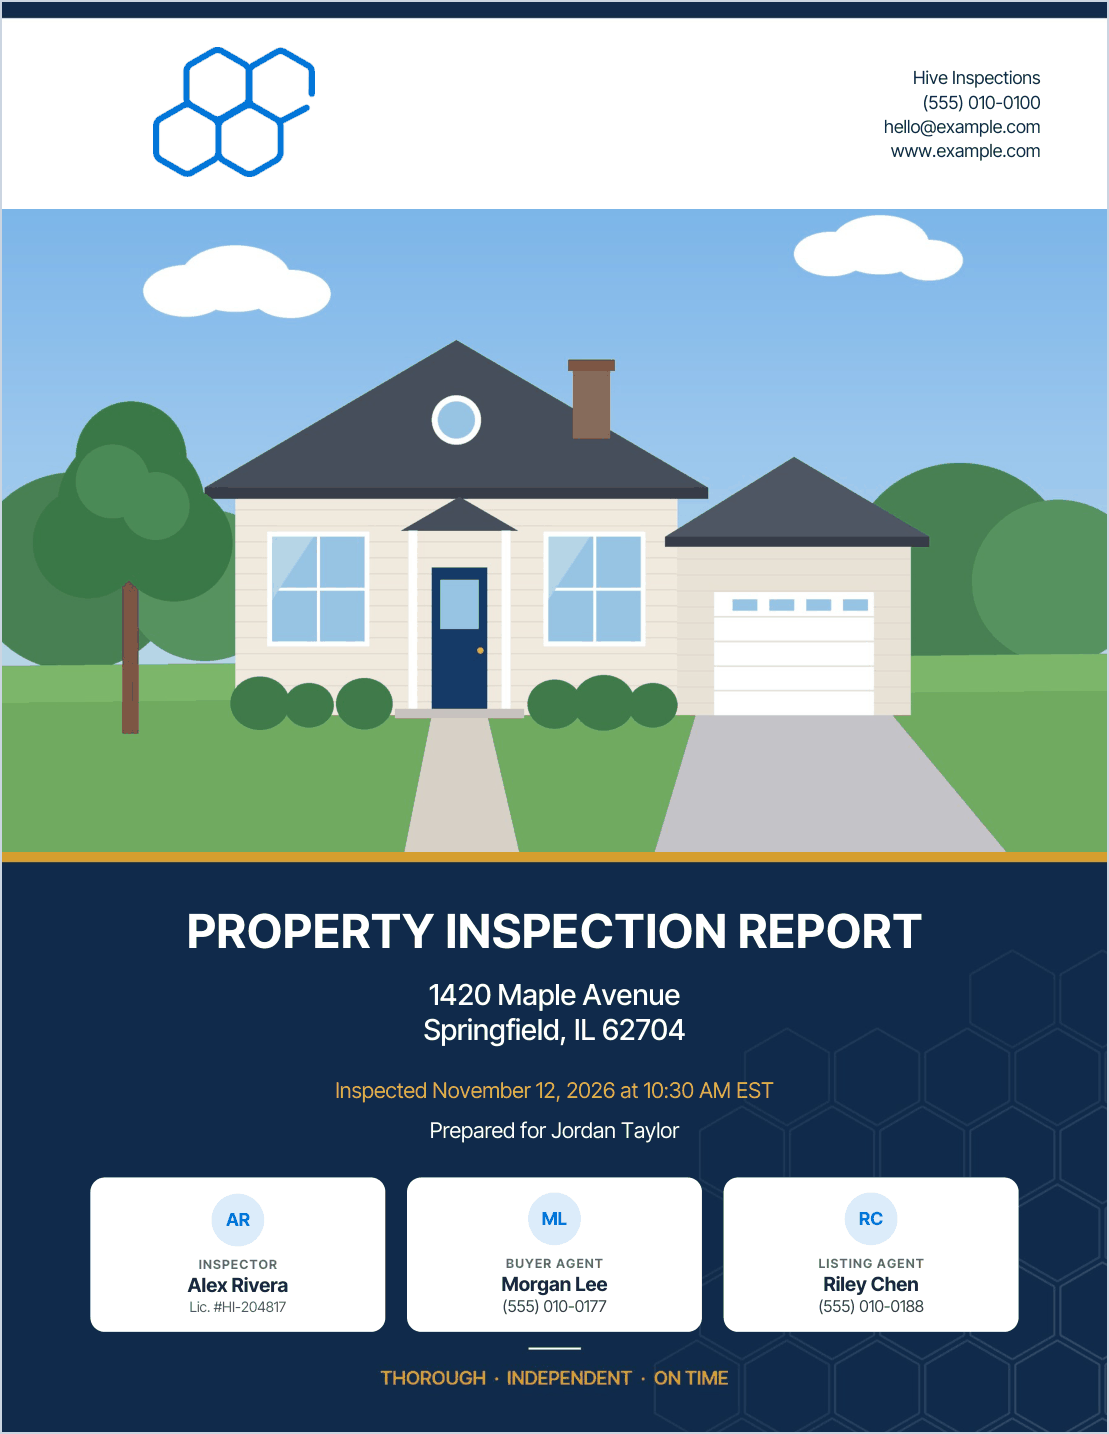
- The cover applies to your whole company: every inspector and every template.
- It’s used on the full report PDF and the summary PDF. The digital report isn’t affected.
- State forms use it too: TREC, Florida 4-Point, Florida Wind Mitigation, Florida Roof and Florida WDI. NPMA-33 and Texas WDI have no cover page, so nothing changes on those.
- You can save several covers and switch between them. One is in use at a time.
- You need the Business Tools permission, and a computer. The designer needs a window at least as wide as a small laptop screen.
Prepare your cover image
Make the design in any tool you like, such as Canva, Photoshop or PowerPoint, and export it as an image.
PDF files can’t be uploaded. Export your design as a JPG or PNG first.
Create a cover
Choose Custom
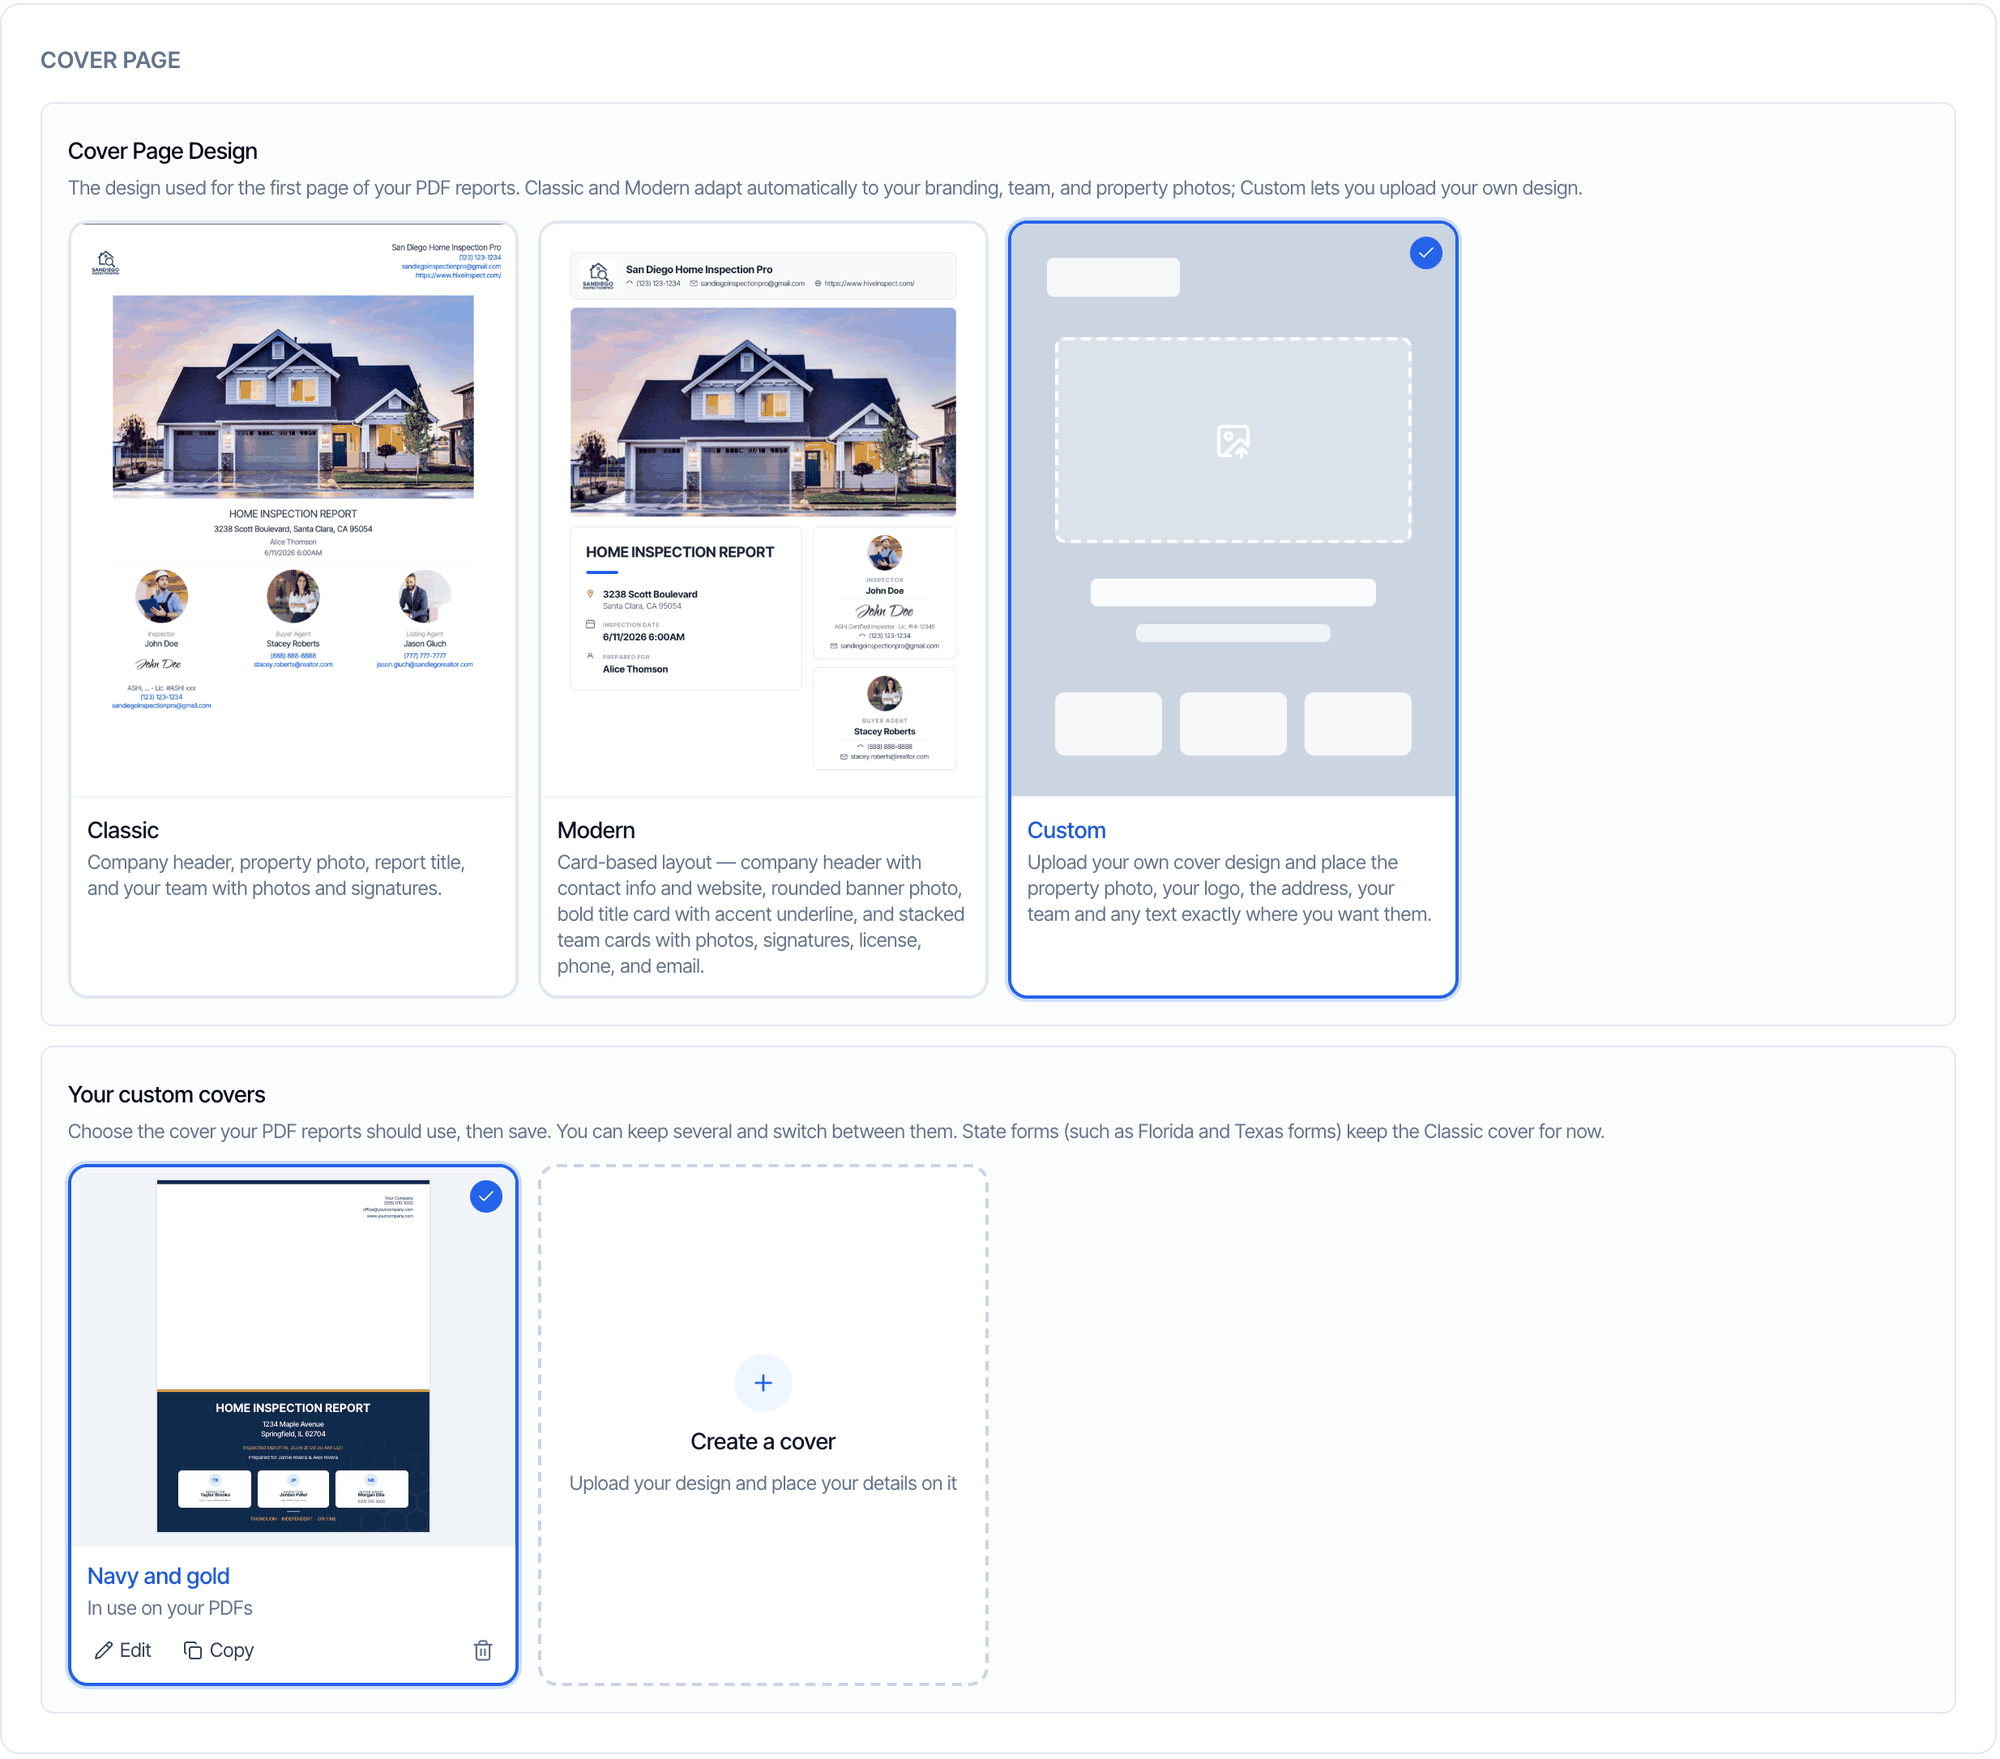
- Go to Business Tools → Report Customization and open the PDF Report tab.
- Under Cover Page Design, click Custom. Your custom covers appears below the cards.
- Click Create a cover.
Upload your image and choose the area
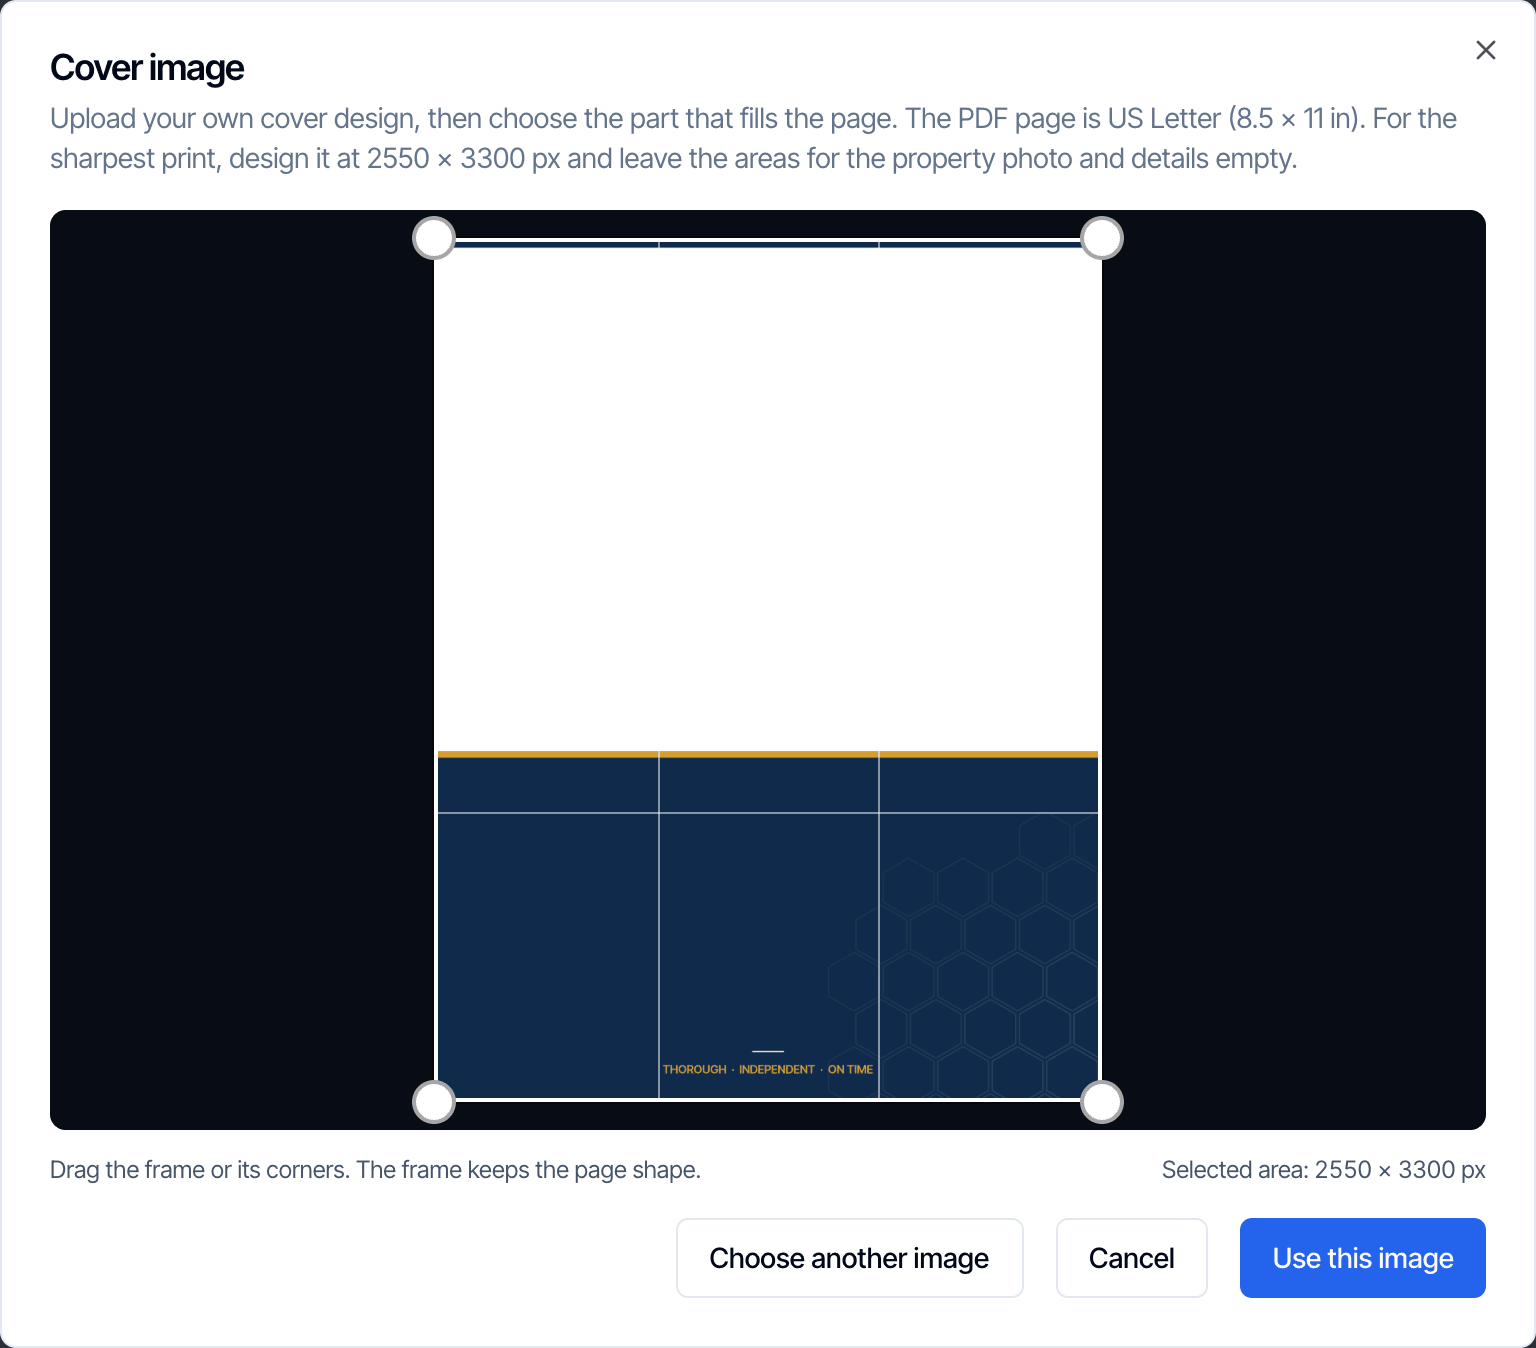
- Drop your image on the dialog, or click Choose file.
- Drag the frame or its corners to pick the part that fills the page. The frame keeps the page shape.
- Click Use this image.
Add your fields
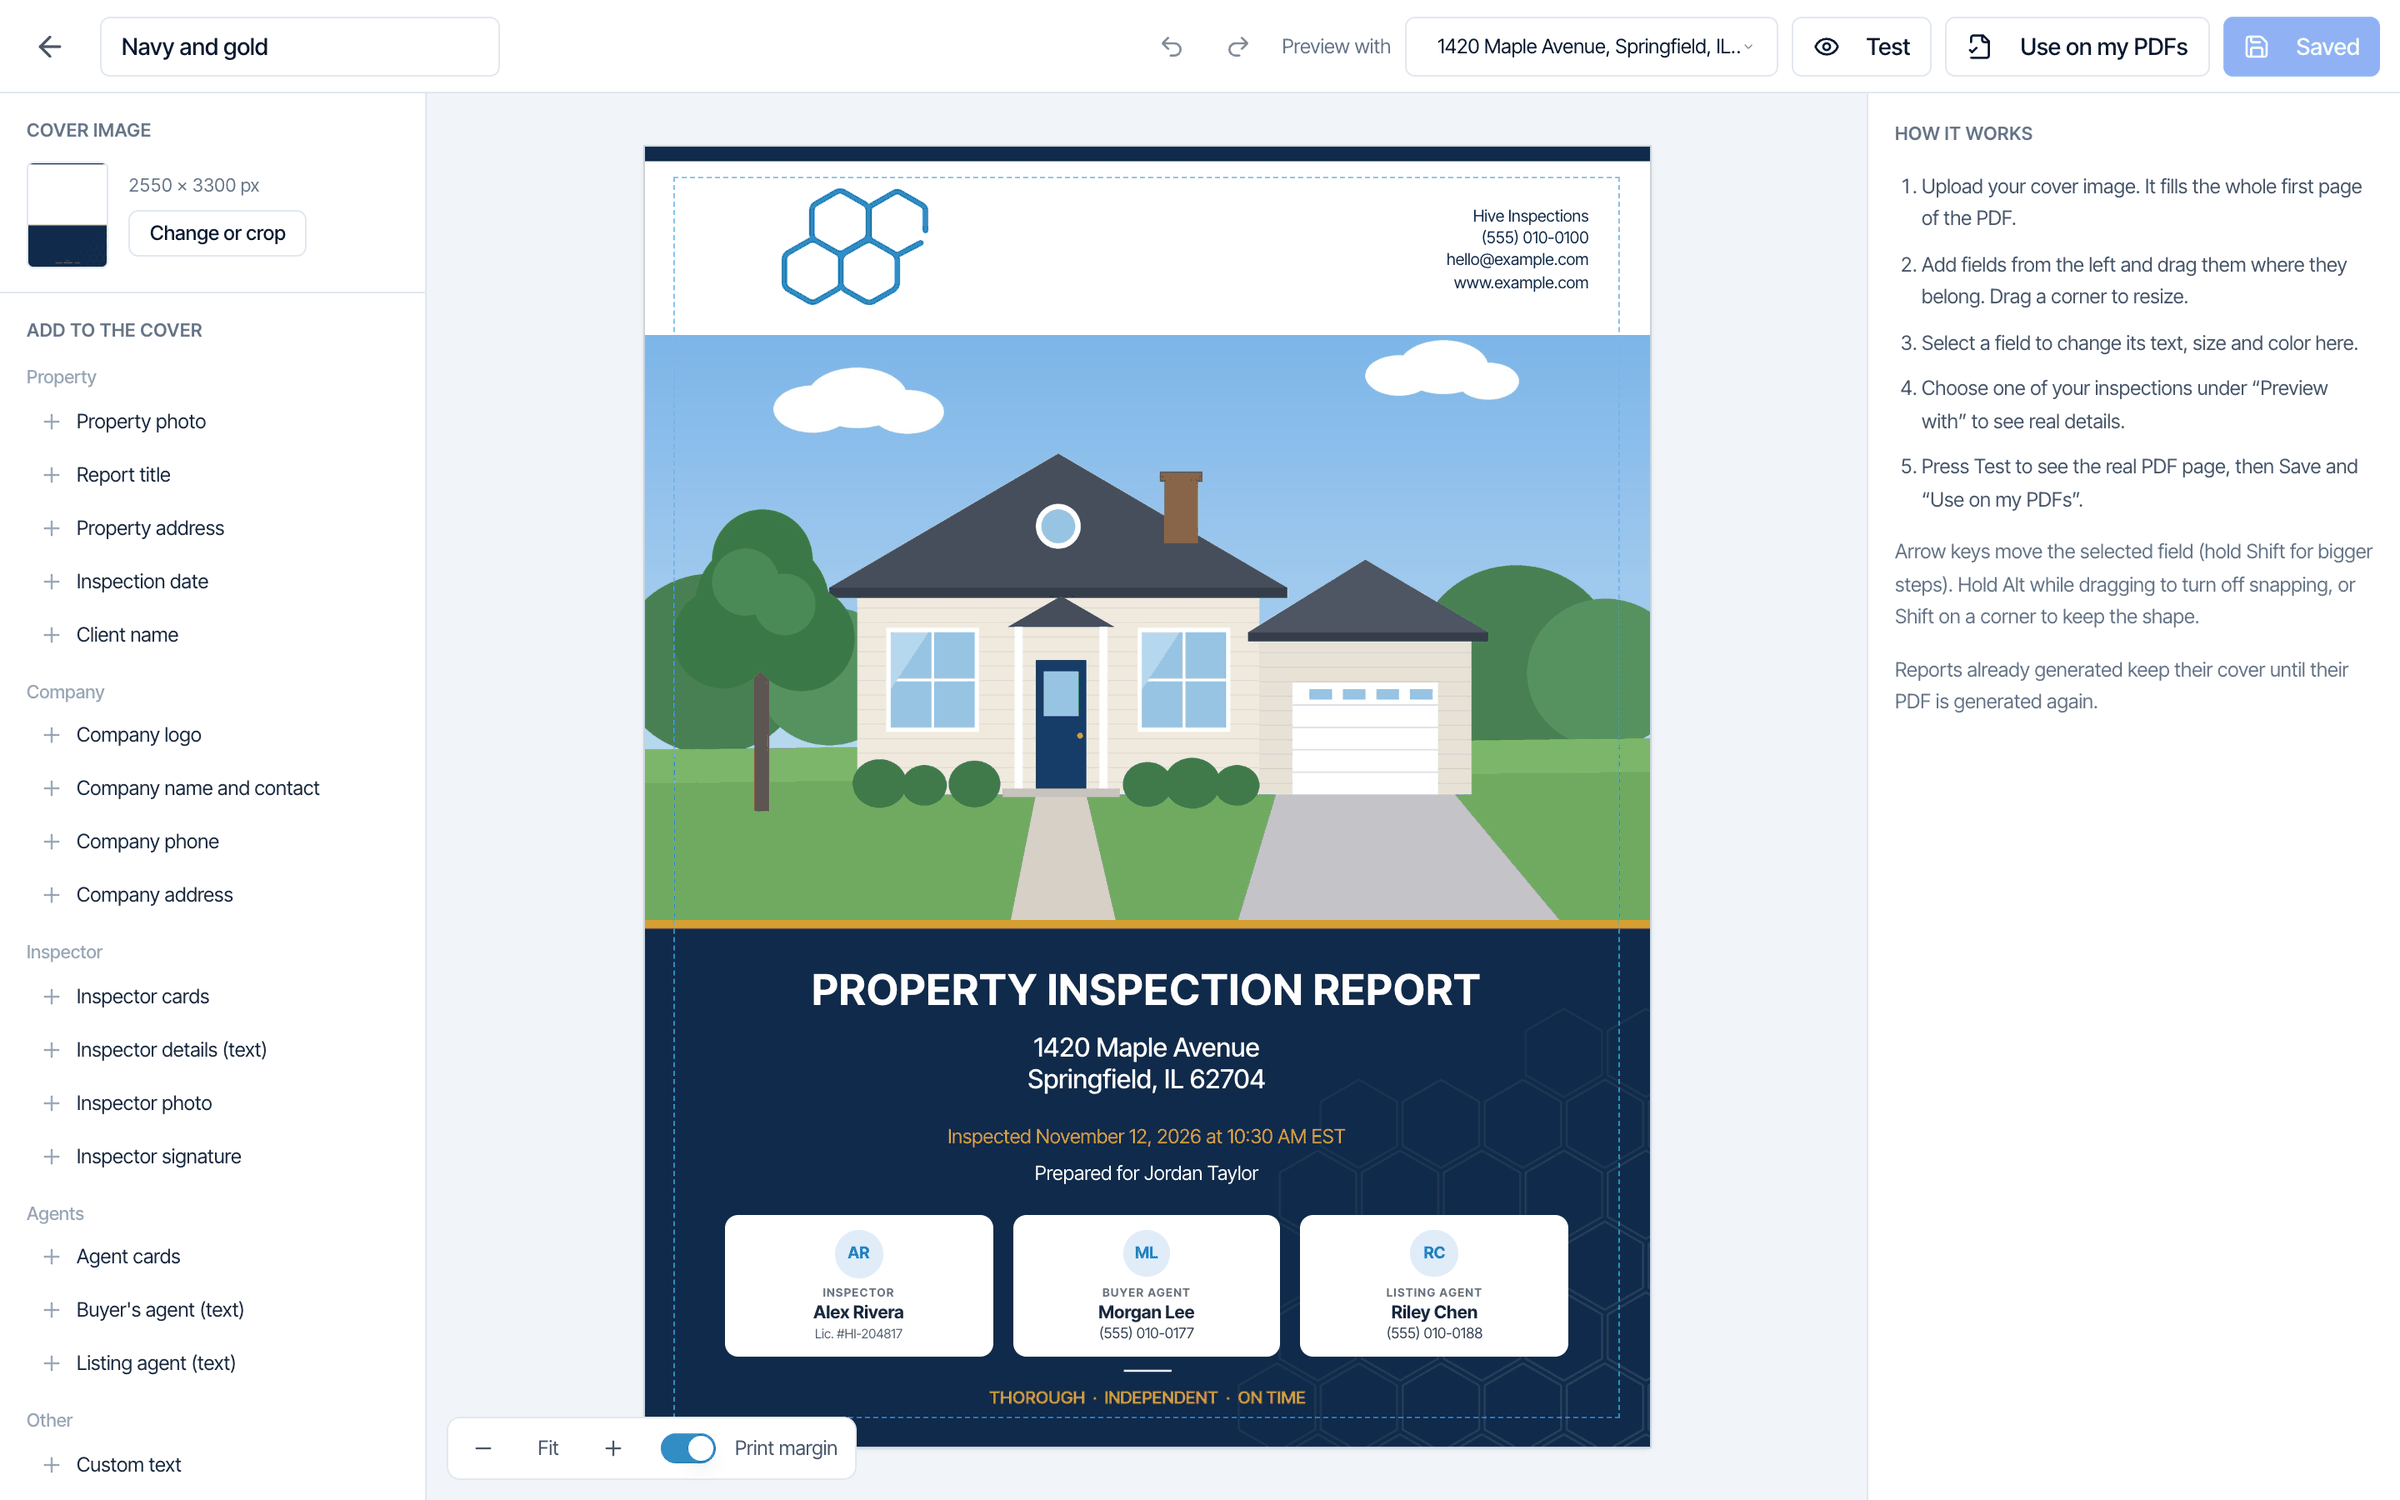
- Click a field under Add to the cover on the left. It appears on the page.
- Drag the field where it belongs. Drag a corner or an edge to resize it.
- Click a field to change its settings on the right. See Fields you can add.
Preview with a real inspection
The page starts with example details. Open Preview with at the top and choose one of your last 20 inspections to see its real address, photo and people on your design.Try a few. An inspection with a long address or two inspectors shows you whether your boxes are large enough.
Test the real PDF page
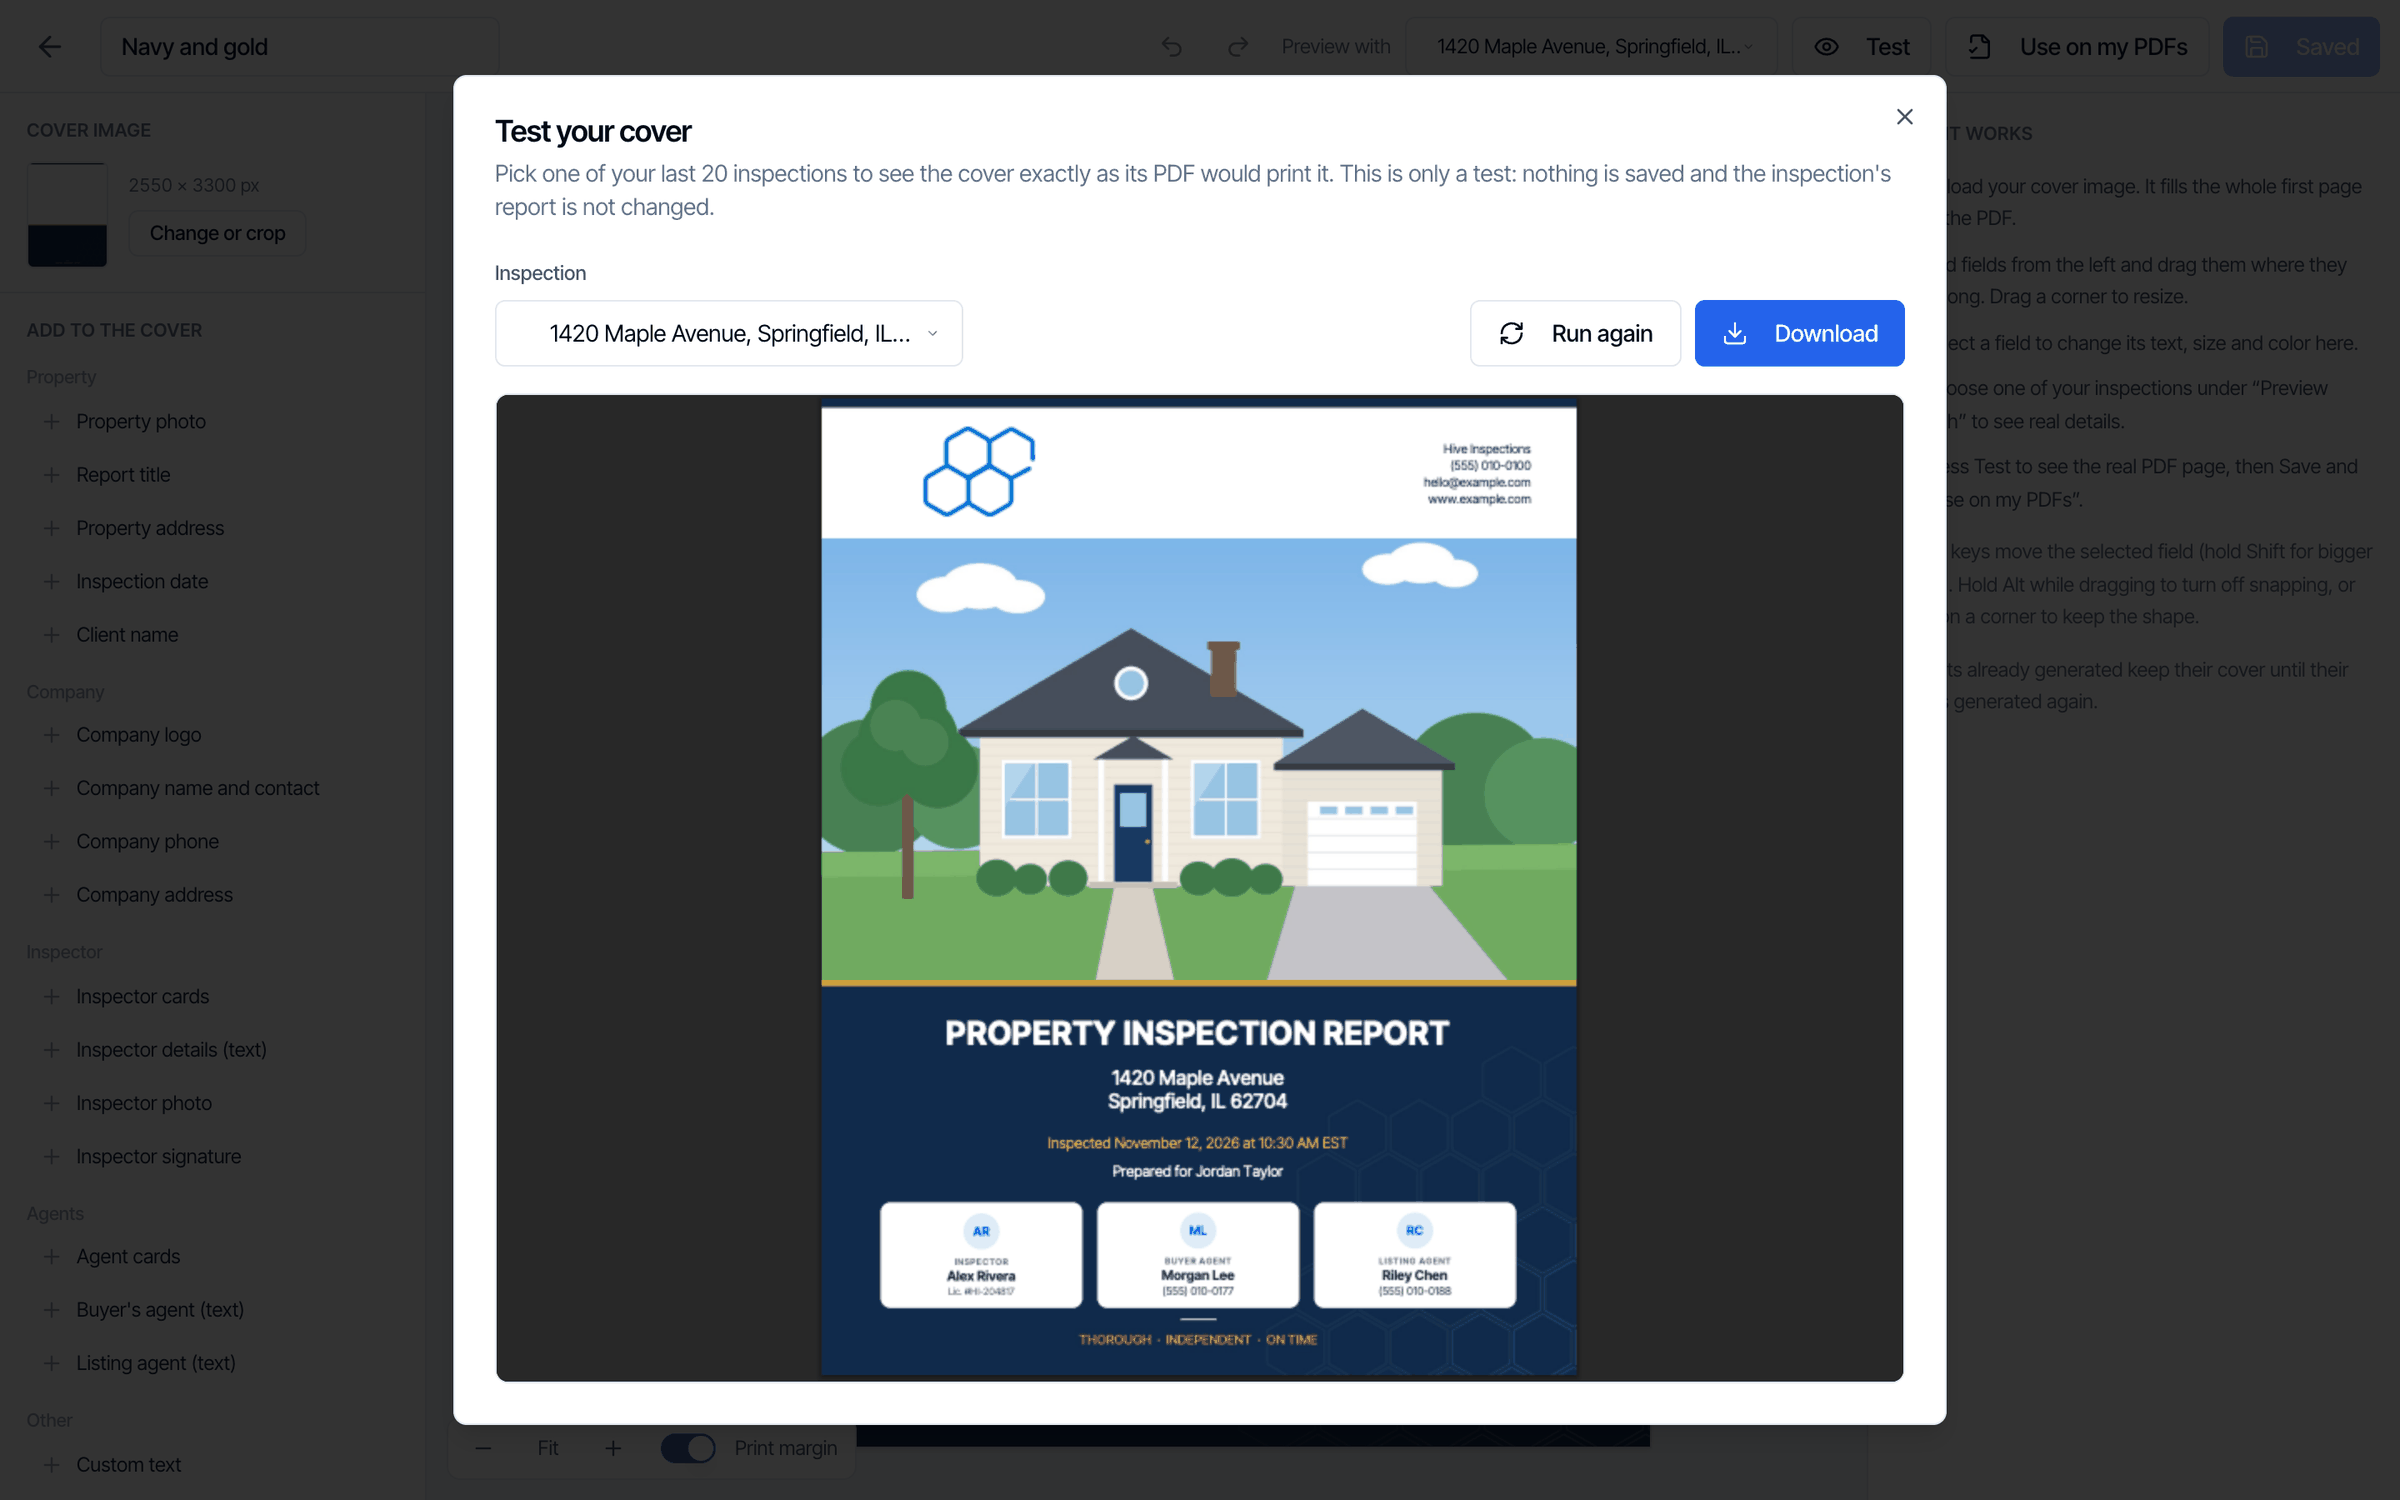
- Click Test. Hive builds the cover as a one-page PDF, exactly as it would print.
- Change the Inspection to test another one. If it has more than one report, choose the Report too.
- Click Download to keep a copy.
Save and use it
- Click Save.
- Click Use on my PDFs. The cover now shows In use on your PDFs, and new PDFs use it.
Fields you can add
Each button under Add to the cover adds one field, already set up. You can change any of them afterwards.
A cover can hold up to 60 fields. Every field you added is listed under On the cover at the bottom of the left panel. Click a name there to select a field that’s hard to click on the page.
Text fields
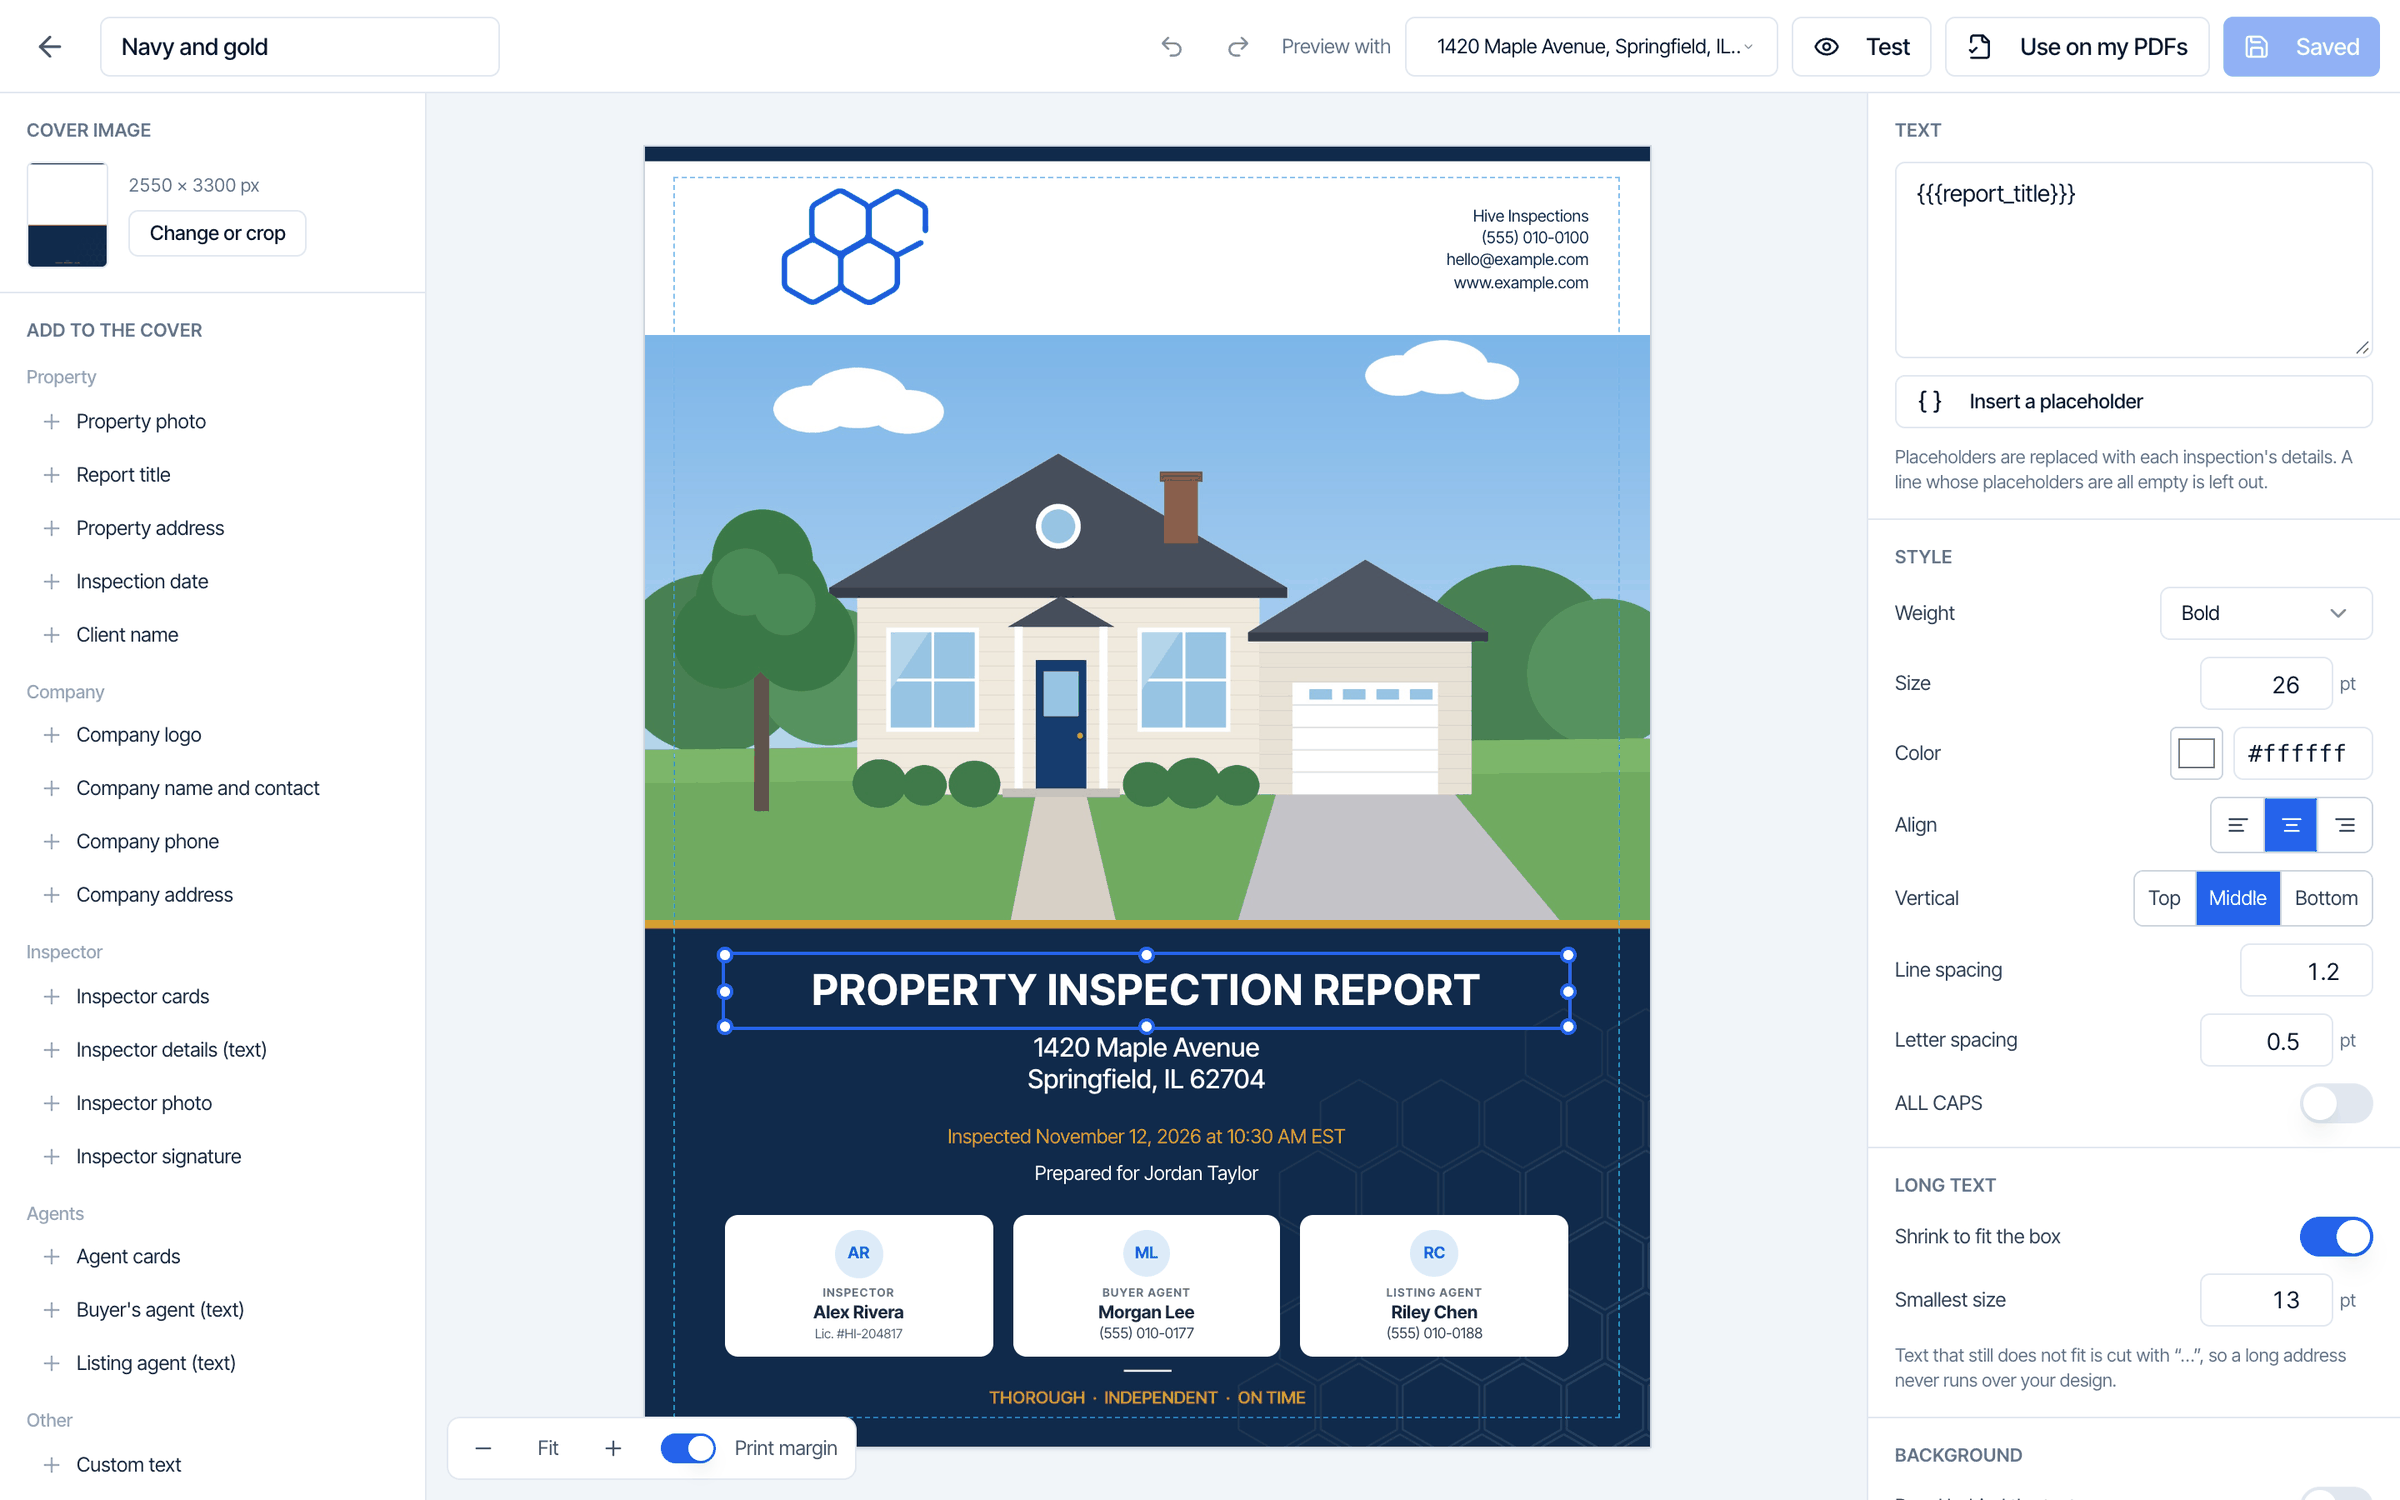
- Text. Type anything. Words inside three curly brackets, such as
{{{property_street}}}, are placeholders. Hive swaps them for the real details of each inspection. - Insert a placeholder. Search the list and click one to add it where your cursor is. The list covers the property, the inspection, the client, the inspectors, the agents, your company and your custom fields.
- Style. Weight (Regular, Medium, Bold or Italic), size, color, alignment, line spacing, letter spacing and ALL CAPS.
- Long text. With Shrink to fit the box on, text that is too long gets smaller, down to the Smallest size you set. Text that still doesn’t fit is cut with ”…”, so a long address never runs over your design.
- Background. Turn on Panel behind the text to put a colored block behind this one field.
{{{buyer_agent_full_name}}}” prints nothing when the inspection has no buyer’s agent. A line with no placeholders always prints.
For what each placeholder means, see Placeholders.
Pictures
Select a picture field to choose what it Shows: the property photo, your company logo, the inspector’s photo or signature, or the buyer’s or listing agent’s photo.- Fit. Fill fills the box and may crop the edges. Fit shows the whole picture inside the box.
- Shape. Square, Rounded or Circle.
- If there is no photo. For a person’s photo, choose Leave empty or Show initials.
- Border. Add a border and pick its color and thickness.
Inspector and agent cards
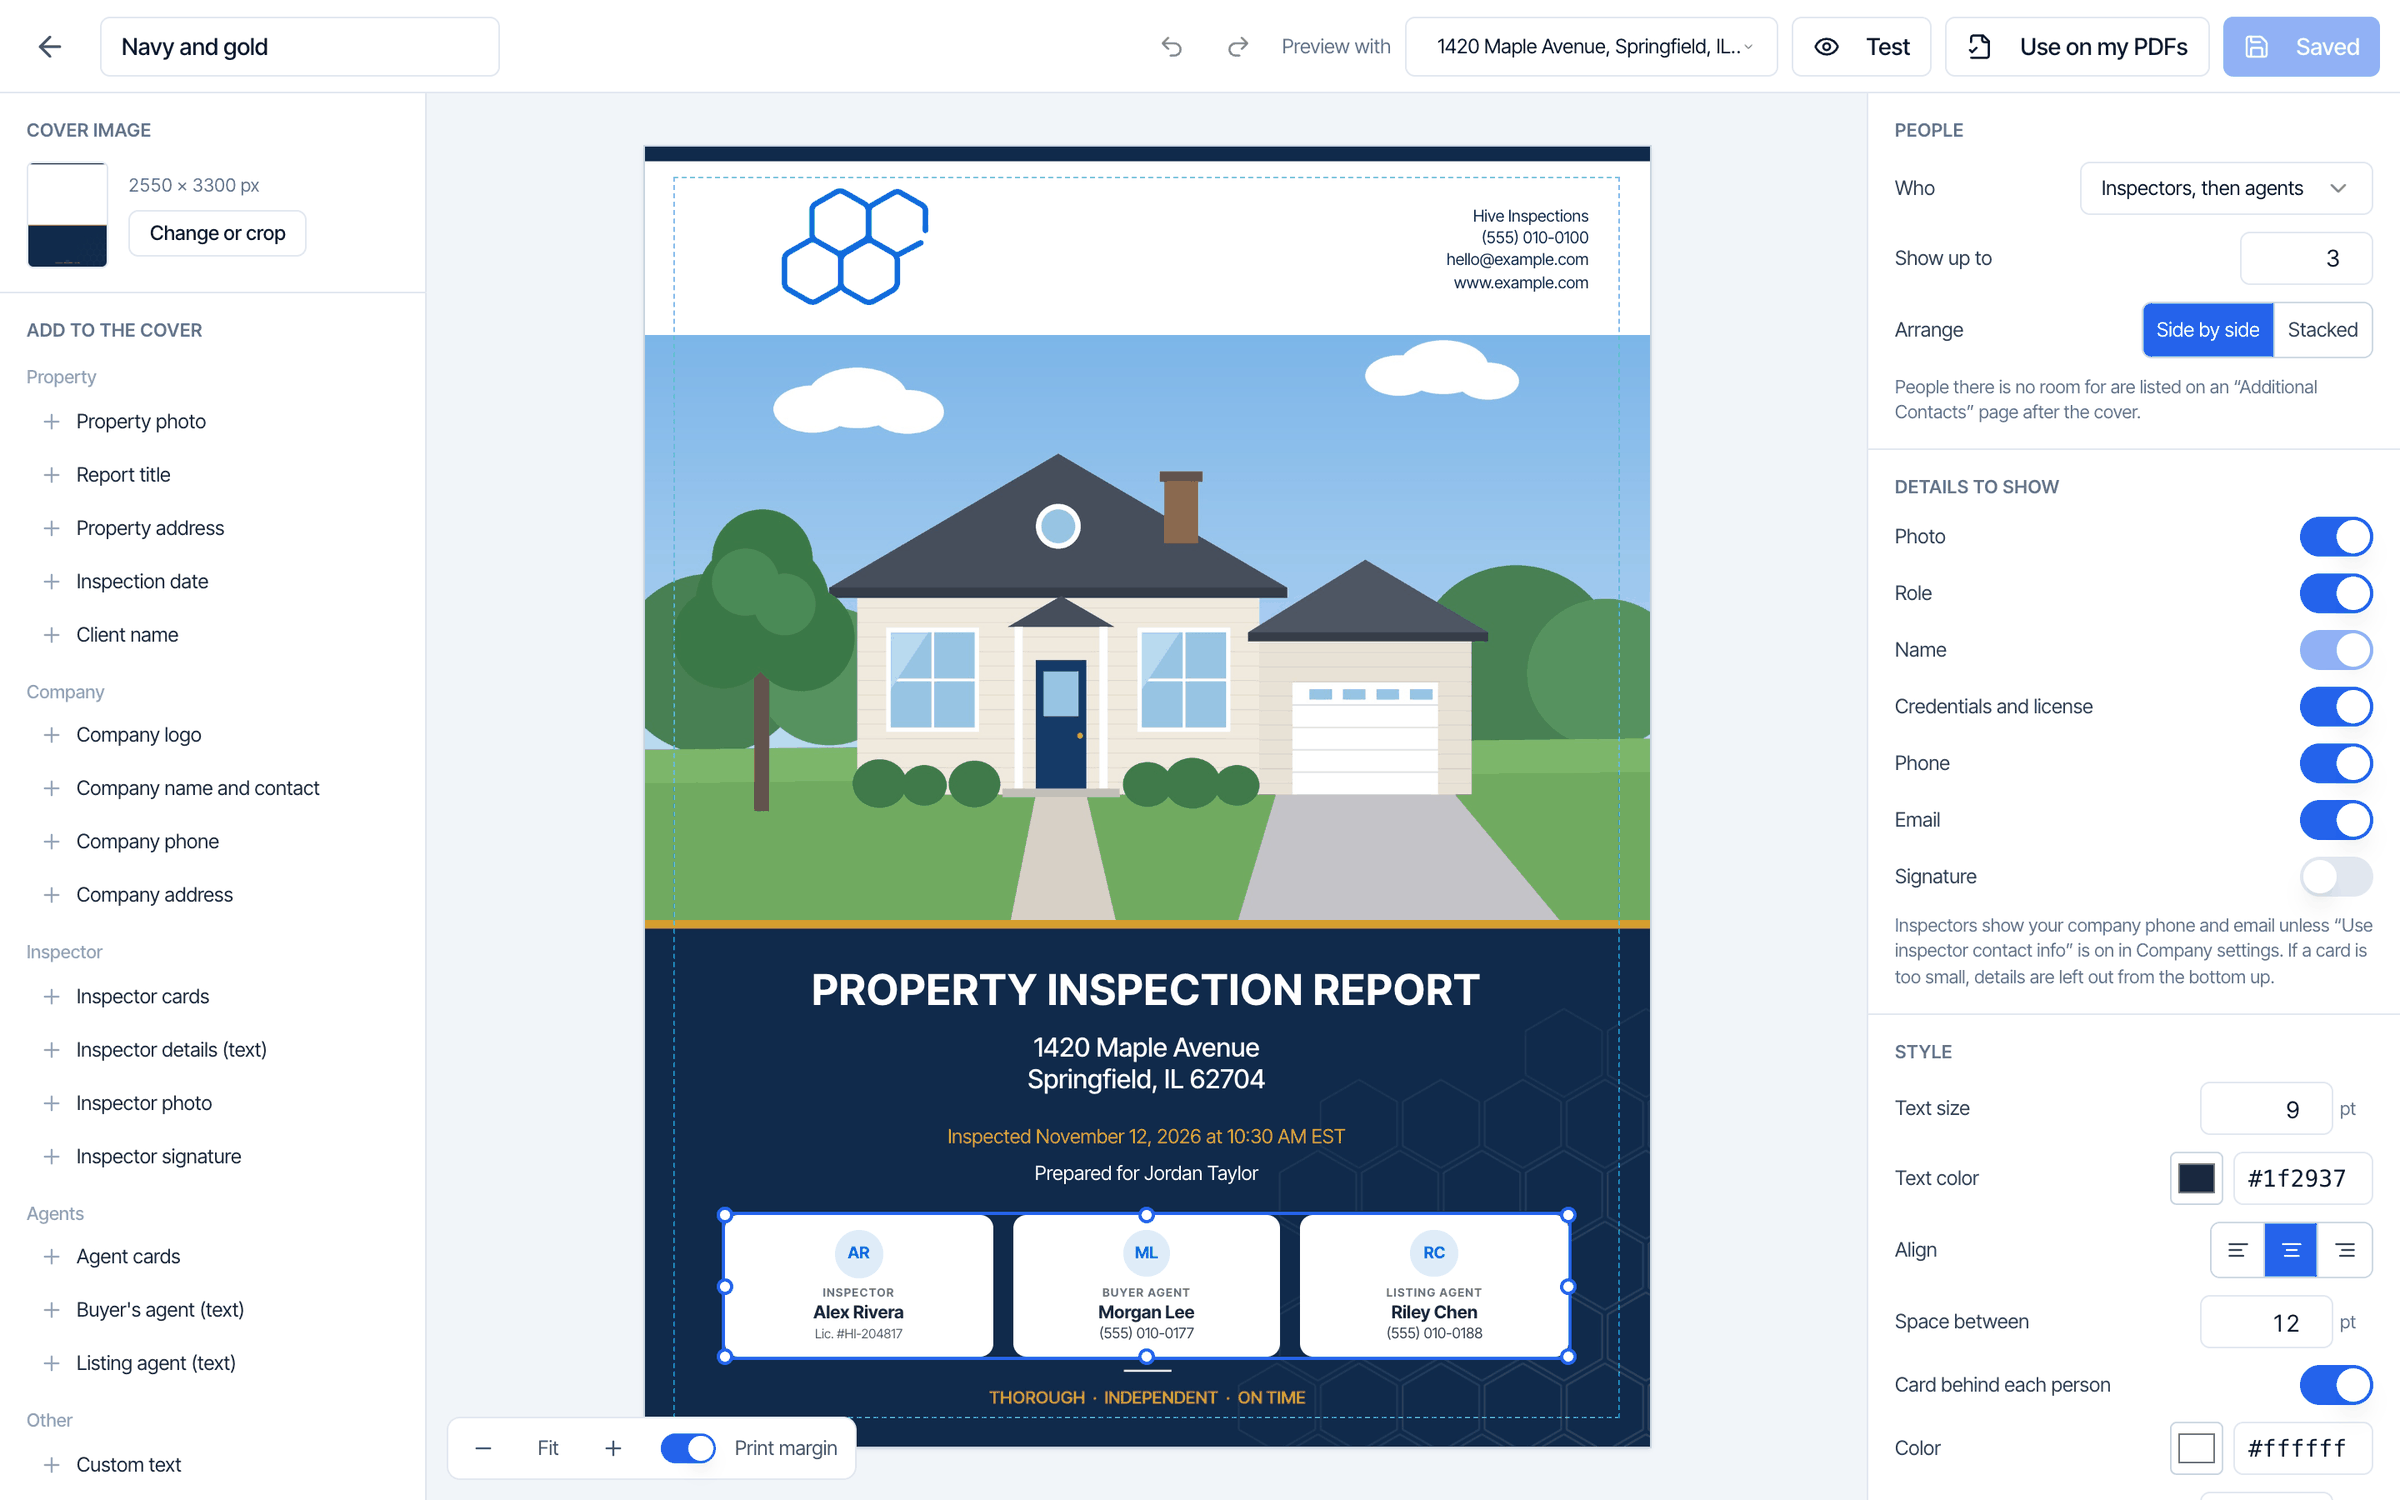
- Who. Inspectors, Agents, or Inspectors, then agents.
- Show up to. The most cards to print. People there is no room for are listed on an Additional Contacts page after the cover.
- Arrange. Side by side or Stacked.
- Details to show. Photo, role, credentials and license, phone, email and signature. The name always shows.
- Style. Text size, color, alignment, the space between cards, and an optional card behind each person.
Position, size and order
Every field has these at the bottom of its settings:- Position and size. Type exact values in inches: From left, From top, Width and Height.
- Arrange. Bring to front, Bring forward, Send backward or Send to back. A new Panel goes behind the fields already on the page.
- Duplicate and Delete.
Work faster in the designer
To replace the image or pick a different area of it, click Change or crop under Cover image. Your fields stay where they are.
Manage your saved covers
Your covers are listed under Your custom covers on the PDF Report tab whenever Custom is selected. You can keep up to 30.- Switch covers. Click a cover, then click Save on the Report Customization page. The cover shows Selected. Save to use it. until you save.
- Edit. Opens the cover in the designer. When you save a cover that’s in use, new PDFs use the change straight away.
- Copy. Makes a copy to try a variation without touching the original.
- Delete. Click the trash icon. A cover that’s in use can’t be deleted. Choose another cover or another design first.
When the cover shows up
New PDFs use the cover as soon as it’s in use. A PDF that already exists keeps the cover it was built with. To refresh the PDF of a report you already published:- In the Web Editor: open the report, click PDF in the toolbar, then click Regenerate.
- In the mobile app: open the inspection, tap the three dots on the report, then tap Regenerate PDF.
Frequently asked questions
What size should my cover image be?
What size should my cover image be?
Design it at 8.5 x 11 in, portrait, and export it at 2550 x 3300 px. The smallest size Hive accepts is 1275 x 1650 px. JPG, PNG, WEBP and HEIC files up to 15MB work.
Can I upload a PDF as my cover?
Can I upload a PDF as my cover?
No. Export your design as a JPG or PNG and upload that.
Can I use a different cover for each template or inspector?
Can I use a different cover for each template or inspector?
Not yet. One cover is in use for the whole company at a time. You can save several and switch between them on the Report Customization page.
Does the custom cover apply to state forms like TREC or Florida forms?
Does the custom cover apply to state forms like TREC or Florida forms?
Yes. TREC, Florida 4-Point, Florida Wind Mitigation, Florida Roof and Florida WDI print your custom cover as their first page, and so does TREC’s summary PDF. NPMA-33 and Texas WDI start on the official form and have no cover page, so they stay as they are.One difference from a regular report: a state form has no Additional Contacts page. If an inspector or agent card block is set to show fewer people than the inspection has, the extra people aren’t printed on the form.
Does the Test change my client's report?
Does the Test change my client's report?
No. Test builds a separate one-page PDF from the inspection’s details. Nothing is saved and the inspection’s report and PDF stay as they are.
I turned my cover on but a report still has the old cover. Why?
I turned my cover on but a report still has the old cover. Why?
That report’s PDF was built before the change. Open the report in the Web Editor, click PDF, then Regenerate. In the mobile app, tap the three dots on the report and choose Regenerate PDF.
Why is a field empty on one inspection?
Why is a field empty on one inspection?
The inspection doesn’t have that detail. A placeholder with no value prints nothing, a picture with no photo is left empty, and cards only print for the people on the inspection. Add the missing detail to the inspection, such as a cover photo or an agent, and regenerate the PDF.
Why can't I delete a cover?
Why can't I delete a cover?
It’s the cover in use on your PDFs. Choose another cover, or switch to Classic or Modern, save, then delete it.
Why does the designer say it needs a wider window?
Why does the designer say it needs a wider window?
The designer is built for a computer screen. Open it on a computer, or widen the browser window, to add and edit fields.
Is my custom text translated in translated PDFs?
Is my custom text translated in translated PDFs?
No. Text you type on the cover prints as you typed it in every language.
Related