Video Tutorial
Setting Up Automations for Inspections
1
Set Up Automations Before Scheduling Inspections — 0:01
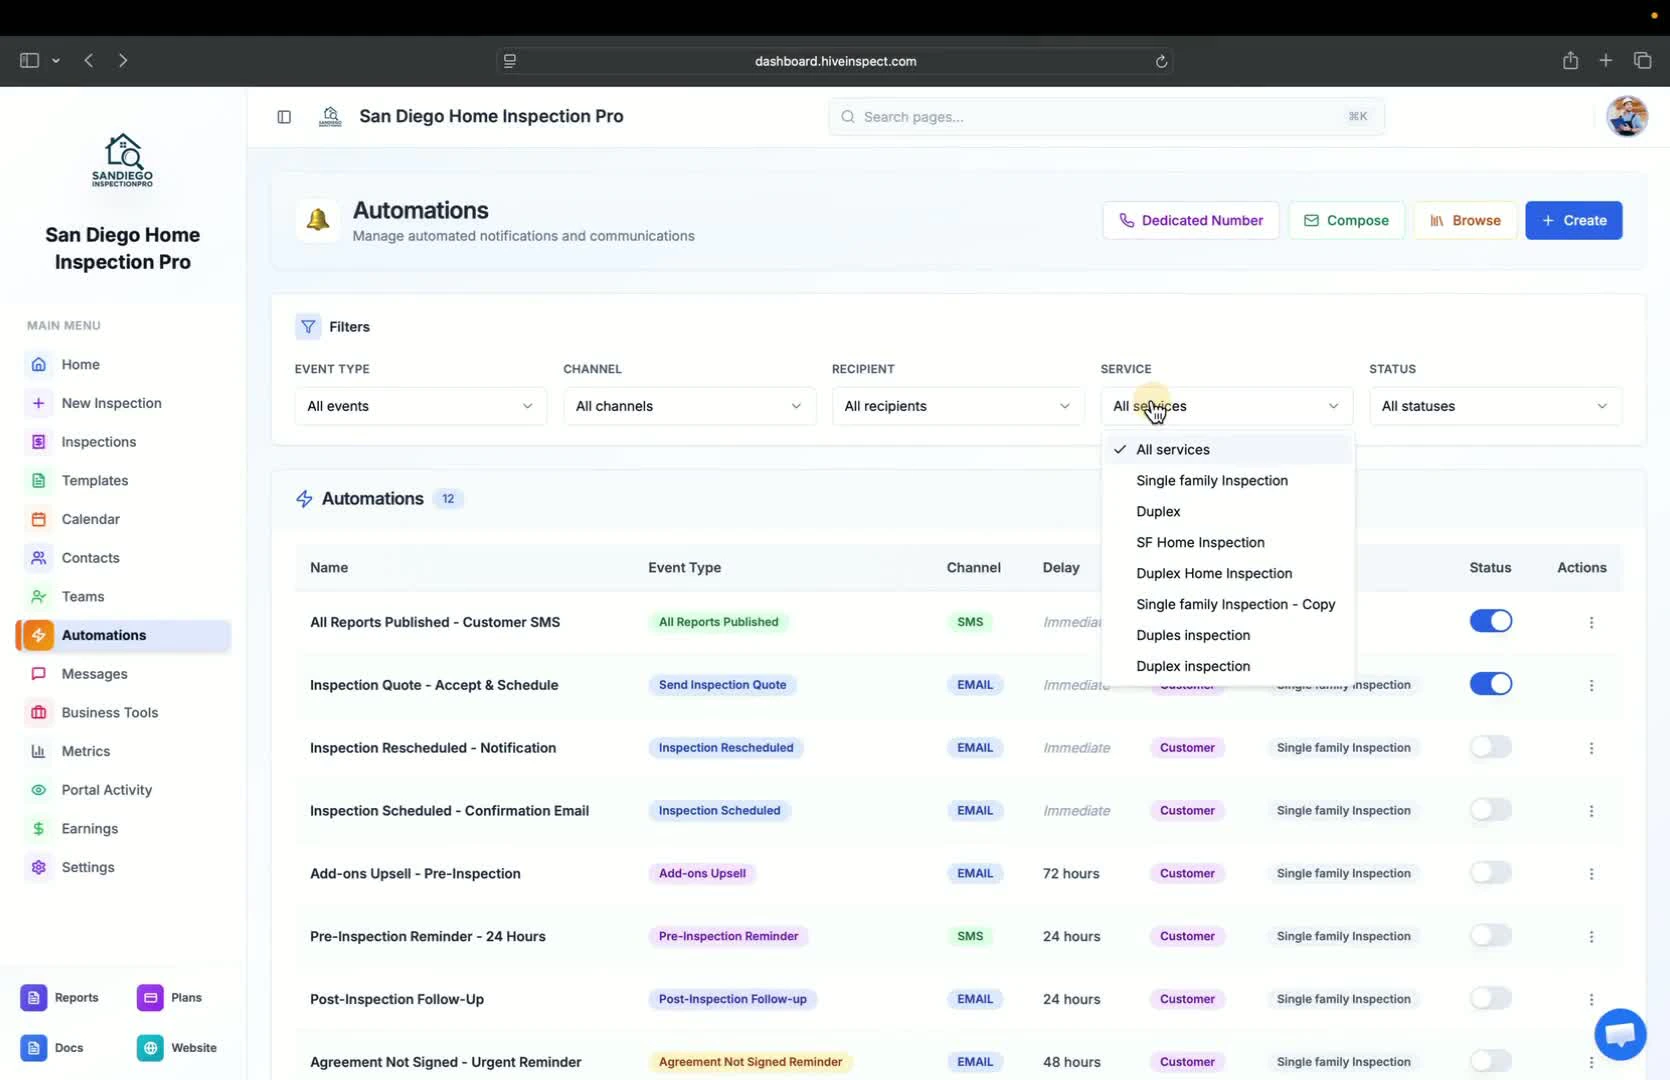
- Go to the Automation section
- Ensure automations are set up before scheduling any inspections
2
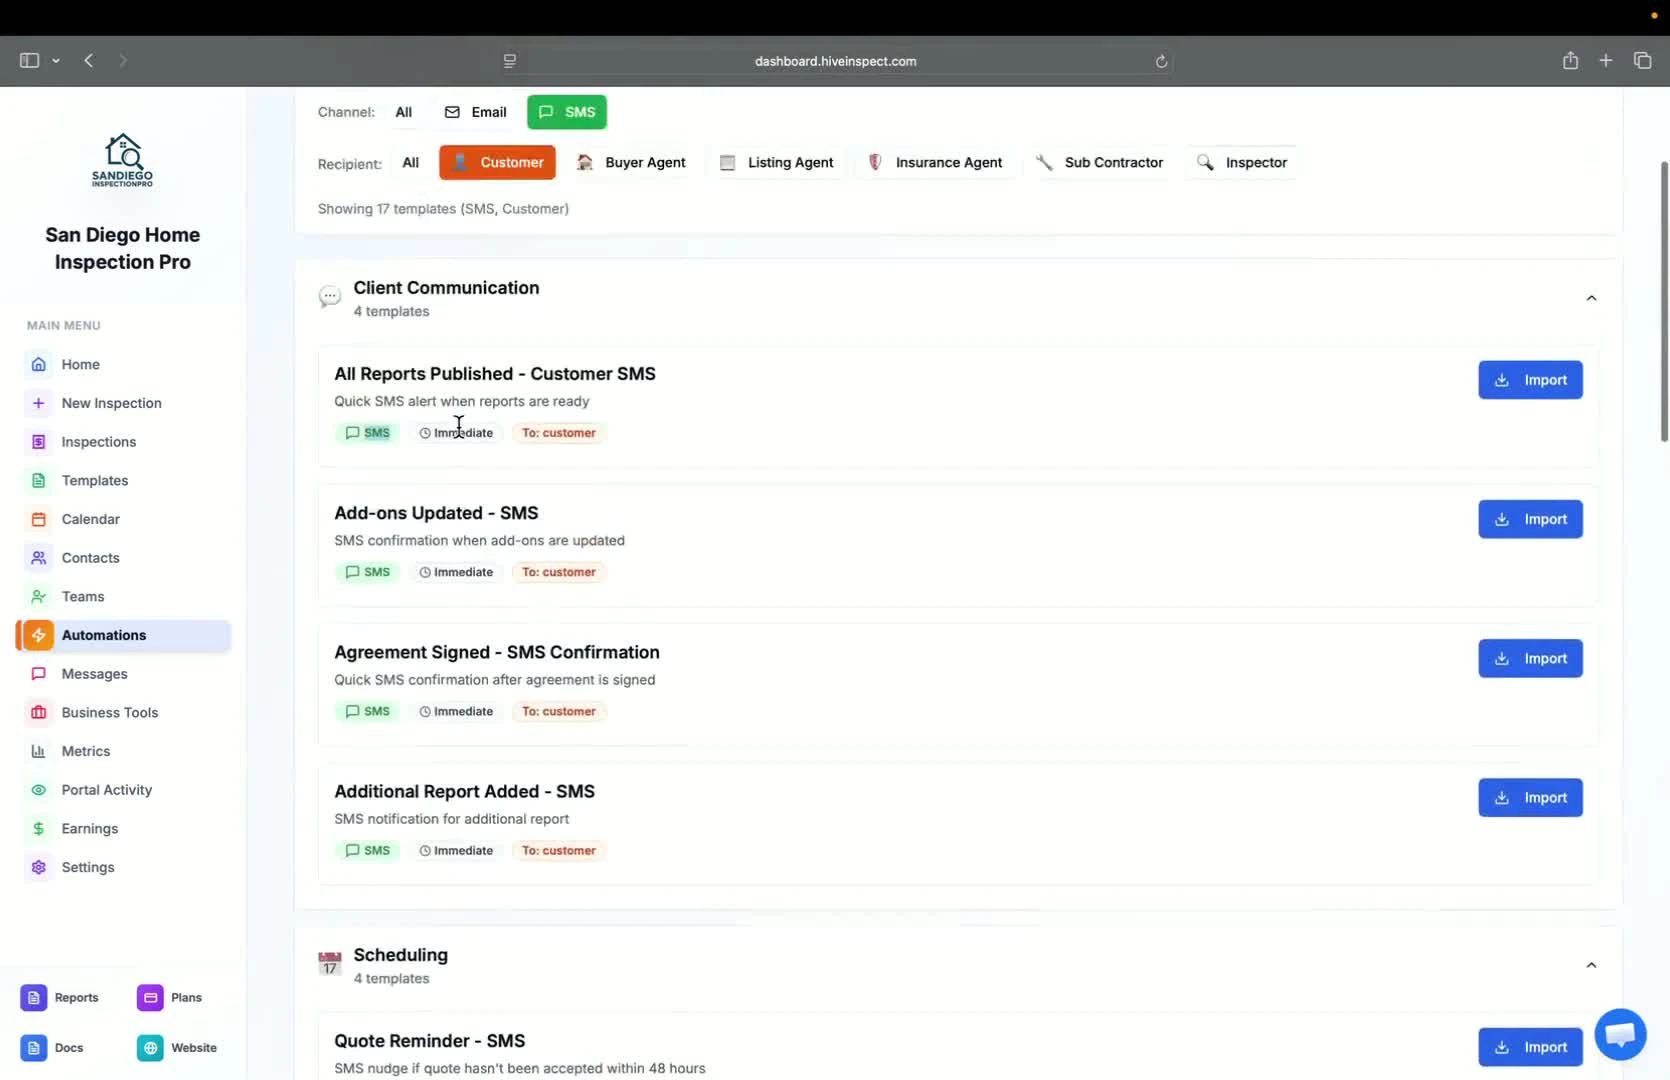
Choose Types of Communications — 0:31
- Select the type of communication you want to send (e.g., email, SMS)
- Understand the trigger points for scheduling communications
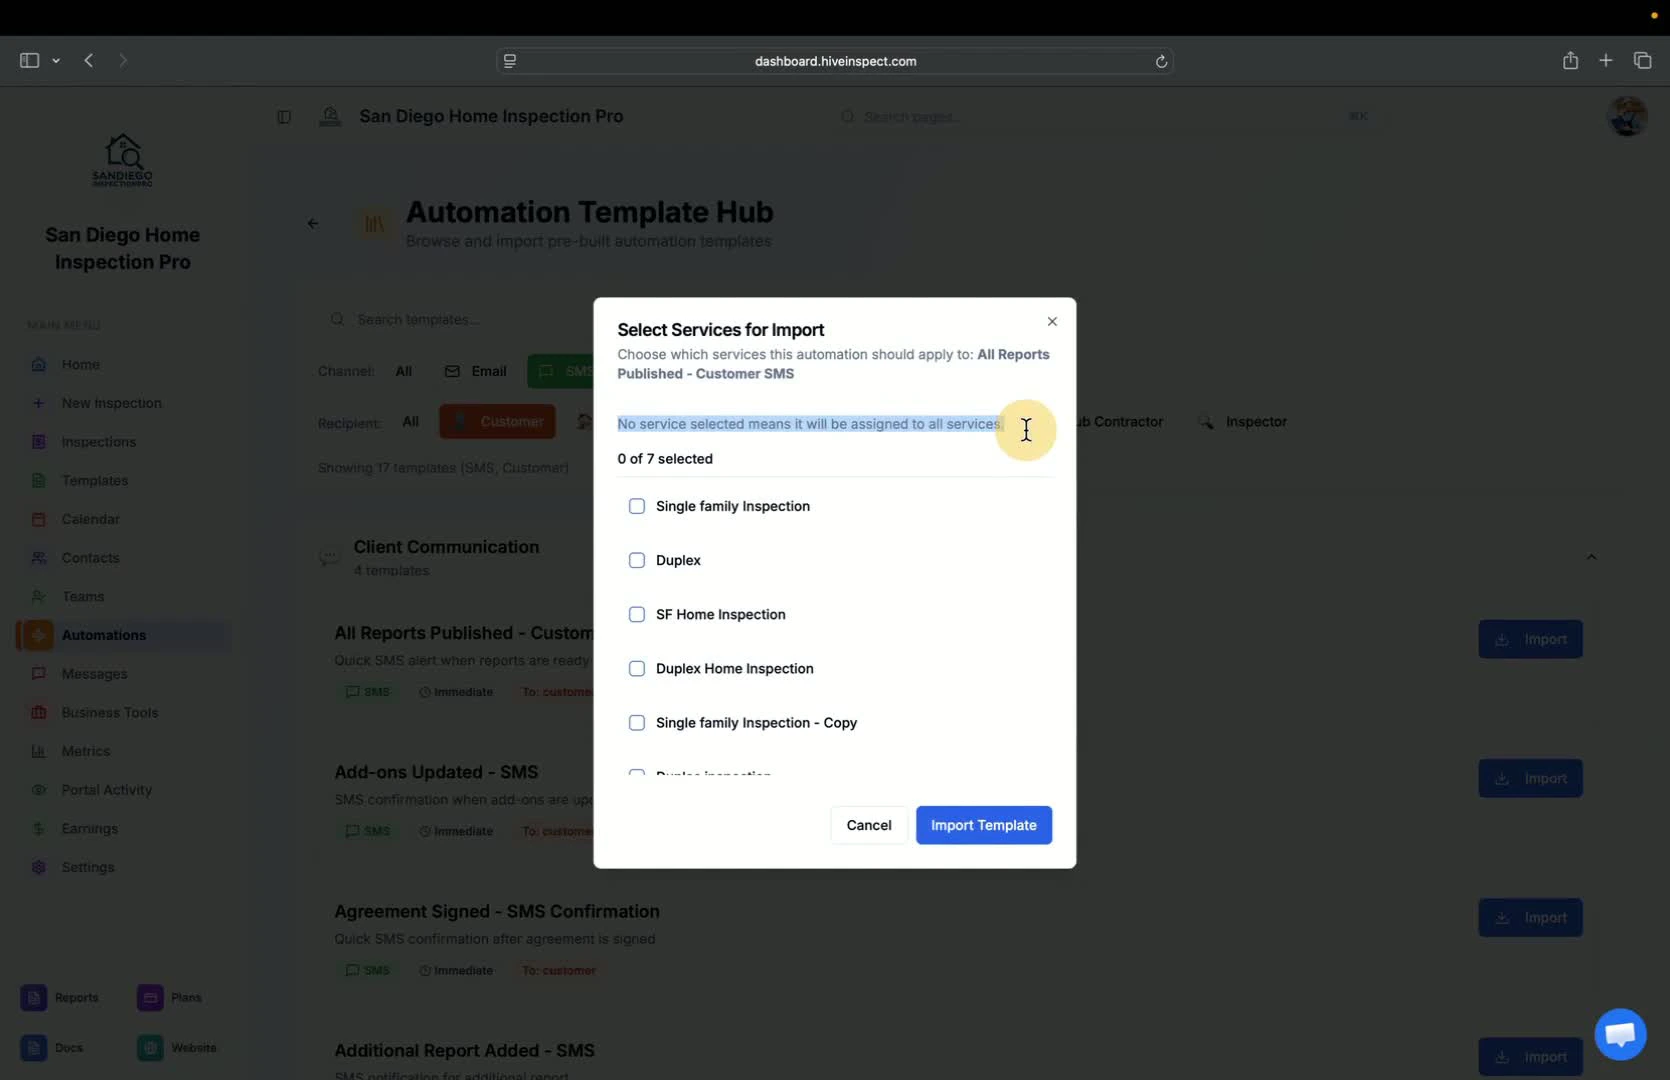
3
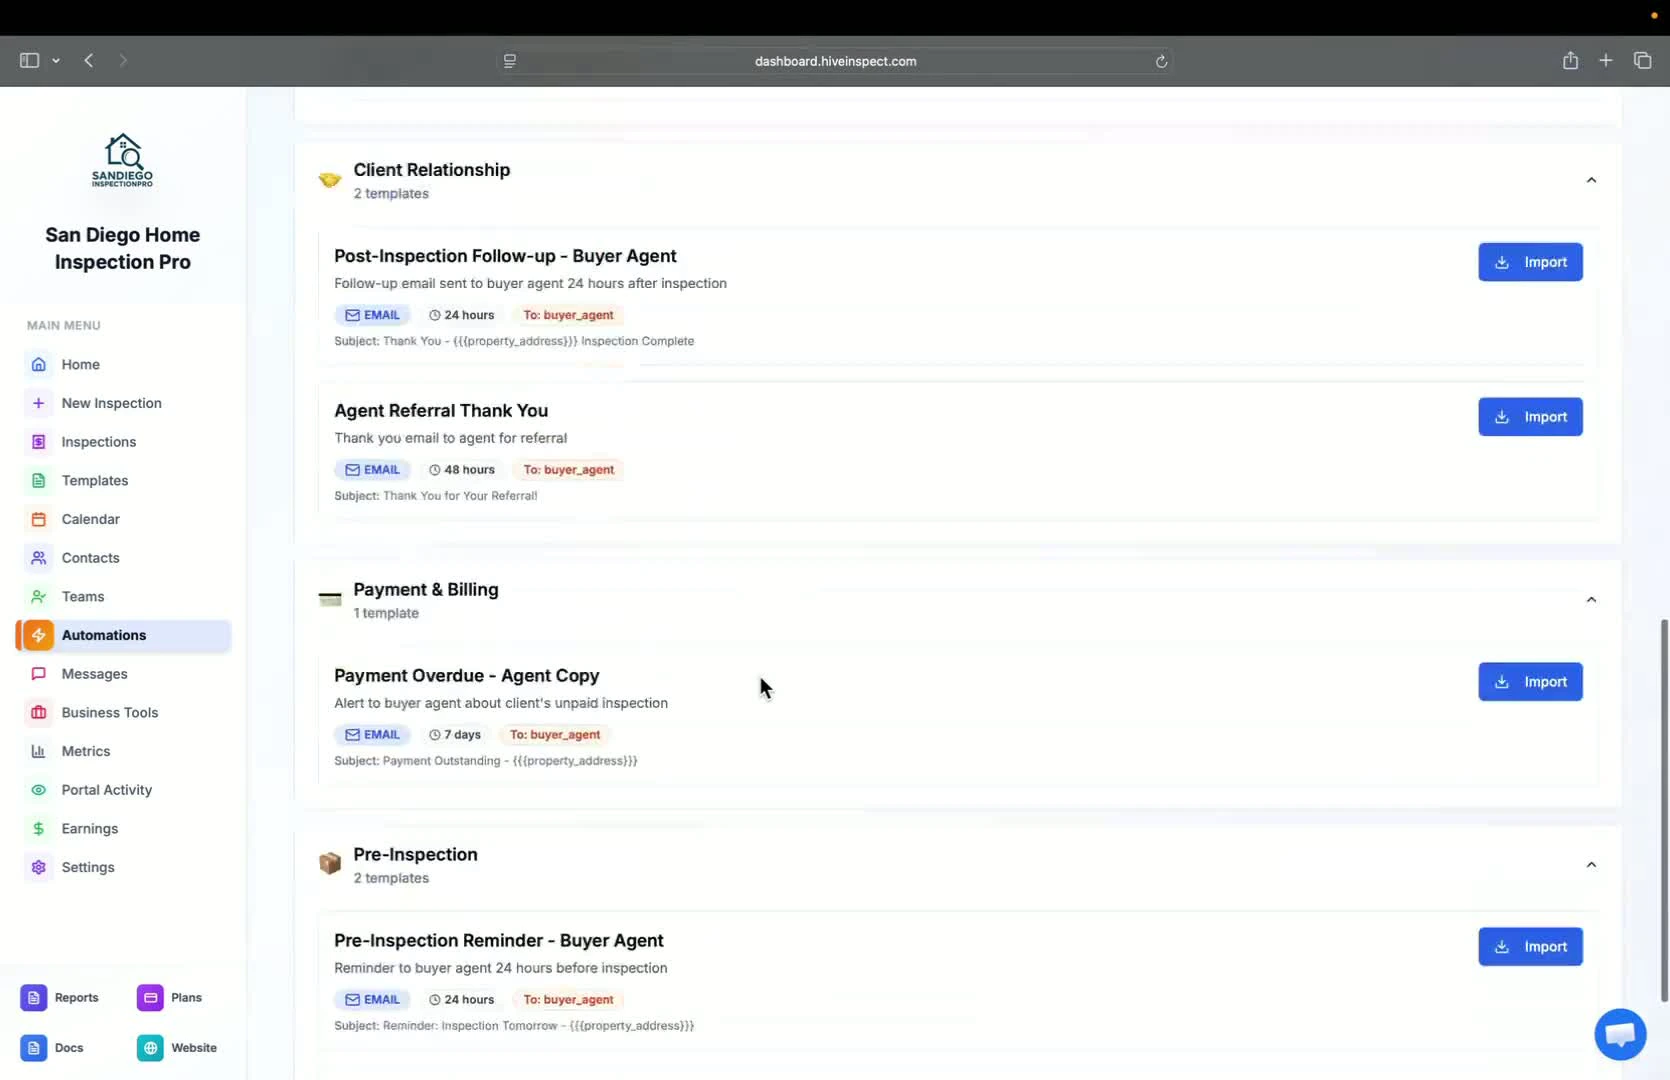
Import Automation Settings — 0:53
- Click Import to select services for the automation
- Note: If no service is selected, the automation applies to all services
4
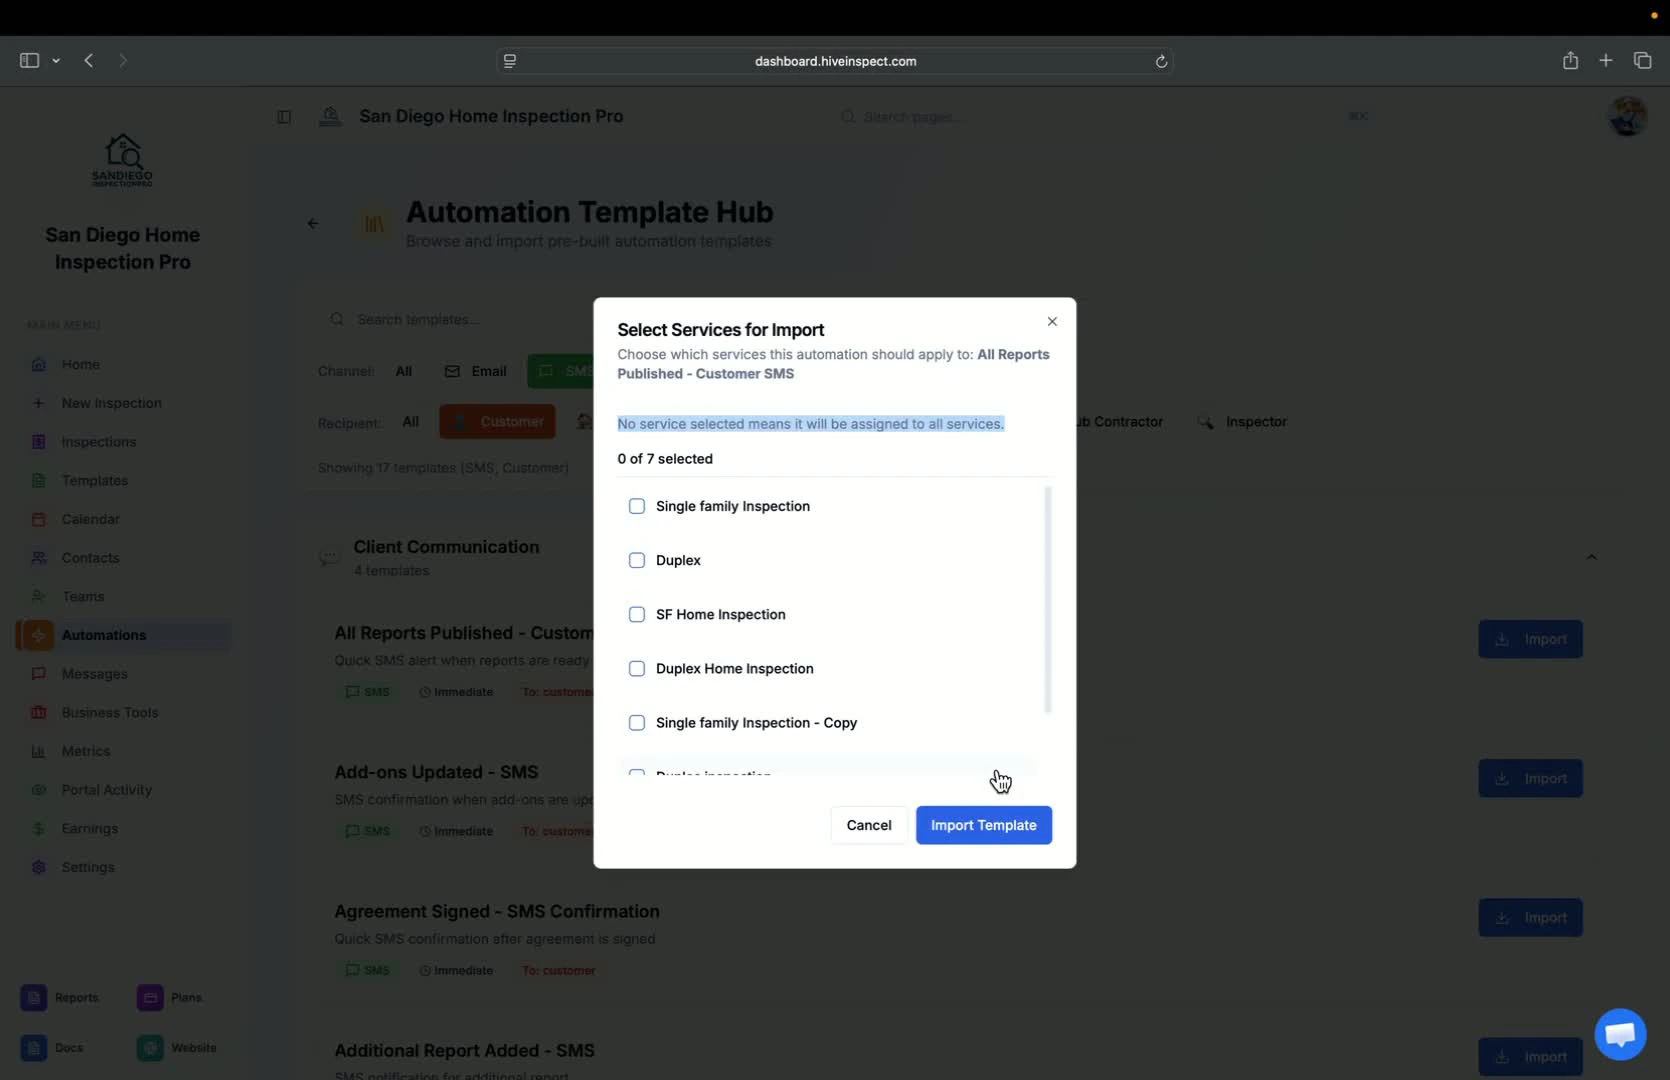
Select Specific Services (Optional) — 1:05
- If needed, select specific services for the automation
- Avoid selecting services unless necessary to ensure future inspections are included
5
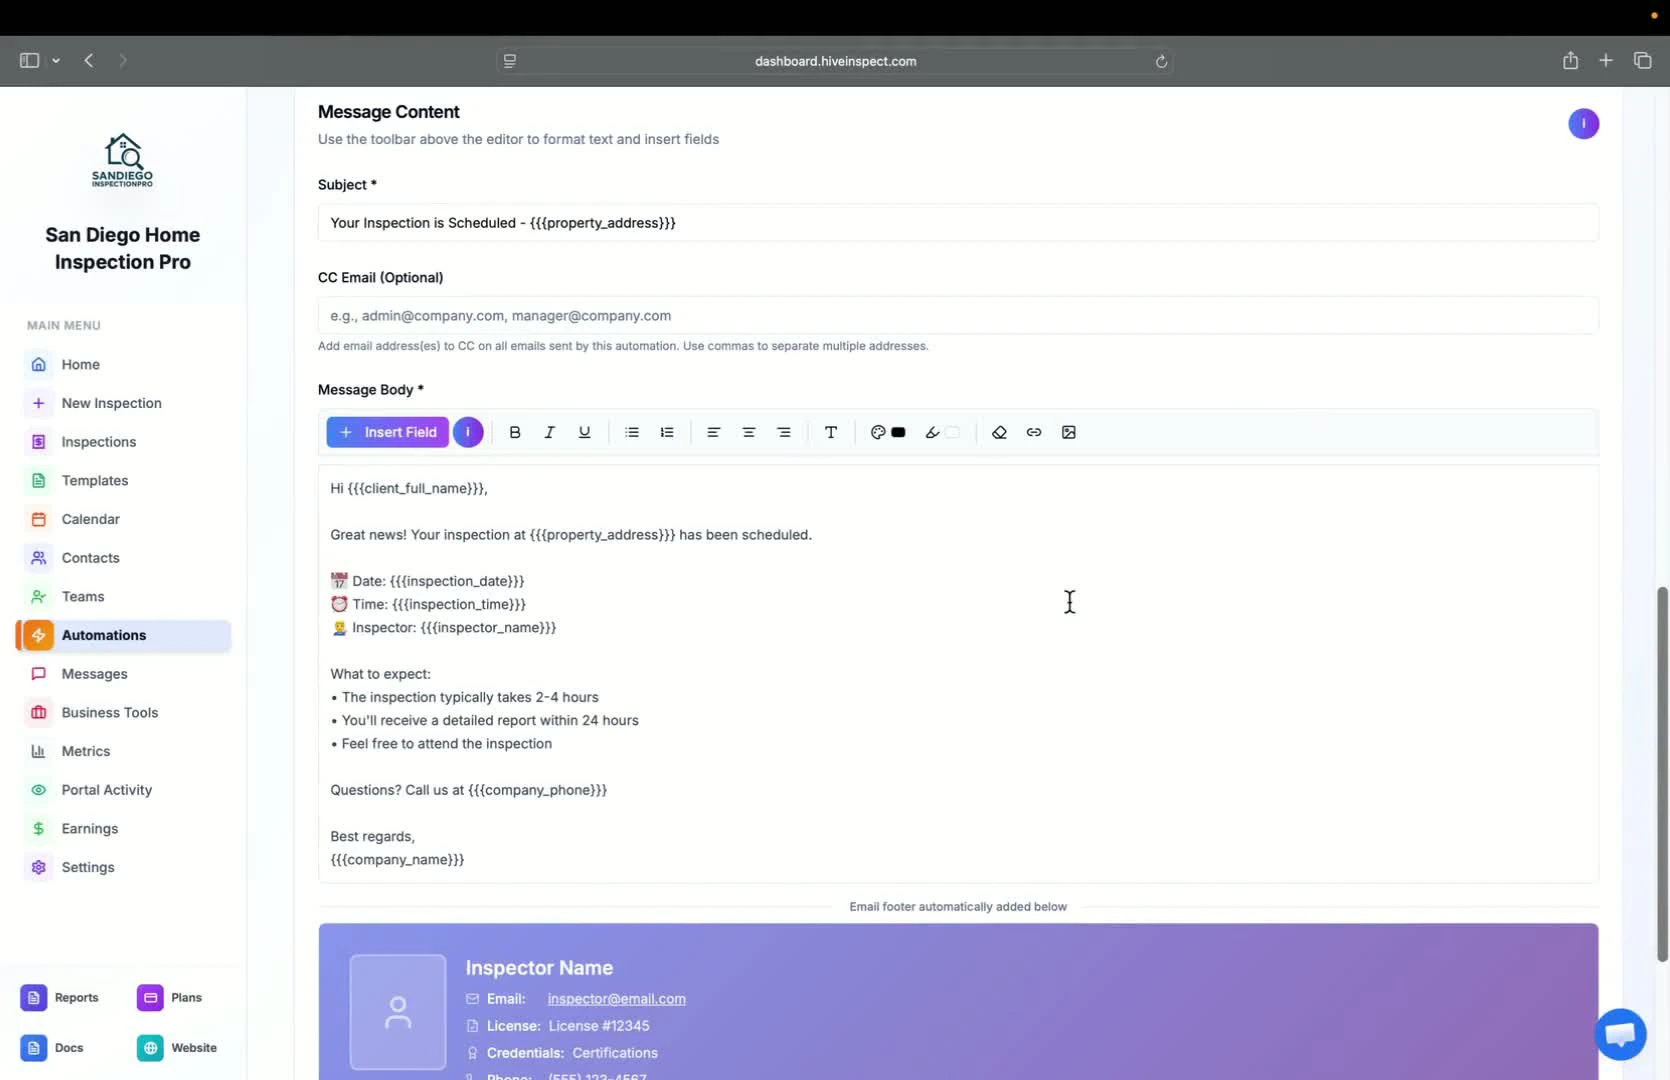
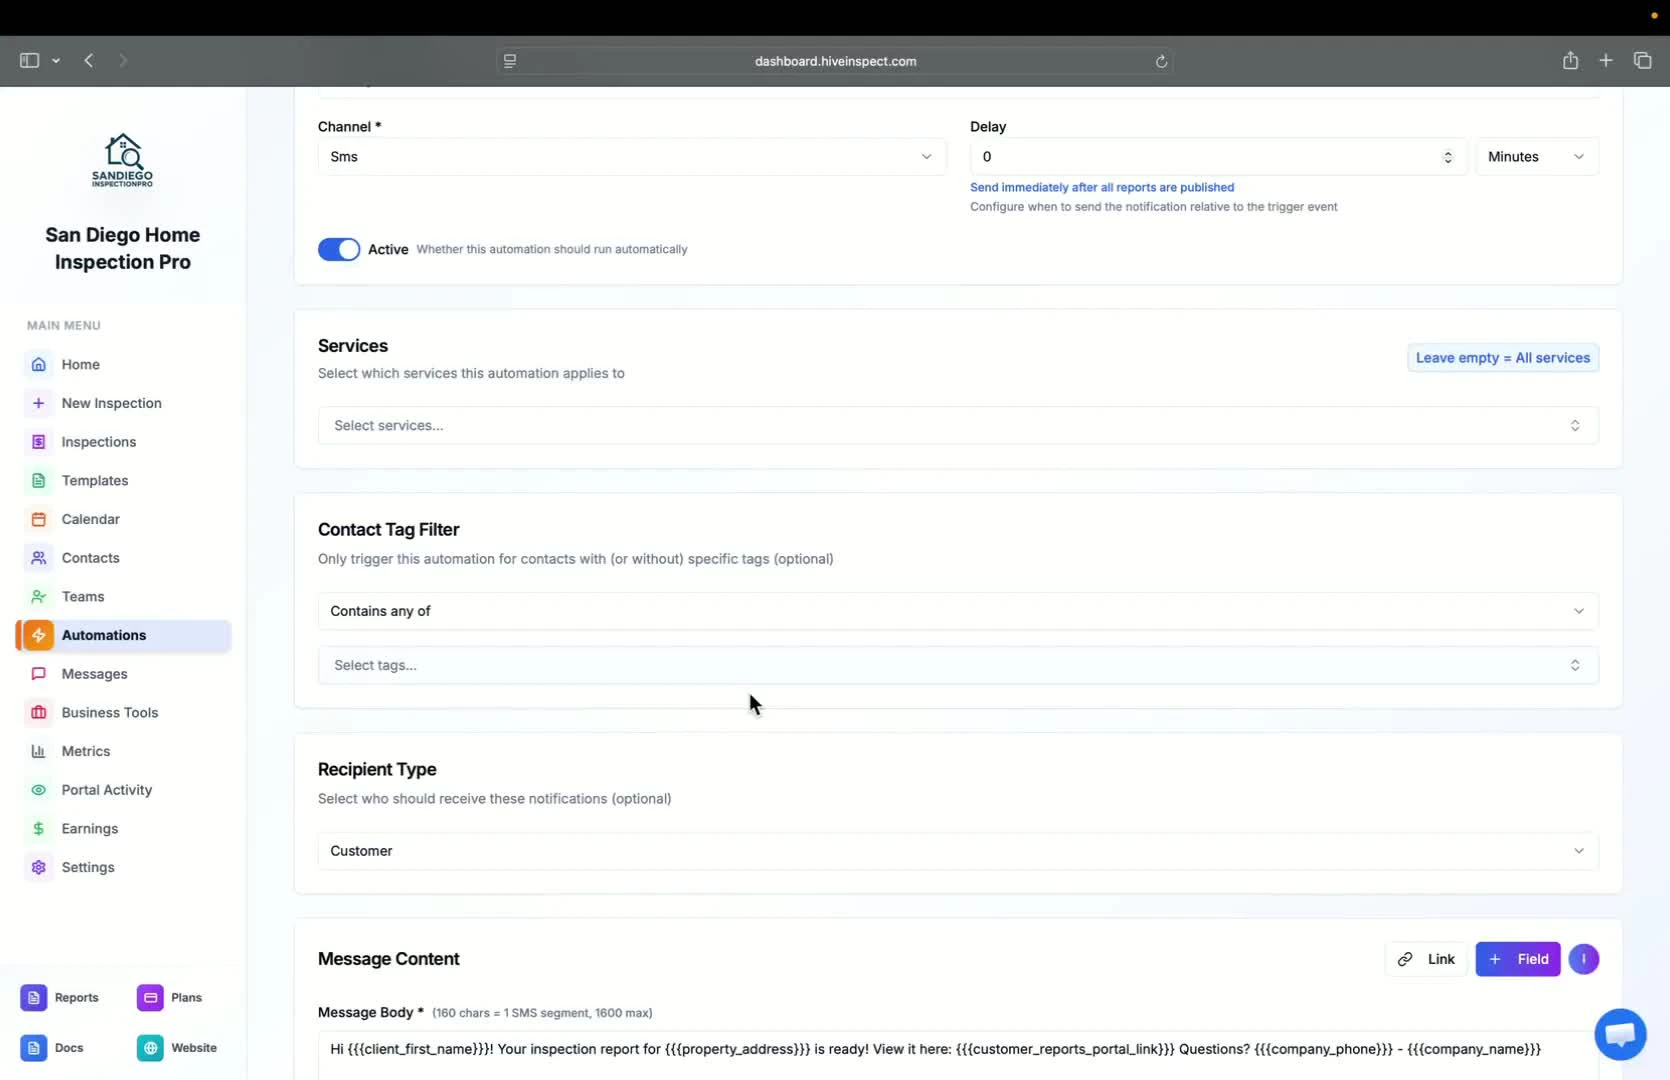
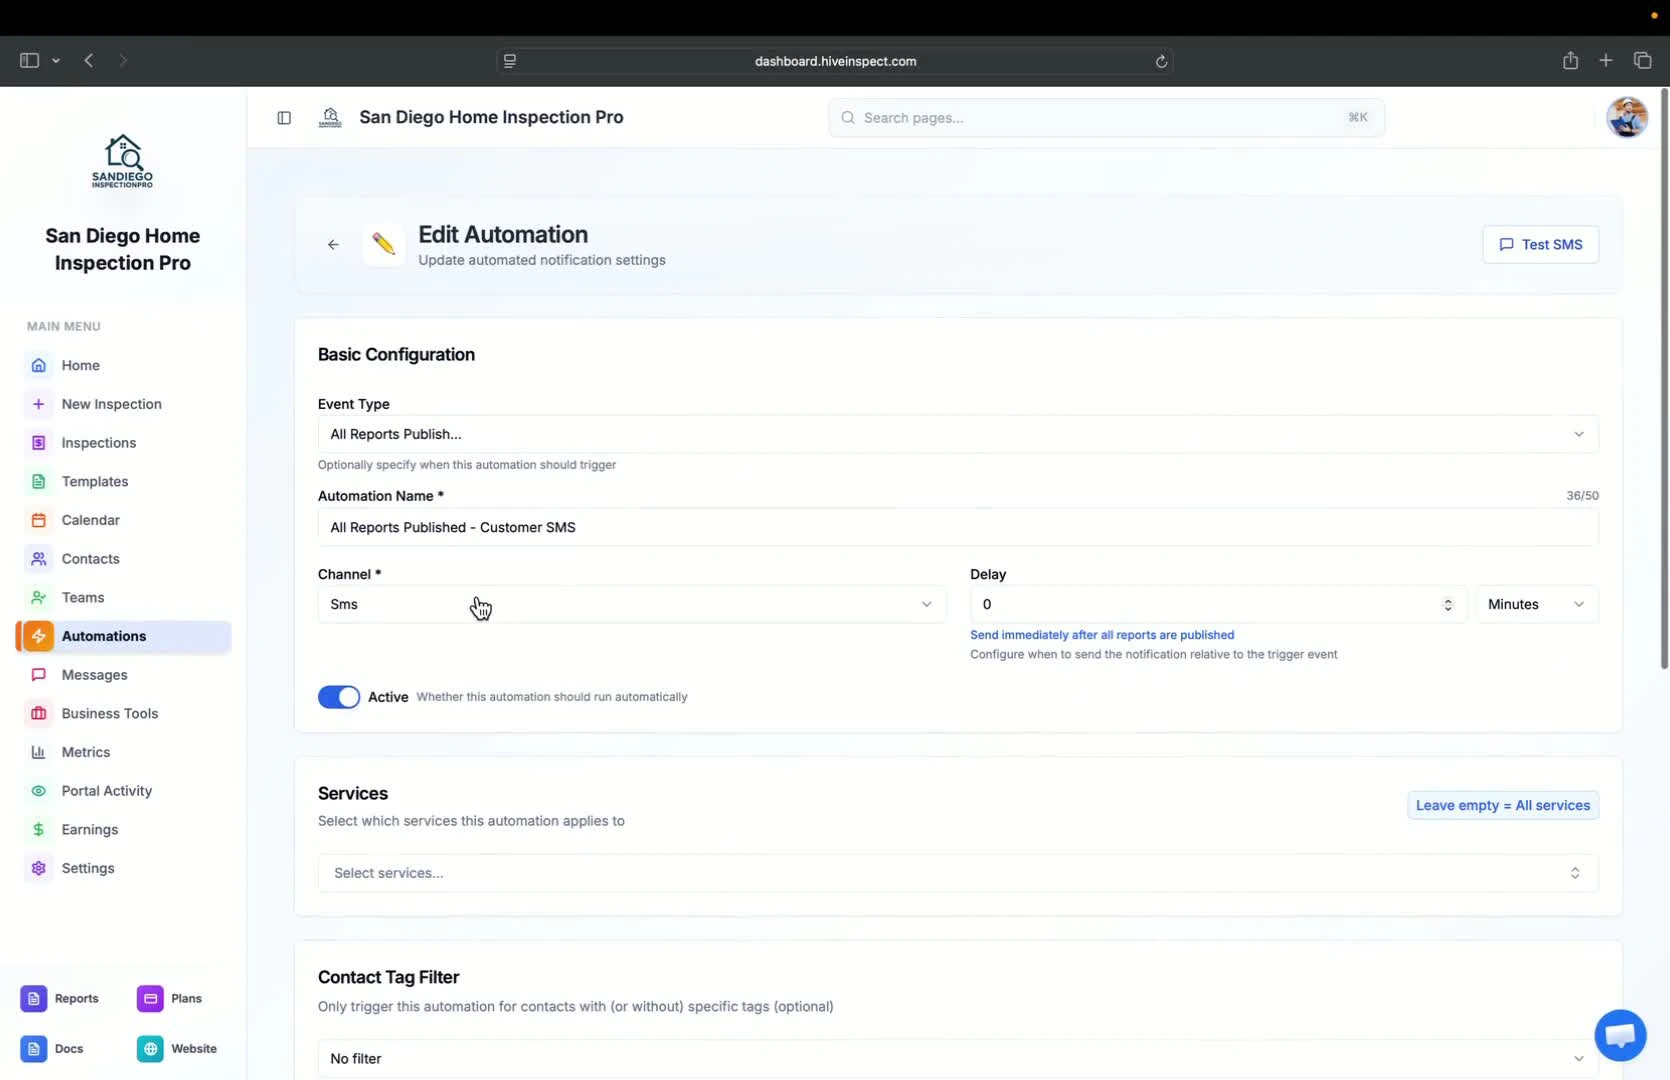
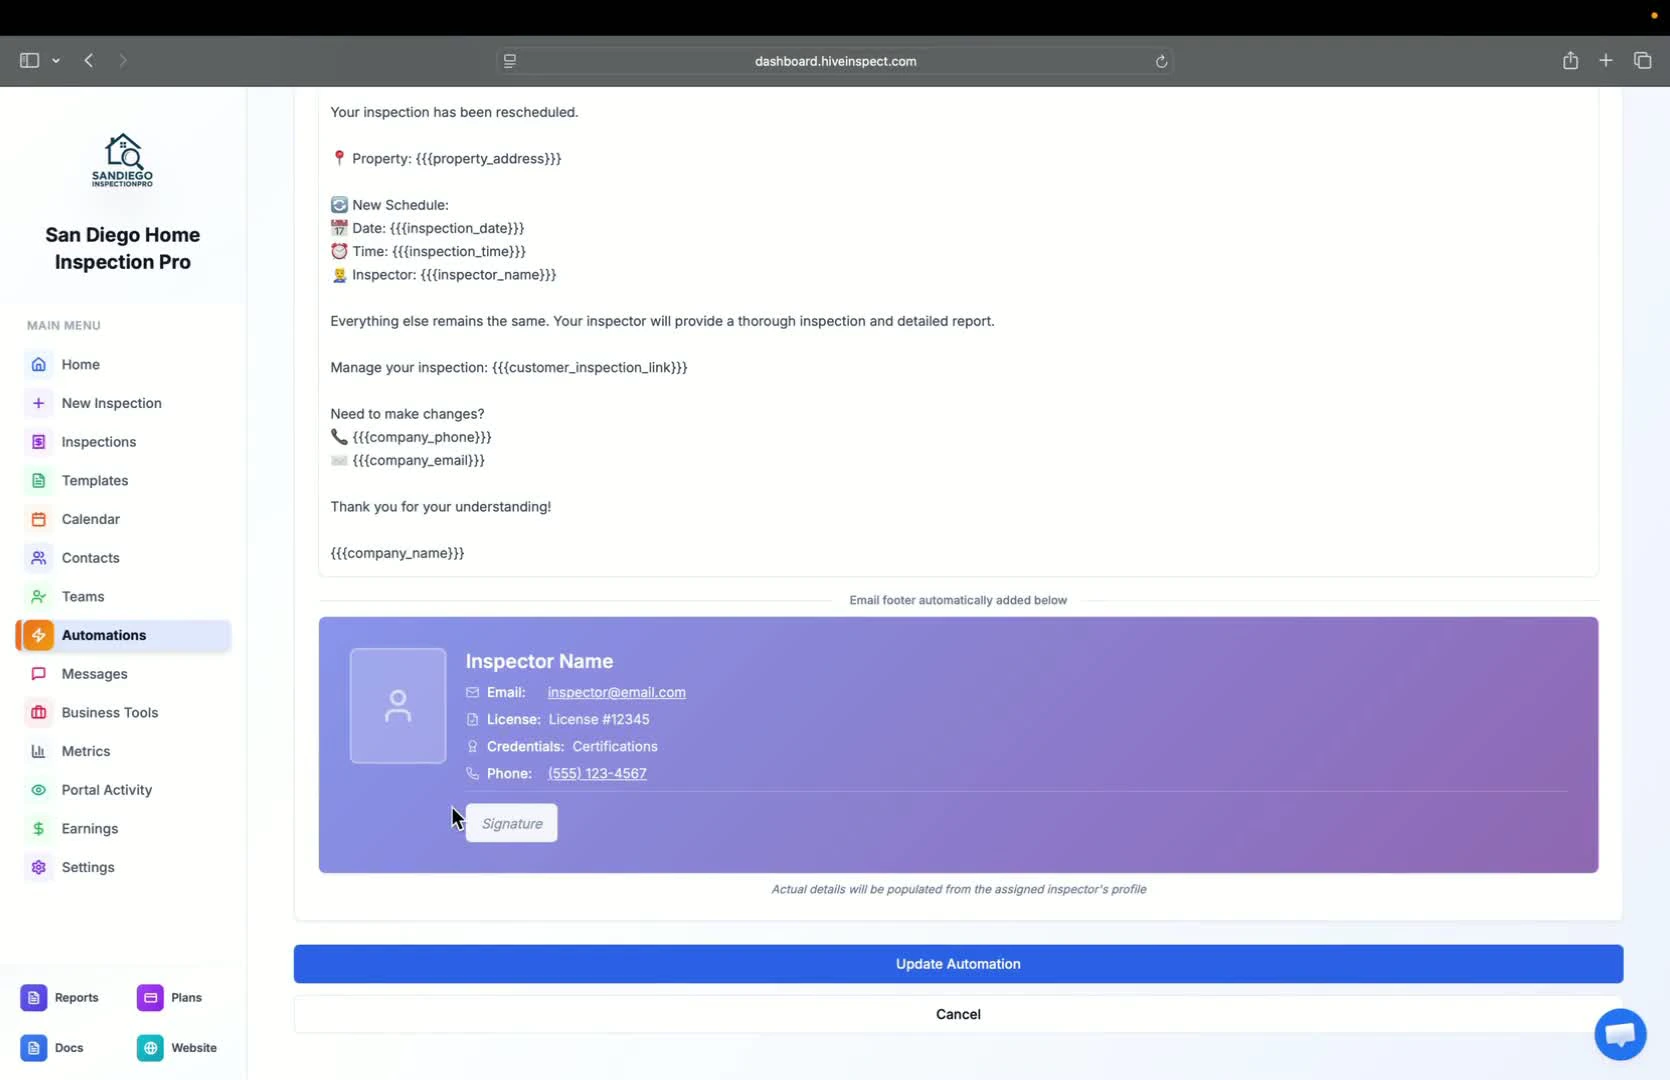
Edit Automation Details — 1:25
- Click Edit to modify the automation settings
- Review trigger types, reference names, channels, and delays
6
Set Filters for Specific Contacts — 2:04
- Use stack filters to exclude specific realtors or contacts from receiving messages
7
Customize Message Body — 2:14
- Edit the message body for emails and SMS
- Use placeholders for personalized content
8
Test SMS and Email Messages — 2:44
- Use the Test SMS feature to see how messages will appear to customers
- Send a test email to yourself to review the customer experience

9
Automatic Inclusion of Footer Information — 3:17
- Default footer includes your license number, credentials, signature, and photo
10
Duplicate Inspections and View Filters — 3:27
- Duplicate inspections as needed
- Use filters to view all inspections and automations
11
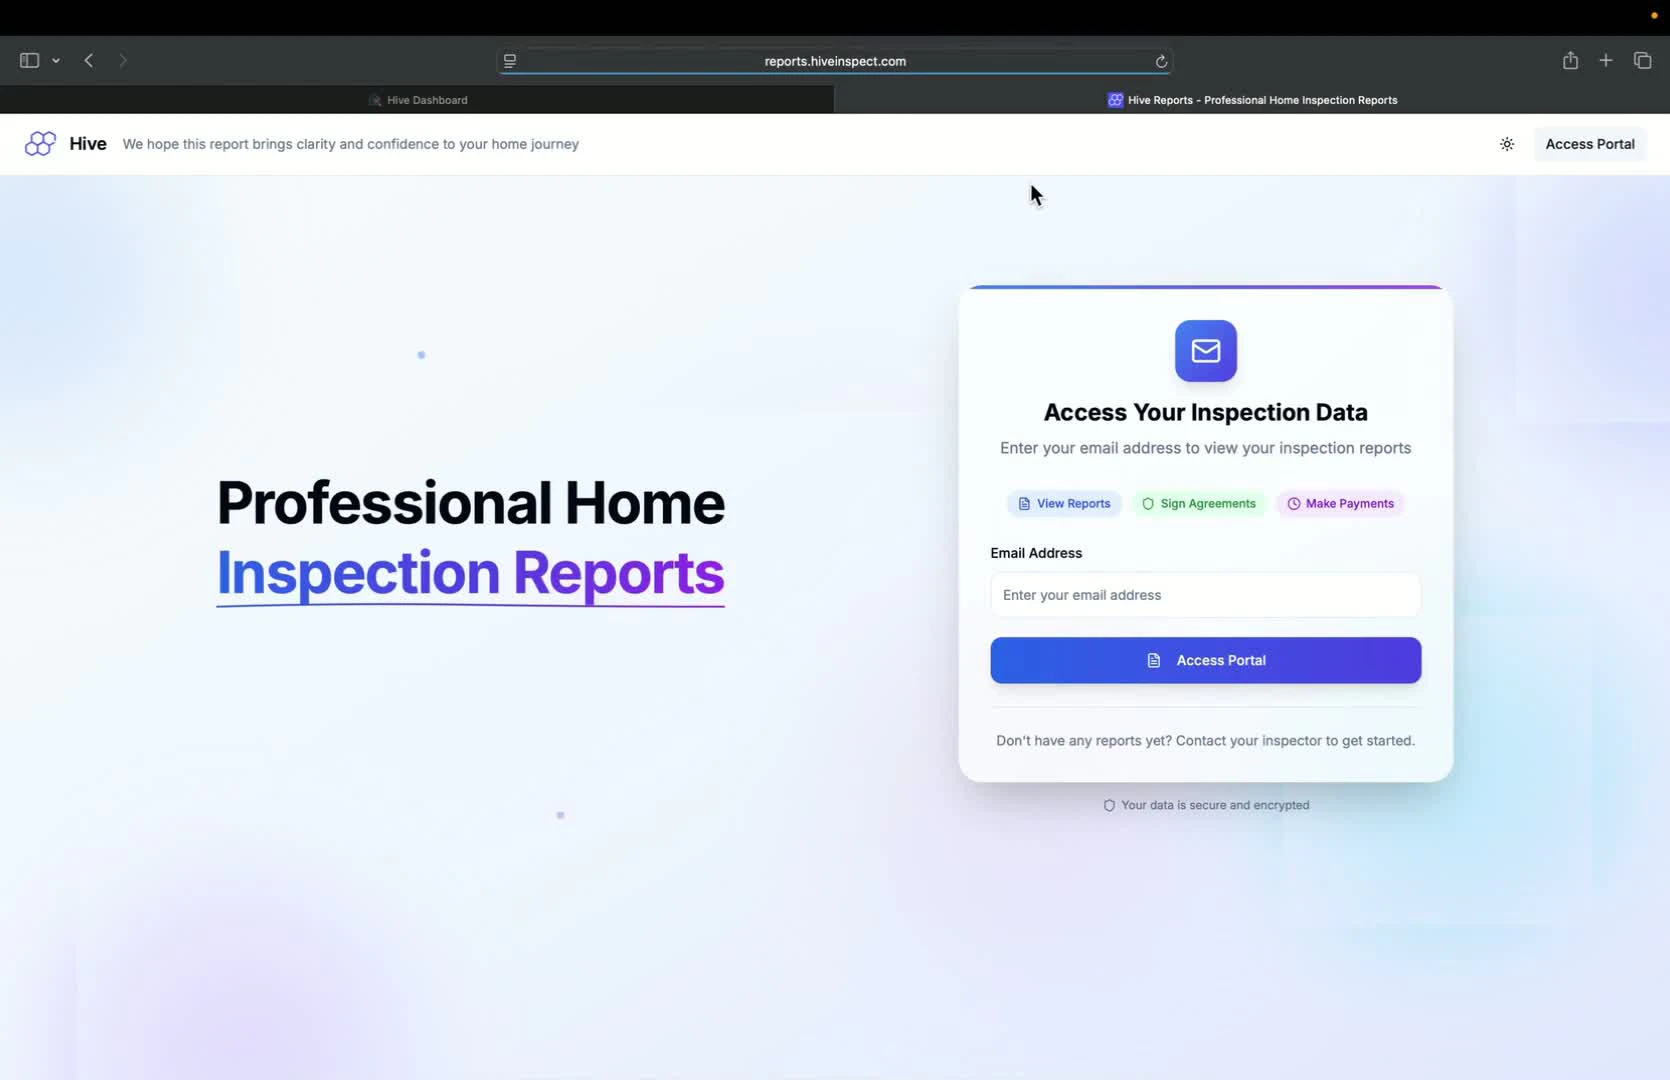
Access Customer Reports Portal — 3:58
- Use the reports button to access the customer portal
- Customers can enter their email to access reports
12
Embed Report Links in Automated Emails — 4:08
- Ensure the custom report placeholder is included in automated emails