

In the dashboard: open the inspection, then Date & time. In the mobile app: open the inspection, then the Reschedule tile.
Plans change: a seller denies access, a closing moves or weather pushes a roof inspection back. You move an inspection to a new date and time from its order page on the web, or from its summary screen in the mobile app. Hive then moves the calendar events and reminders, and sends your reschedule messages if you’ve set them up.Before you start: set up reschedule messages (one time)
Hive doesn’t send a reschedule email or text on its own. To tell the client and agent about the new time automatically:Create a reschedule automation
Go to Automations in the web dashboard and create an email or text automation with the event type Inspection Rescheduled. You can also import a ready-made reschedule automation. See Automation starter pack.
Write the message
Use placeholders such as the inspection date, time and address. They fill in with the new date and time. There’s no placeholder for the old date.
Choose the services
Attach the automation to the services it should cover. An automation with no services sends for every service. See Automation settings.
Reschedule from the inspection order page (web)
Open the inspection
On the Inspections page, click the inspection’s row, client name or address. Its Inspection Order Page opens.
Click Date & time
On a confirmed inspection, the inspector and the schedule are folded into two buttons: Inspectors and Date & time. Date & time shows the current date, time, time zone and length. Click it.
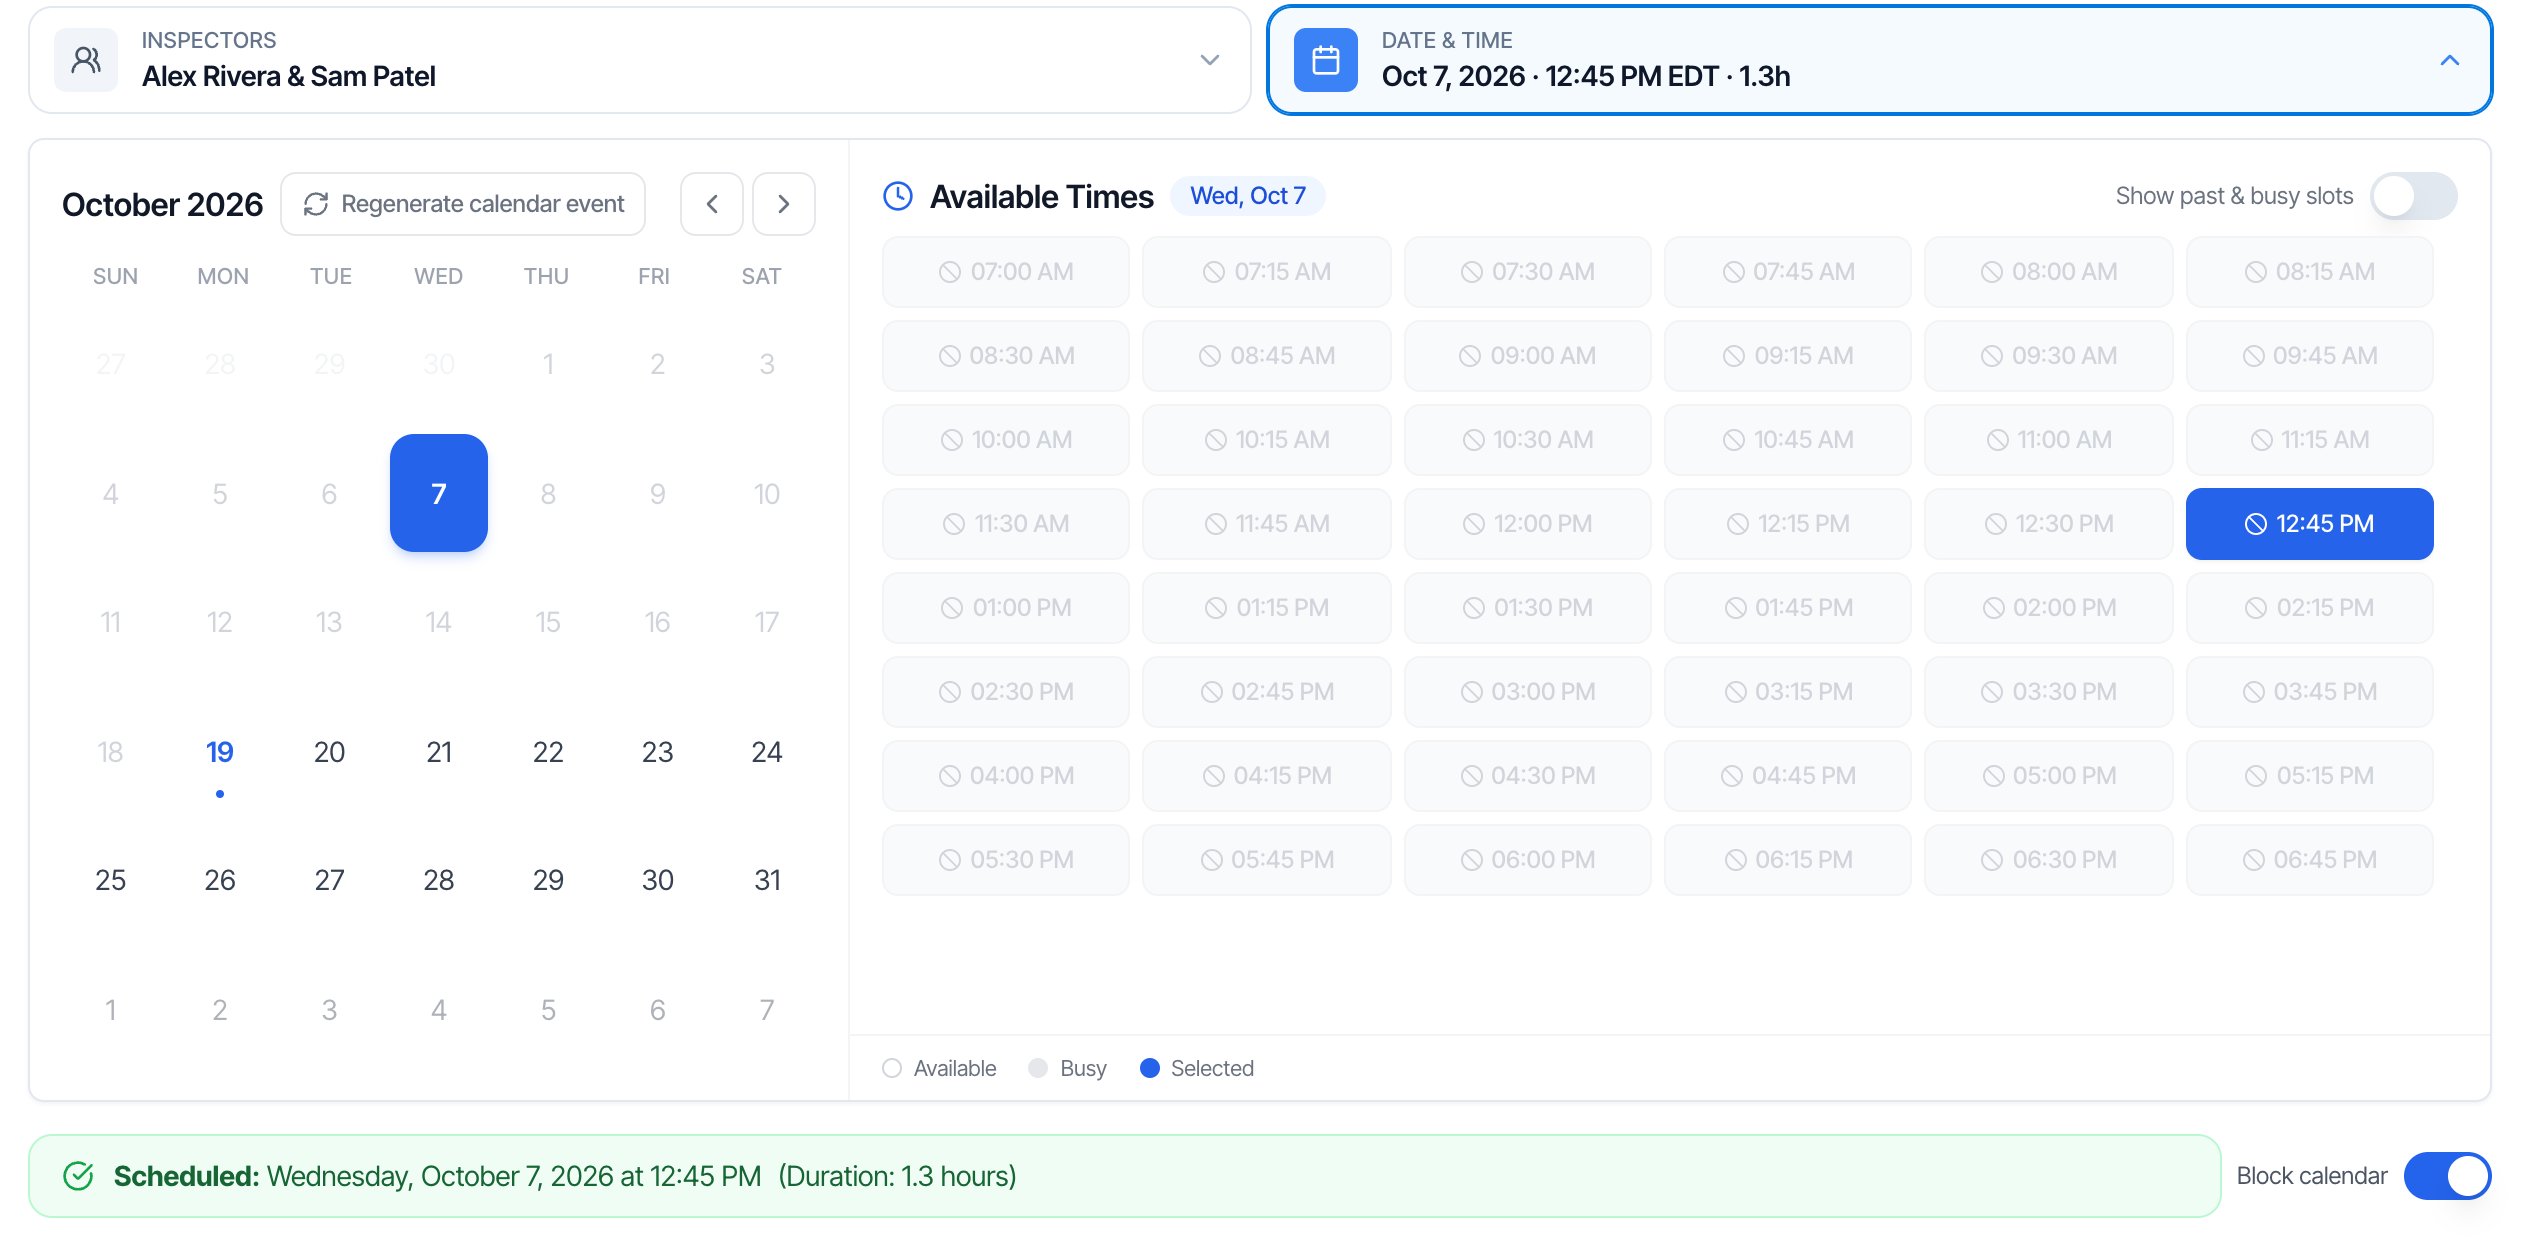
Pick the new date
Click the new day in the calendar. Nothing is saved yet. A yellow bar says Select time to confirm. and the times for that day load.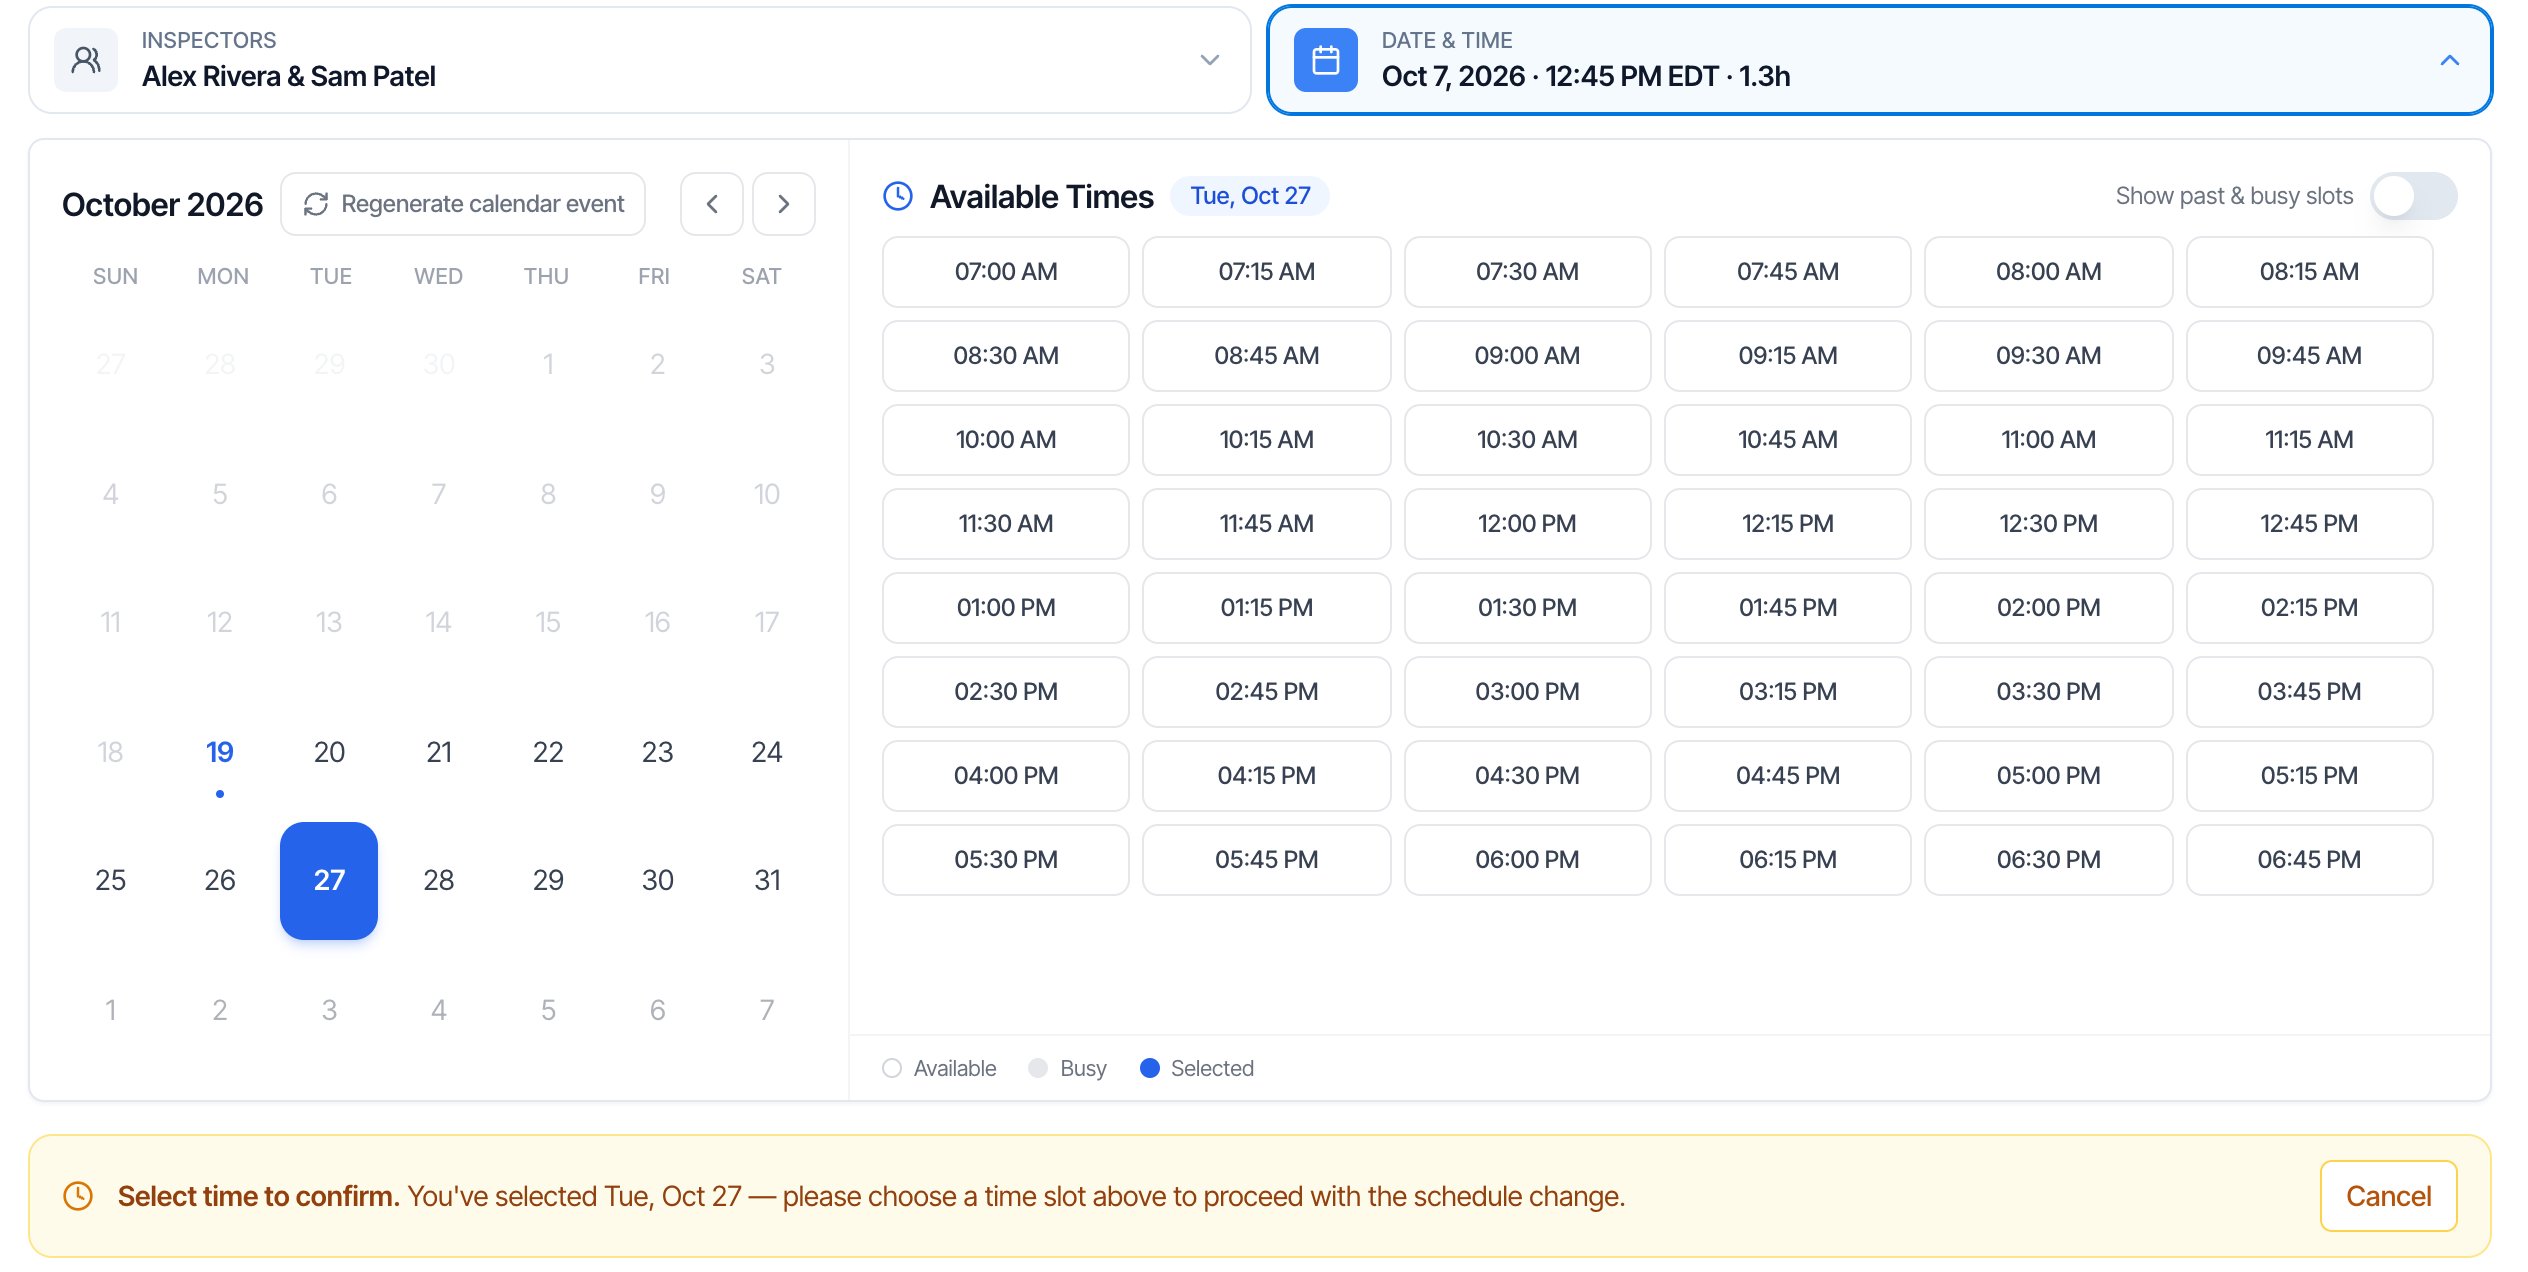
Pick the new time
Click a time. Greyed-out times are busy or in the past. A yellow Pending Schedule Change bar shows the new time.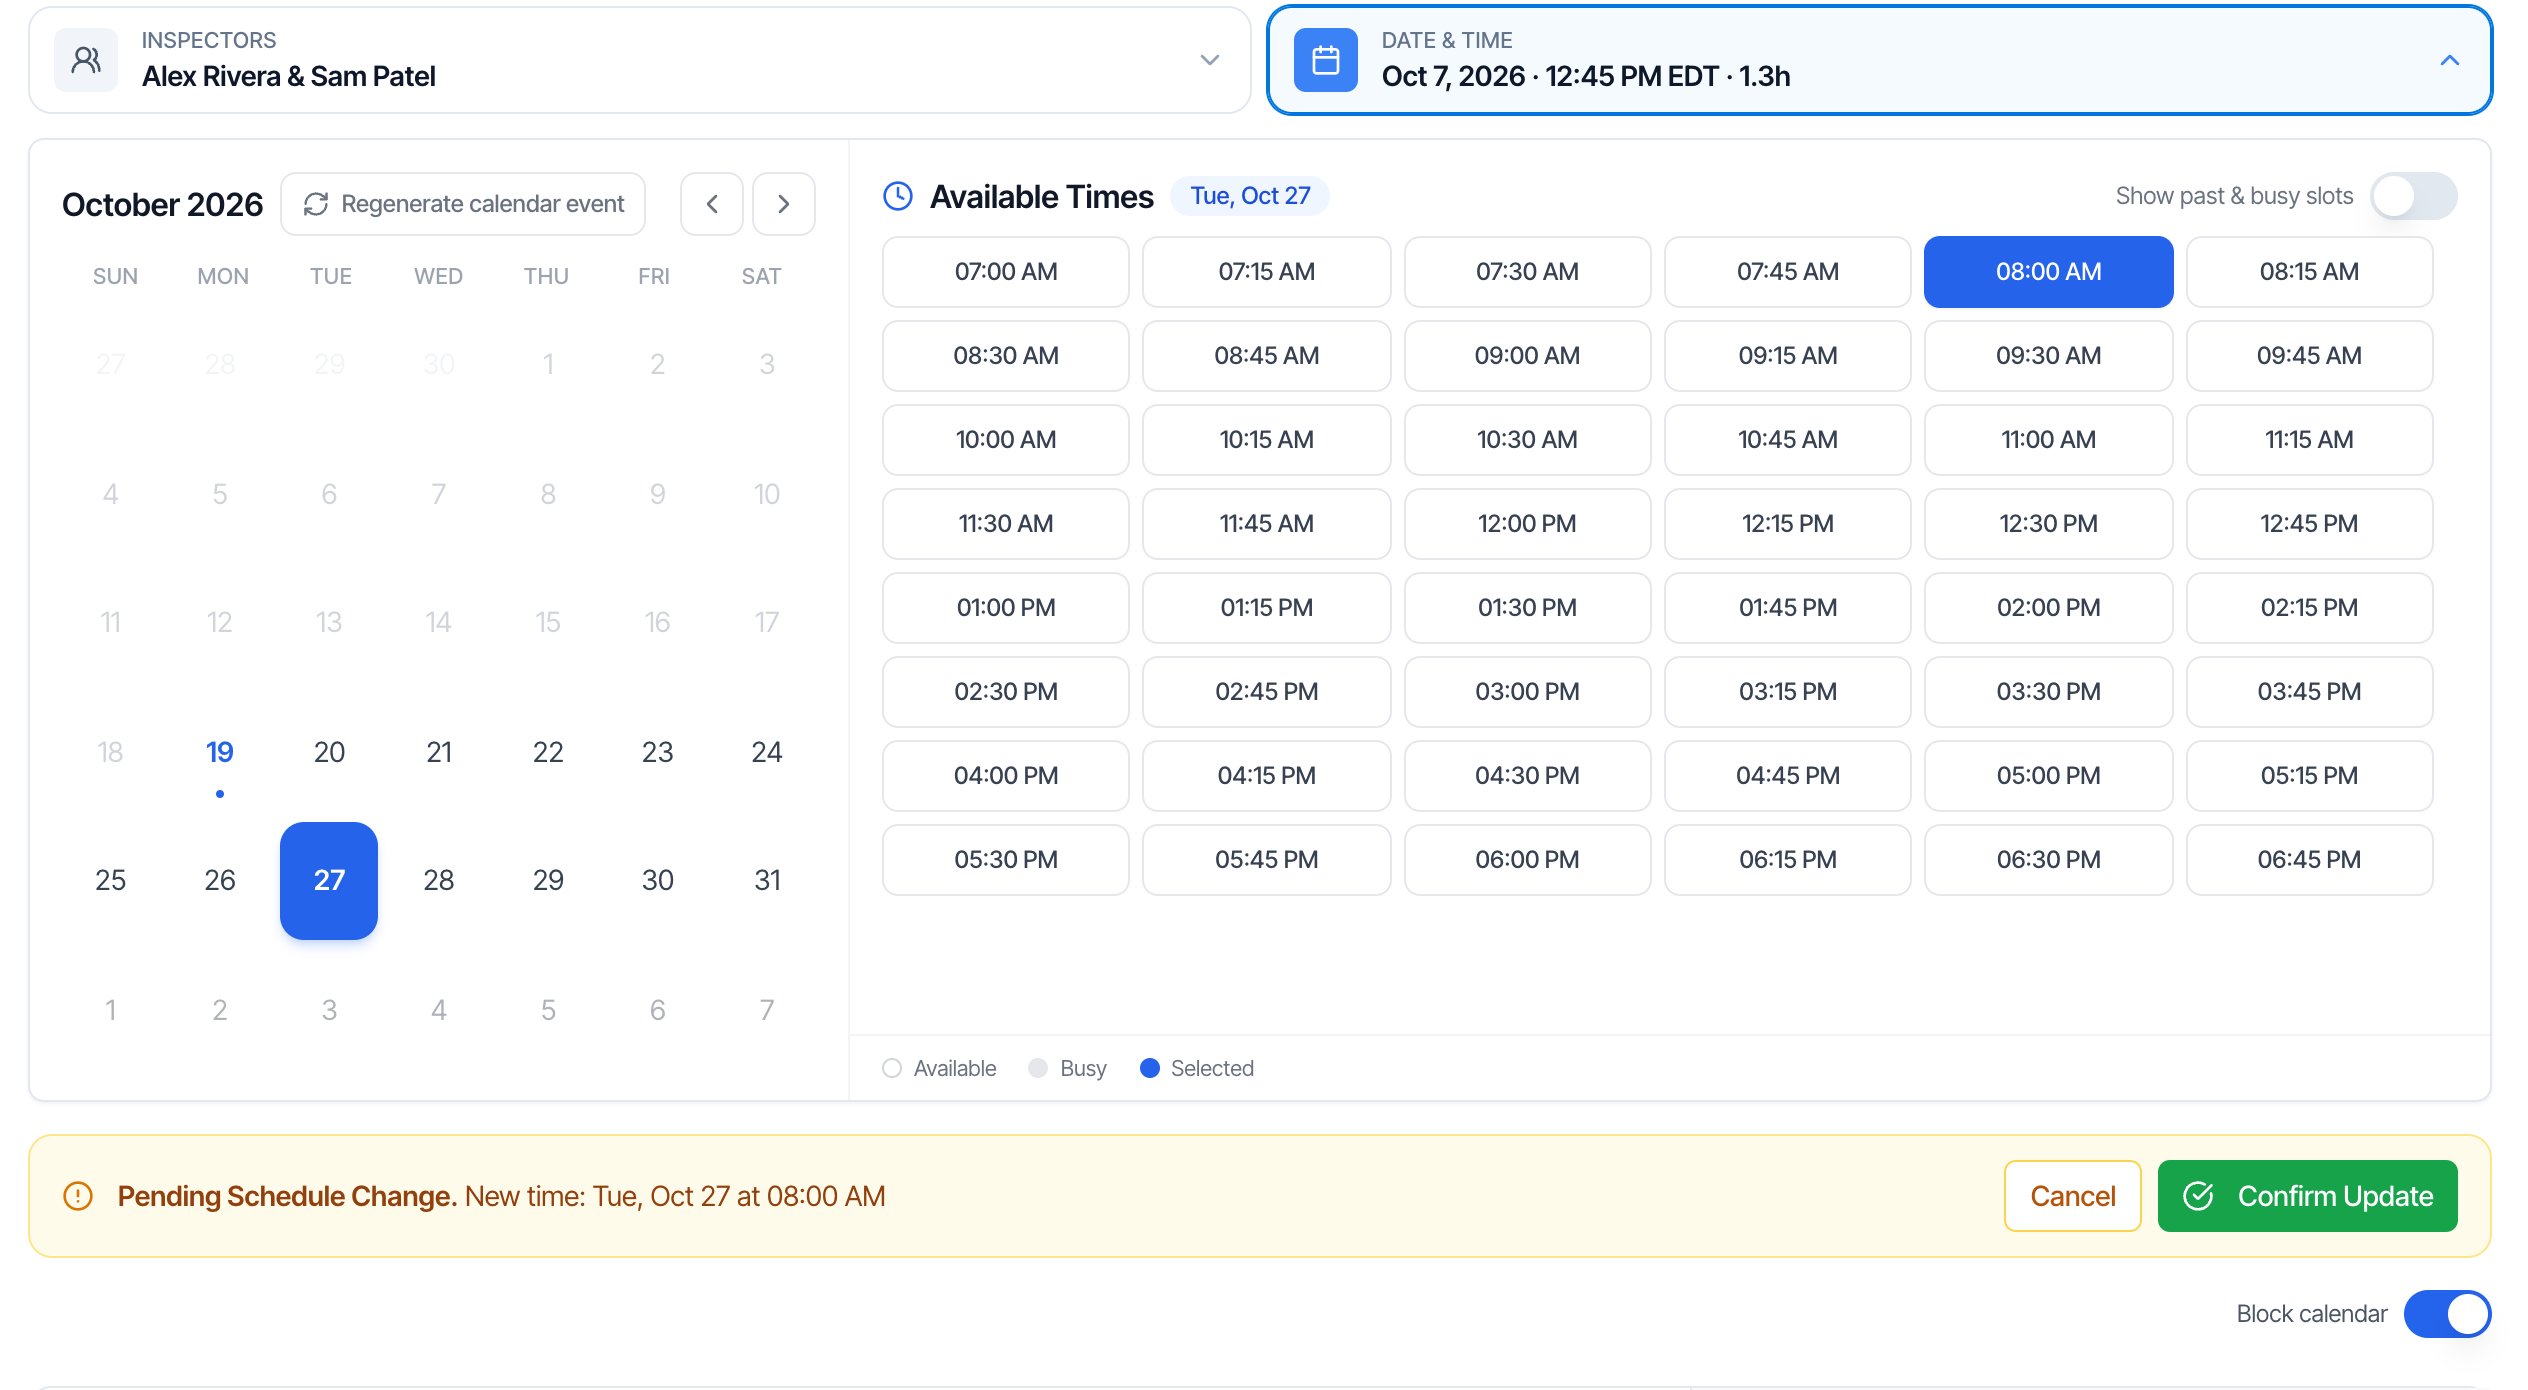
Options in the Date & time section
Good to know on the web
- Only the date and time change here. The length comes from the services and add-ons. To give the job to someone else, open Inspectors and change the team. That saves on its own and doesn’t count as a reschedule.
- Open times are checked for the first inspector listed. If several inspectors are on the job, check the others are free too.
- Times are in your company’s time zone, set in Profile Settings.
- Draft and Waiting inspections work the same way: pick the date, the time, then Confirm Update.
- Review and Canceled inspections save as soon as you click a time. There’s no Confirm Update step.
- On the Hive calendar (Hive Calendar engine only), click ⋮ on an inspection, then Reschedule. The Reschedule Inspection window has the same date and time picker.
Reschedule in the mobile app
Tap the Reschedule tile
In the row of tiles, tap Reschedule, the tile with a calendar icon, next to Status. It shows the current date and time, or Not scheduled.
Pick the day
The Reschedule Inspection sheet opens, showing Currently: and the current time. Swipe the row of days and tap the new day. You can pick today or any of the next 27 days.
Pick the time
Tap a time. Only open times show. To see times that clash with the calendar, turn on Show busy slots: “Include times with calendar conflicts”. The note at the bottom says which time zone the times are in.If the day is full, you see “No open times this day. Turn on “Show busy slots” to pick anyway.”
- It needs an internet connection. Times load live, and the change is saved straight away, not later. If it fails, you see Error Updating Inspection. Try again when you’re online.
- Only the date and time. You can’t change the inspector or Block calendar in the app.
- No past dates and nothing more than four weeks ahead. Use the web for those.
- Times that run past the end of the inspector’s business hours aren’t offered, even with Show busy slots on.
What Hive updates when you reschedule
The web and the mobile app make exactly the same change.
Setting a date for the first time, for example on a draft that had none, isn’t a reschedule. It doesn’t send reschedule messages.
Reschedule without notifying the client
There’s no “don’t notify” switch. Stop the message yourself before you change the date:- Open the inspection and click Automations under Quick Actions.
- Find the reschedule message for each person, shown as Waiting, and click Cancel.
- Reschedule the inspection.
Can clients reschedule themselves?
No. Once an inspection is Waiting or Confirmed, the client can’t change the time. If they open their booking link again, they see “This inspection has already been scheduled. Please contact your inspector to change it.” They contact you, and you reschedule it. While a quote is still a Draft or in Review, the client picks their own time through the scheduler link.Common questions
I don’t see Reschedule under Quick Actions. It isn’t there. On the web, open the inspection and click Date & time, the button that shows the current date and time. In the mobile app, tap the Reschedule tile. I moved the event in Google Calendar and the inspection still shows the old date. Moving the event doesn’t change the inspection. Open the inspection, click Date & time and pick the new date and time. Hive then moves the Google Calendar event to match. If an old event is left behind, click Regenerate calendar event in the same section. Will the client have to sign the agreement or pay again? No. Signed agreements and payments stay attached. Only the date, time, calendar events and reminders change, plus any day or time price modifier. The price changed after I rescheduled. The new time has a different day or time price modifier, such as a weekend charge being added or removed. Check the lines in Fees and Payments. To keep the old price, edit the price on the inspection. The client didn’t get a reschedule email. Check that:- you have an automation with the Inspection Rescheduled event type, turned on, and covering this service;
- the inspection is Confirmed;
- the message wasn’t canceled under Quick Actions → Automations;
- Only Trigger Once isn’t stopping a second reschedule message.
Where to go next
- Inspection statuses: confirm, cancel or reopen an inspection.
- Automation settings: delays, recipients and Only Trigger Once.
- Filter, search and sort your inspections: find the inspection to move.
- Mobile app basics