

In the dashboard: Business Tools → Recommended Contractors
Recommended contractors are the plumbers, electricians, roofers and other pros you send clients to. Add them once, tag each one with the recommendation services they offer, and Hive puts them on the matching defects in every digital report. Your client clicks Find a pro on a defect to get your contractor’s phone number, email and website, and can ask them for a repair quote without leaving the report. It works in three steps:- Add your contractors and the services they offer.
- Give your defect comments a service. Your templates probably do this already. See Recommendation Services.
- Your client sees Find a pro on each matching defect, and Get repair quotes at the end of the report.
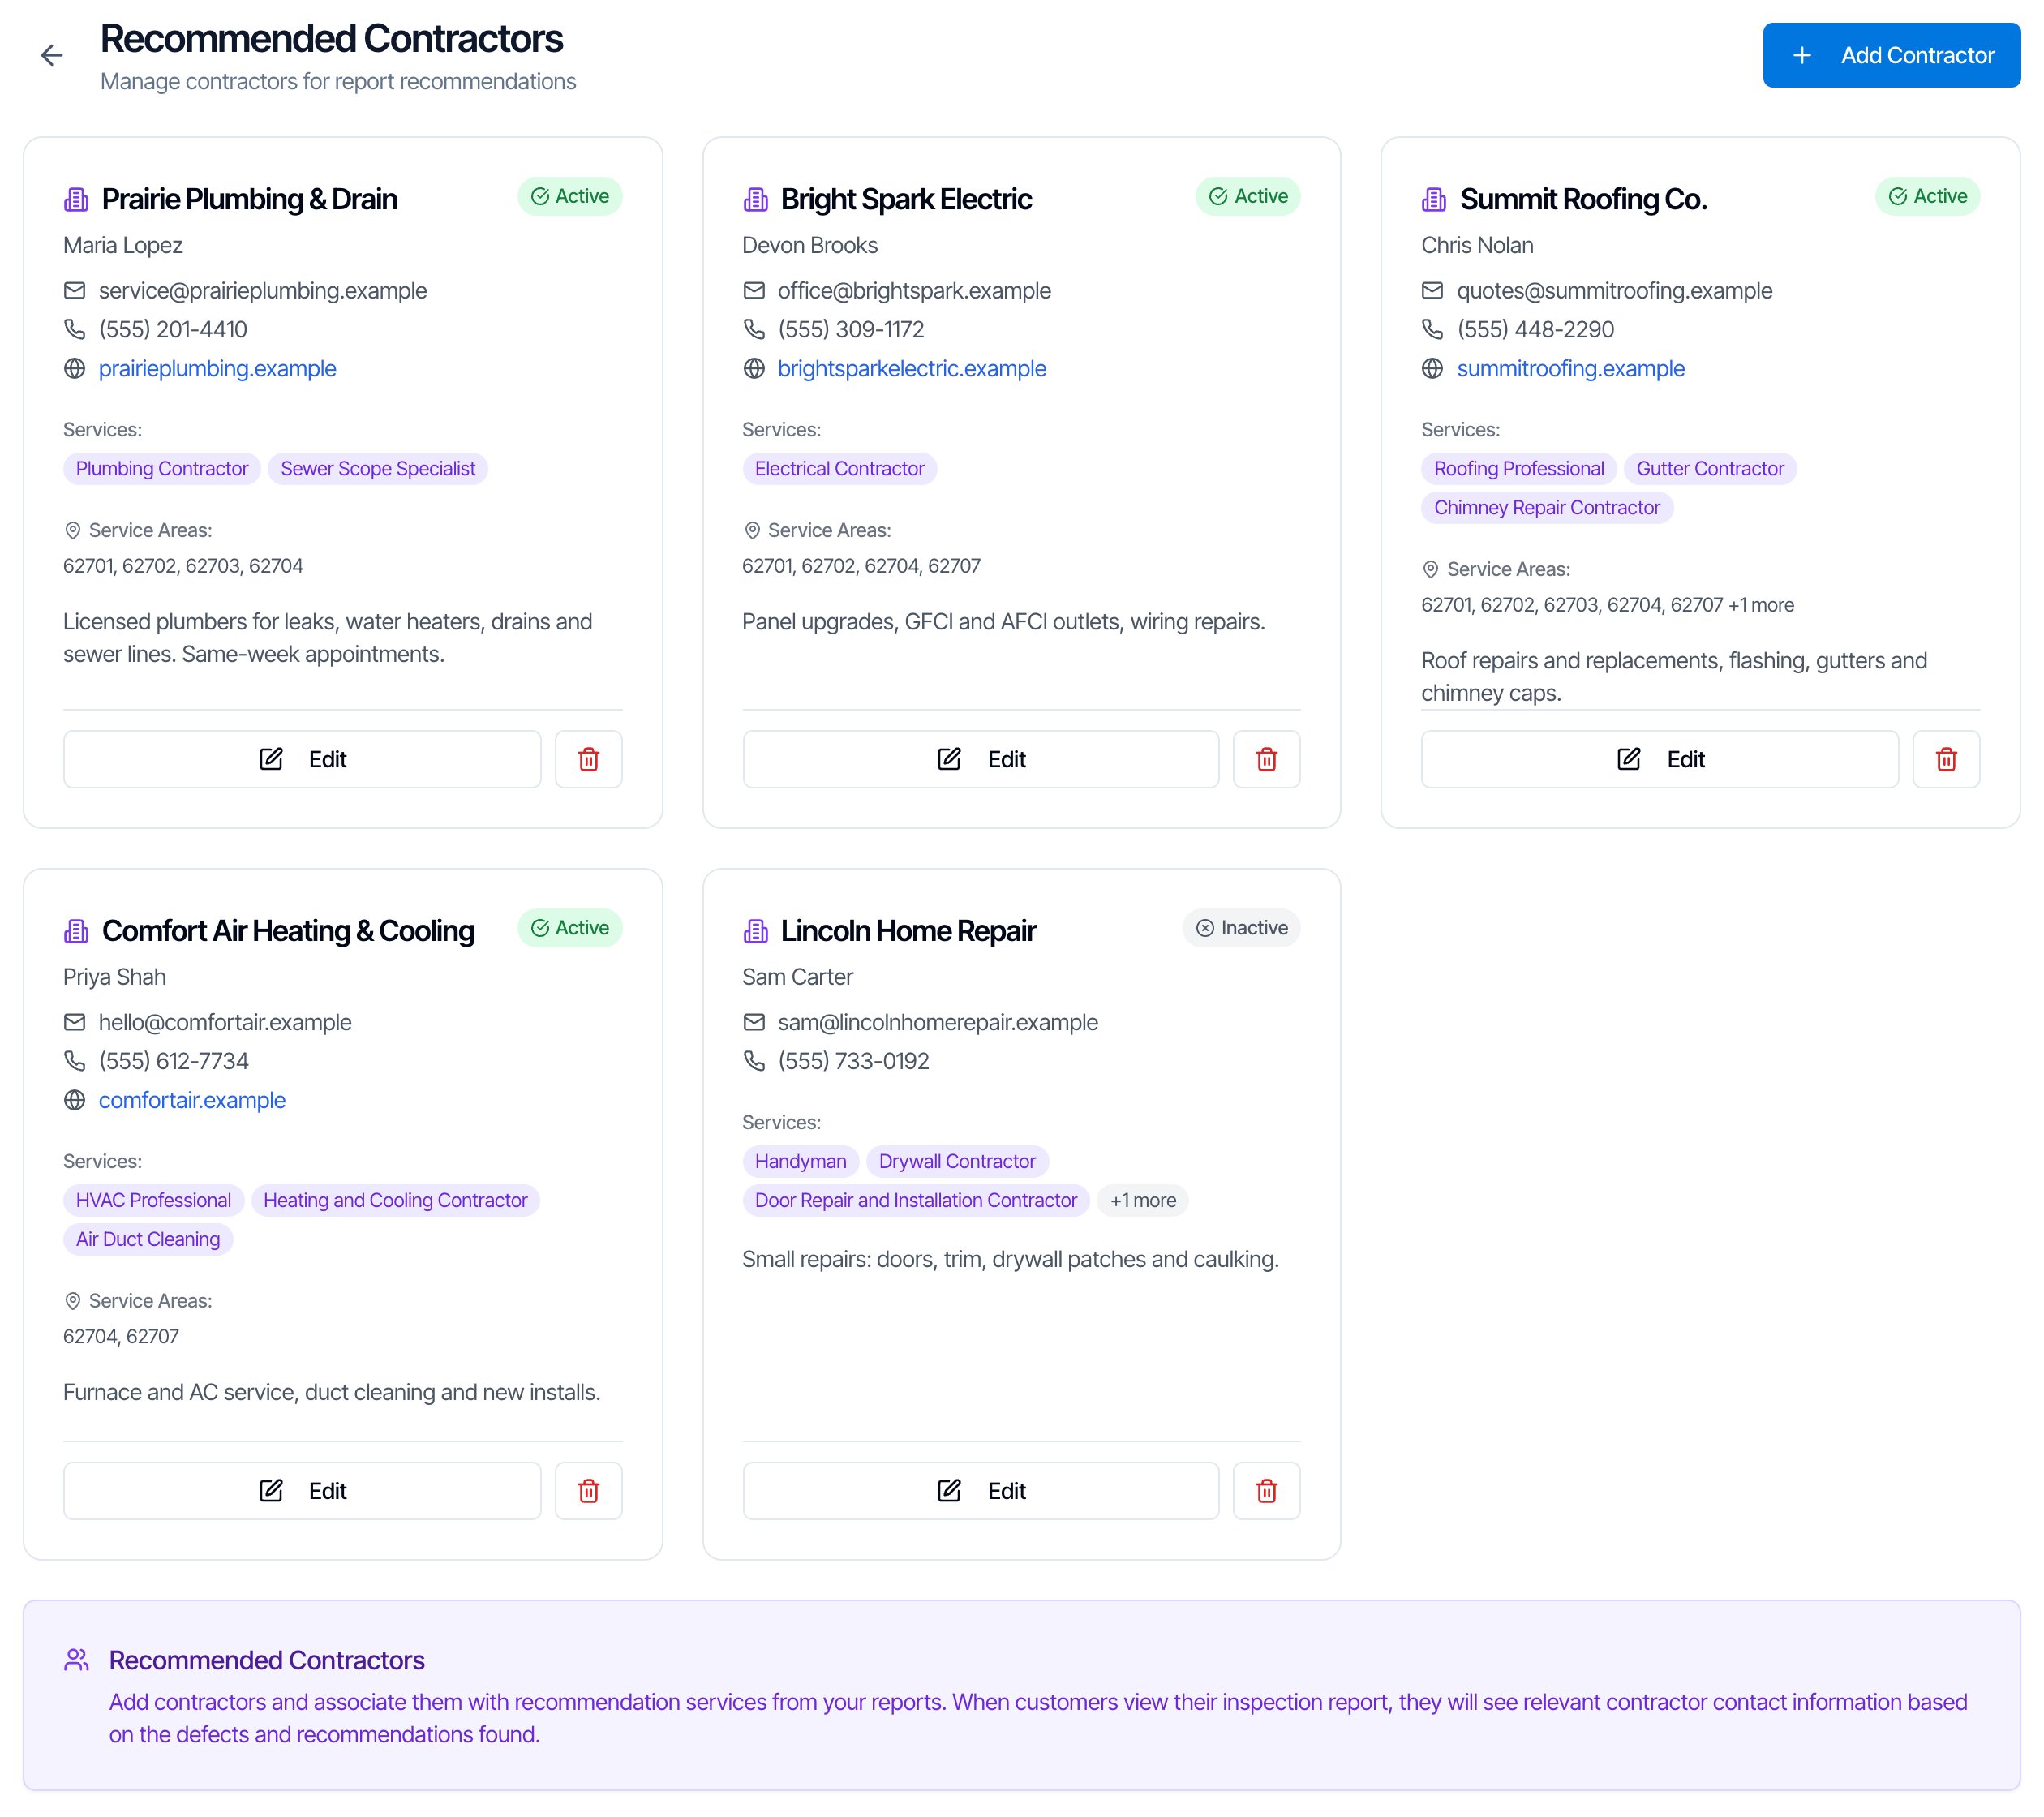
Add a contractor
- Go to Business Tools in the left menu and click the Recommended Contractors card.
- Click Add Contractor at the top right (or Add Your First Contractor if you have none yet).
- Fill in the details, pick the Service Types, and click Add Contractor.
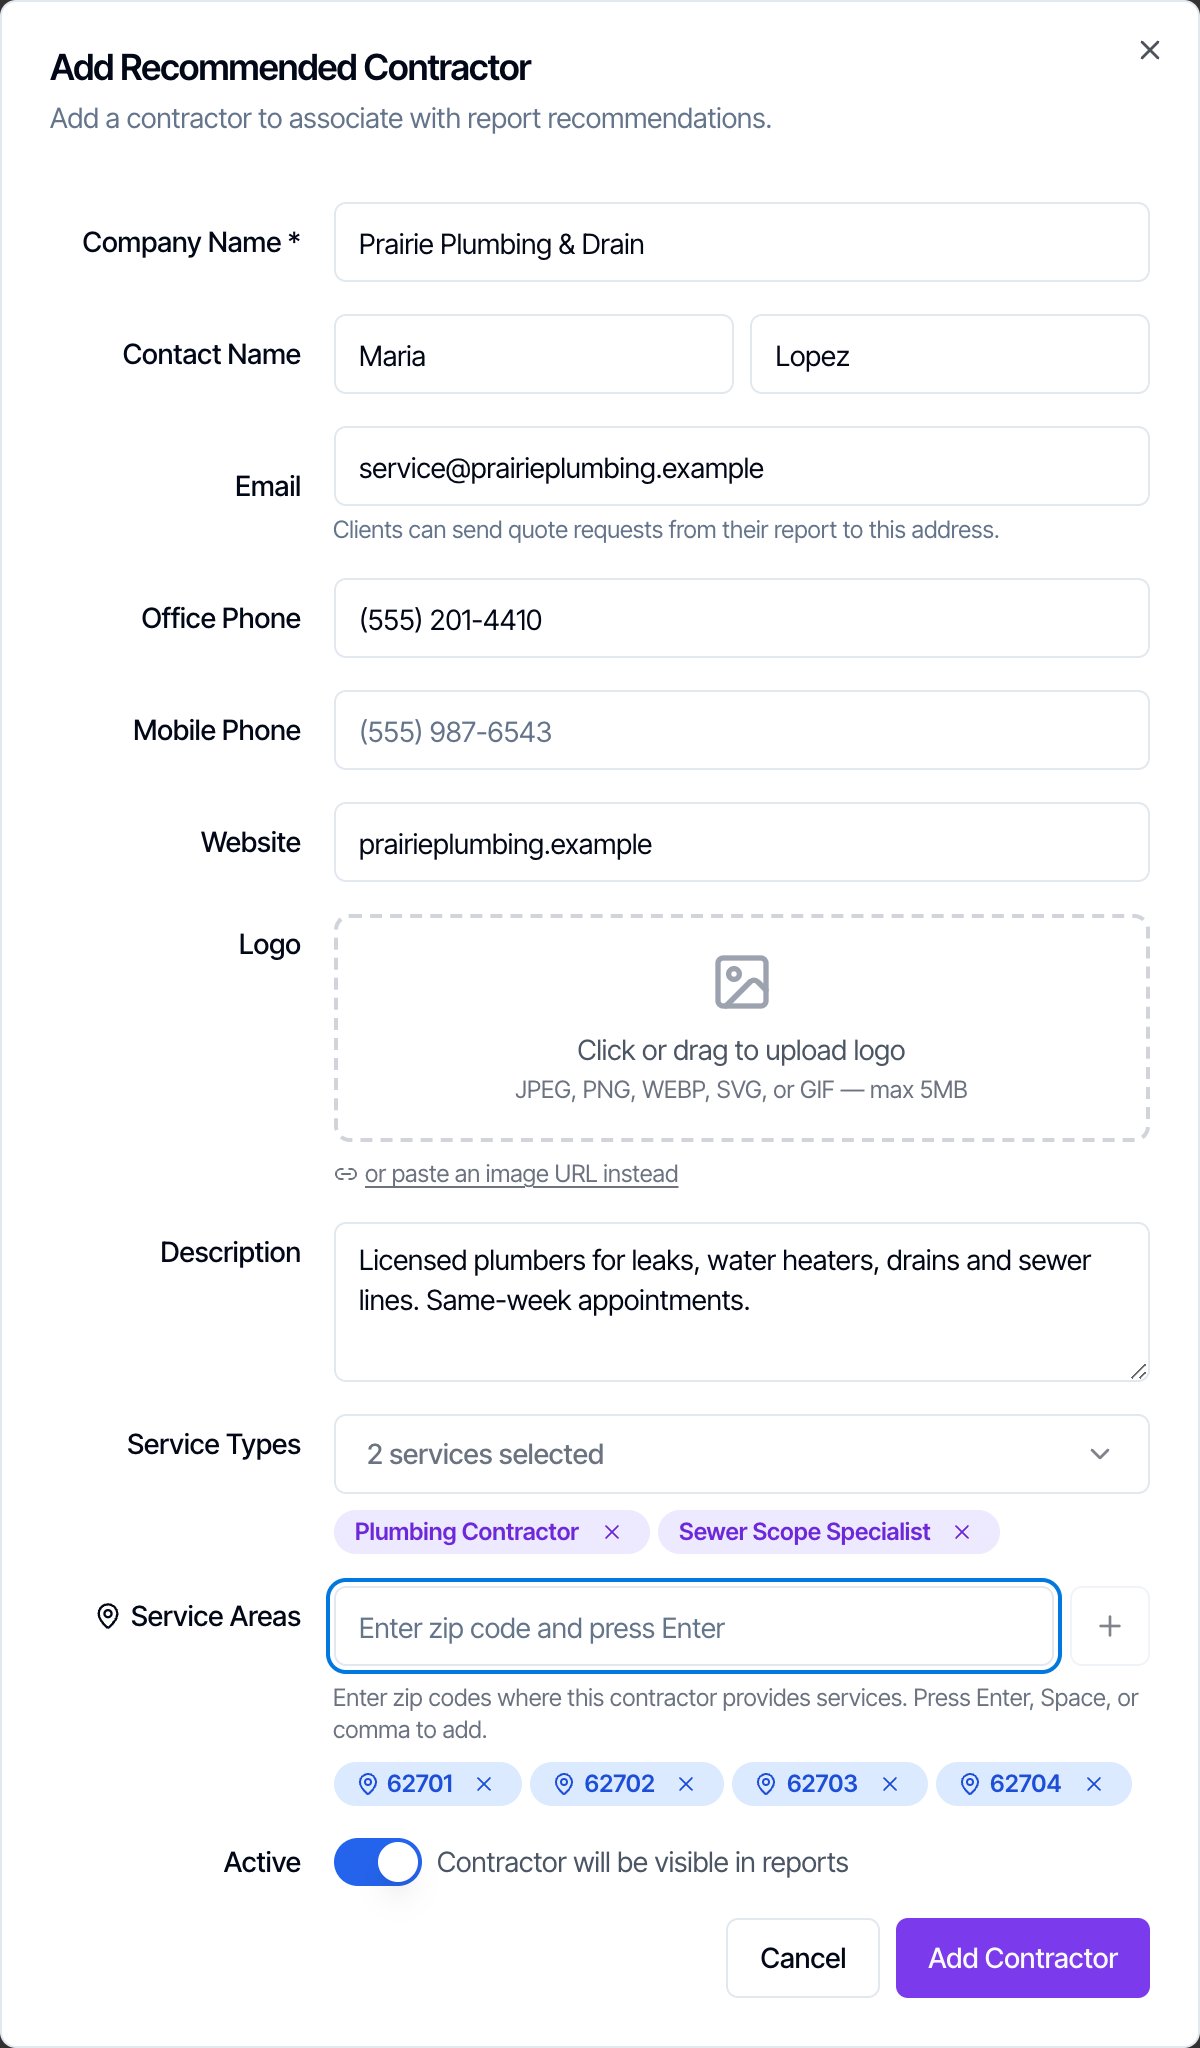
Link the contractor to services
Service Types is the important part. A contractor shows up on a defect only when the defect’s recommendation service is one of the contractor’s service types. Click Select services…, search, and tick every service the contractor covers. A roofer might cover Roofing Professional, Gutter Contractor and Chimney Repair Contractor.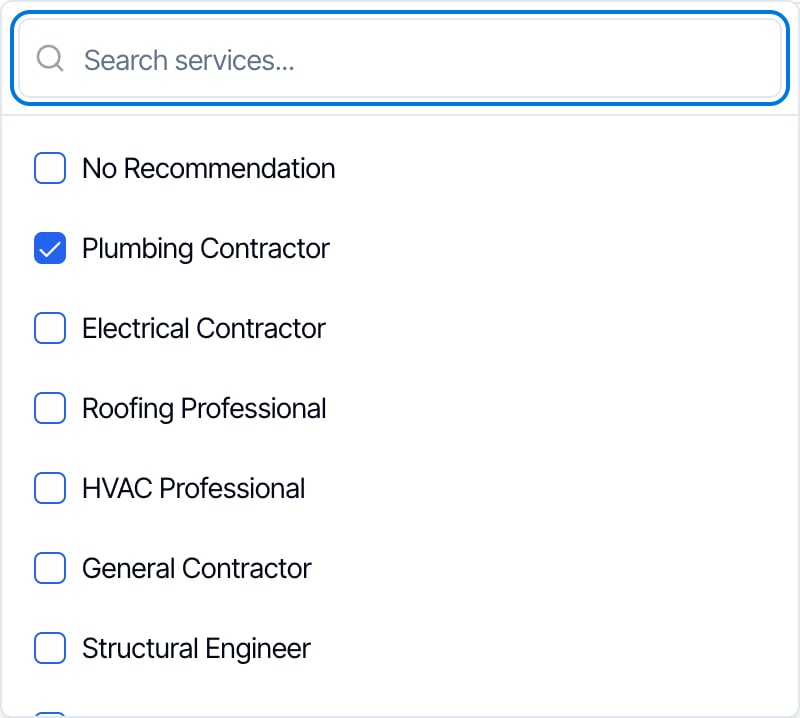
How contractors are matched to defects
A contractor shows on a defect when all of these are true:- The contractor is Active.
- One of the contractor’s Service Types is the defect’s service.
- The defect is in a report from your company.
What your client sees on a defect
When a defect’s service has at least one of your contractors, the green service label on the defect becomes a button: the service name, then Find a pro and an arrow.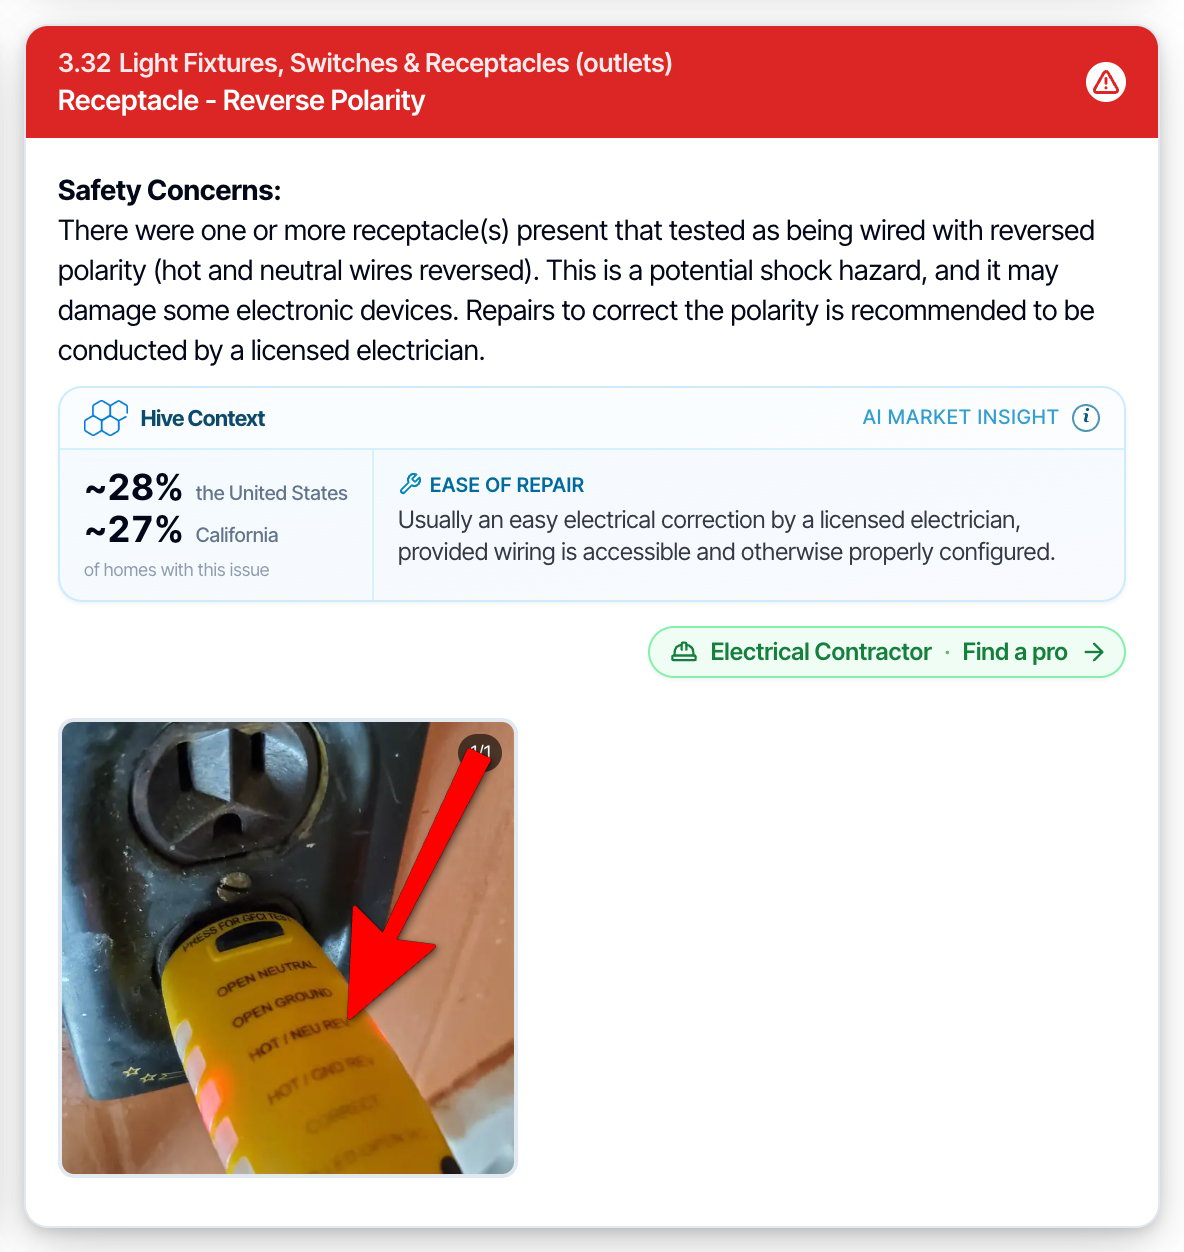
- One contractor
- Several contractors
With one contractor, their details are open straight away.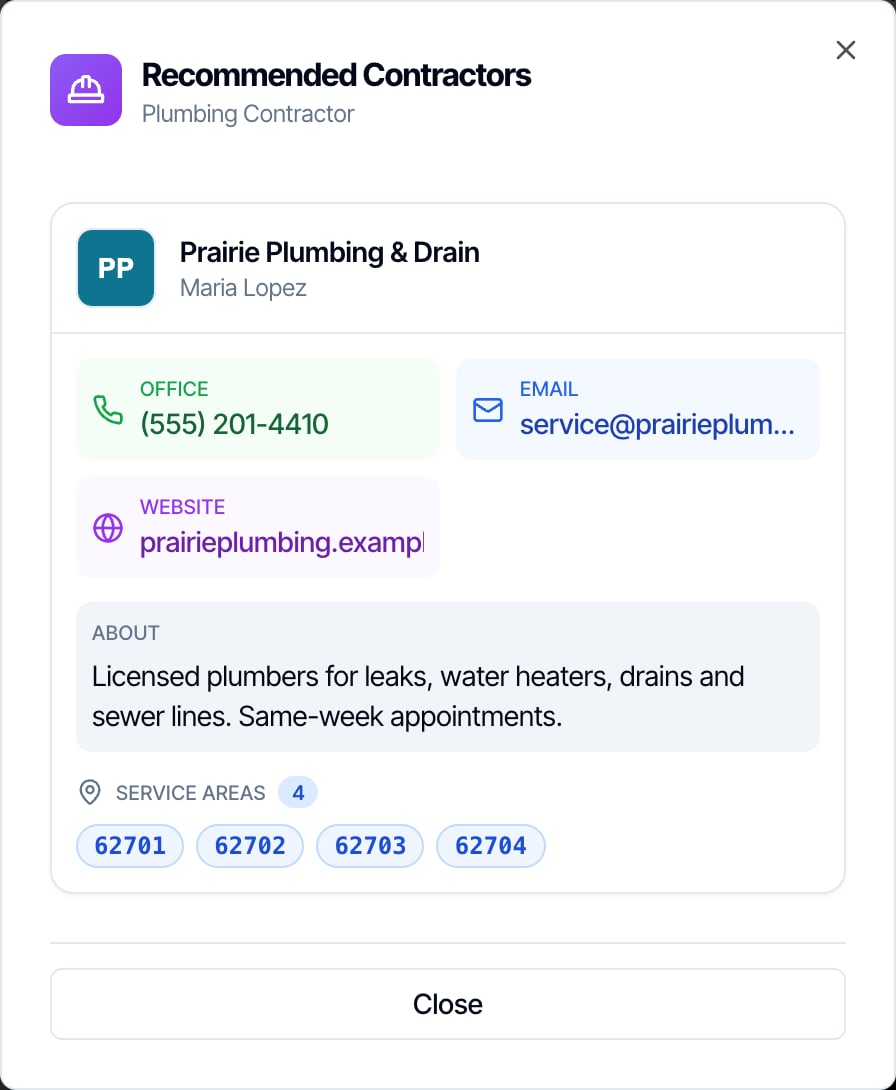
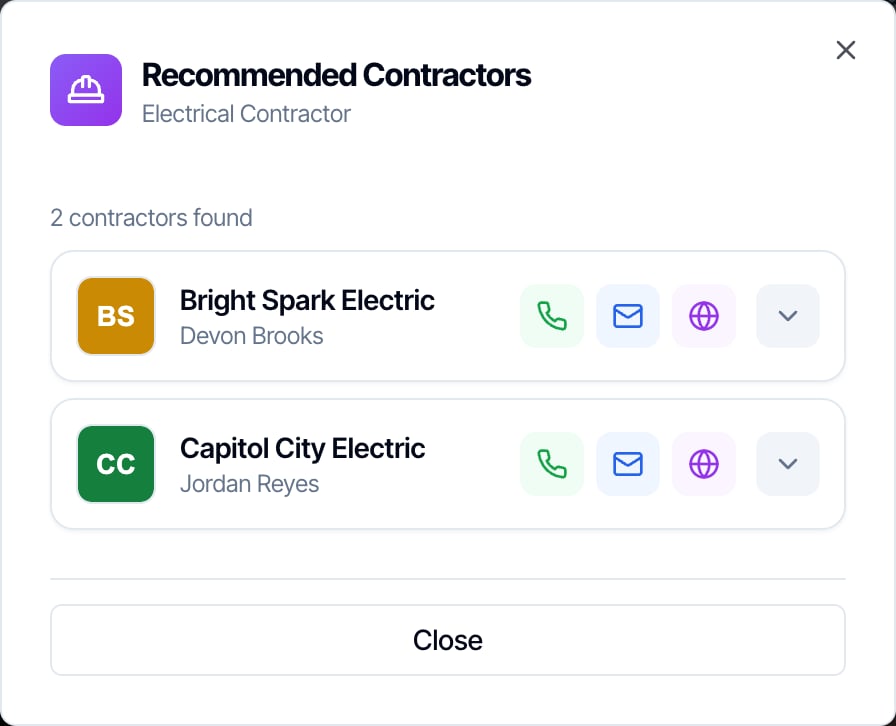
Get repair quotes at the end of the report
At the end of the digital report, after the summary, clients see Get repair quotes. It groups the report’s defects by service and lists your contractors for each one. There’s also a Repair quotes link in the report’s side menu.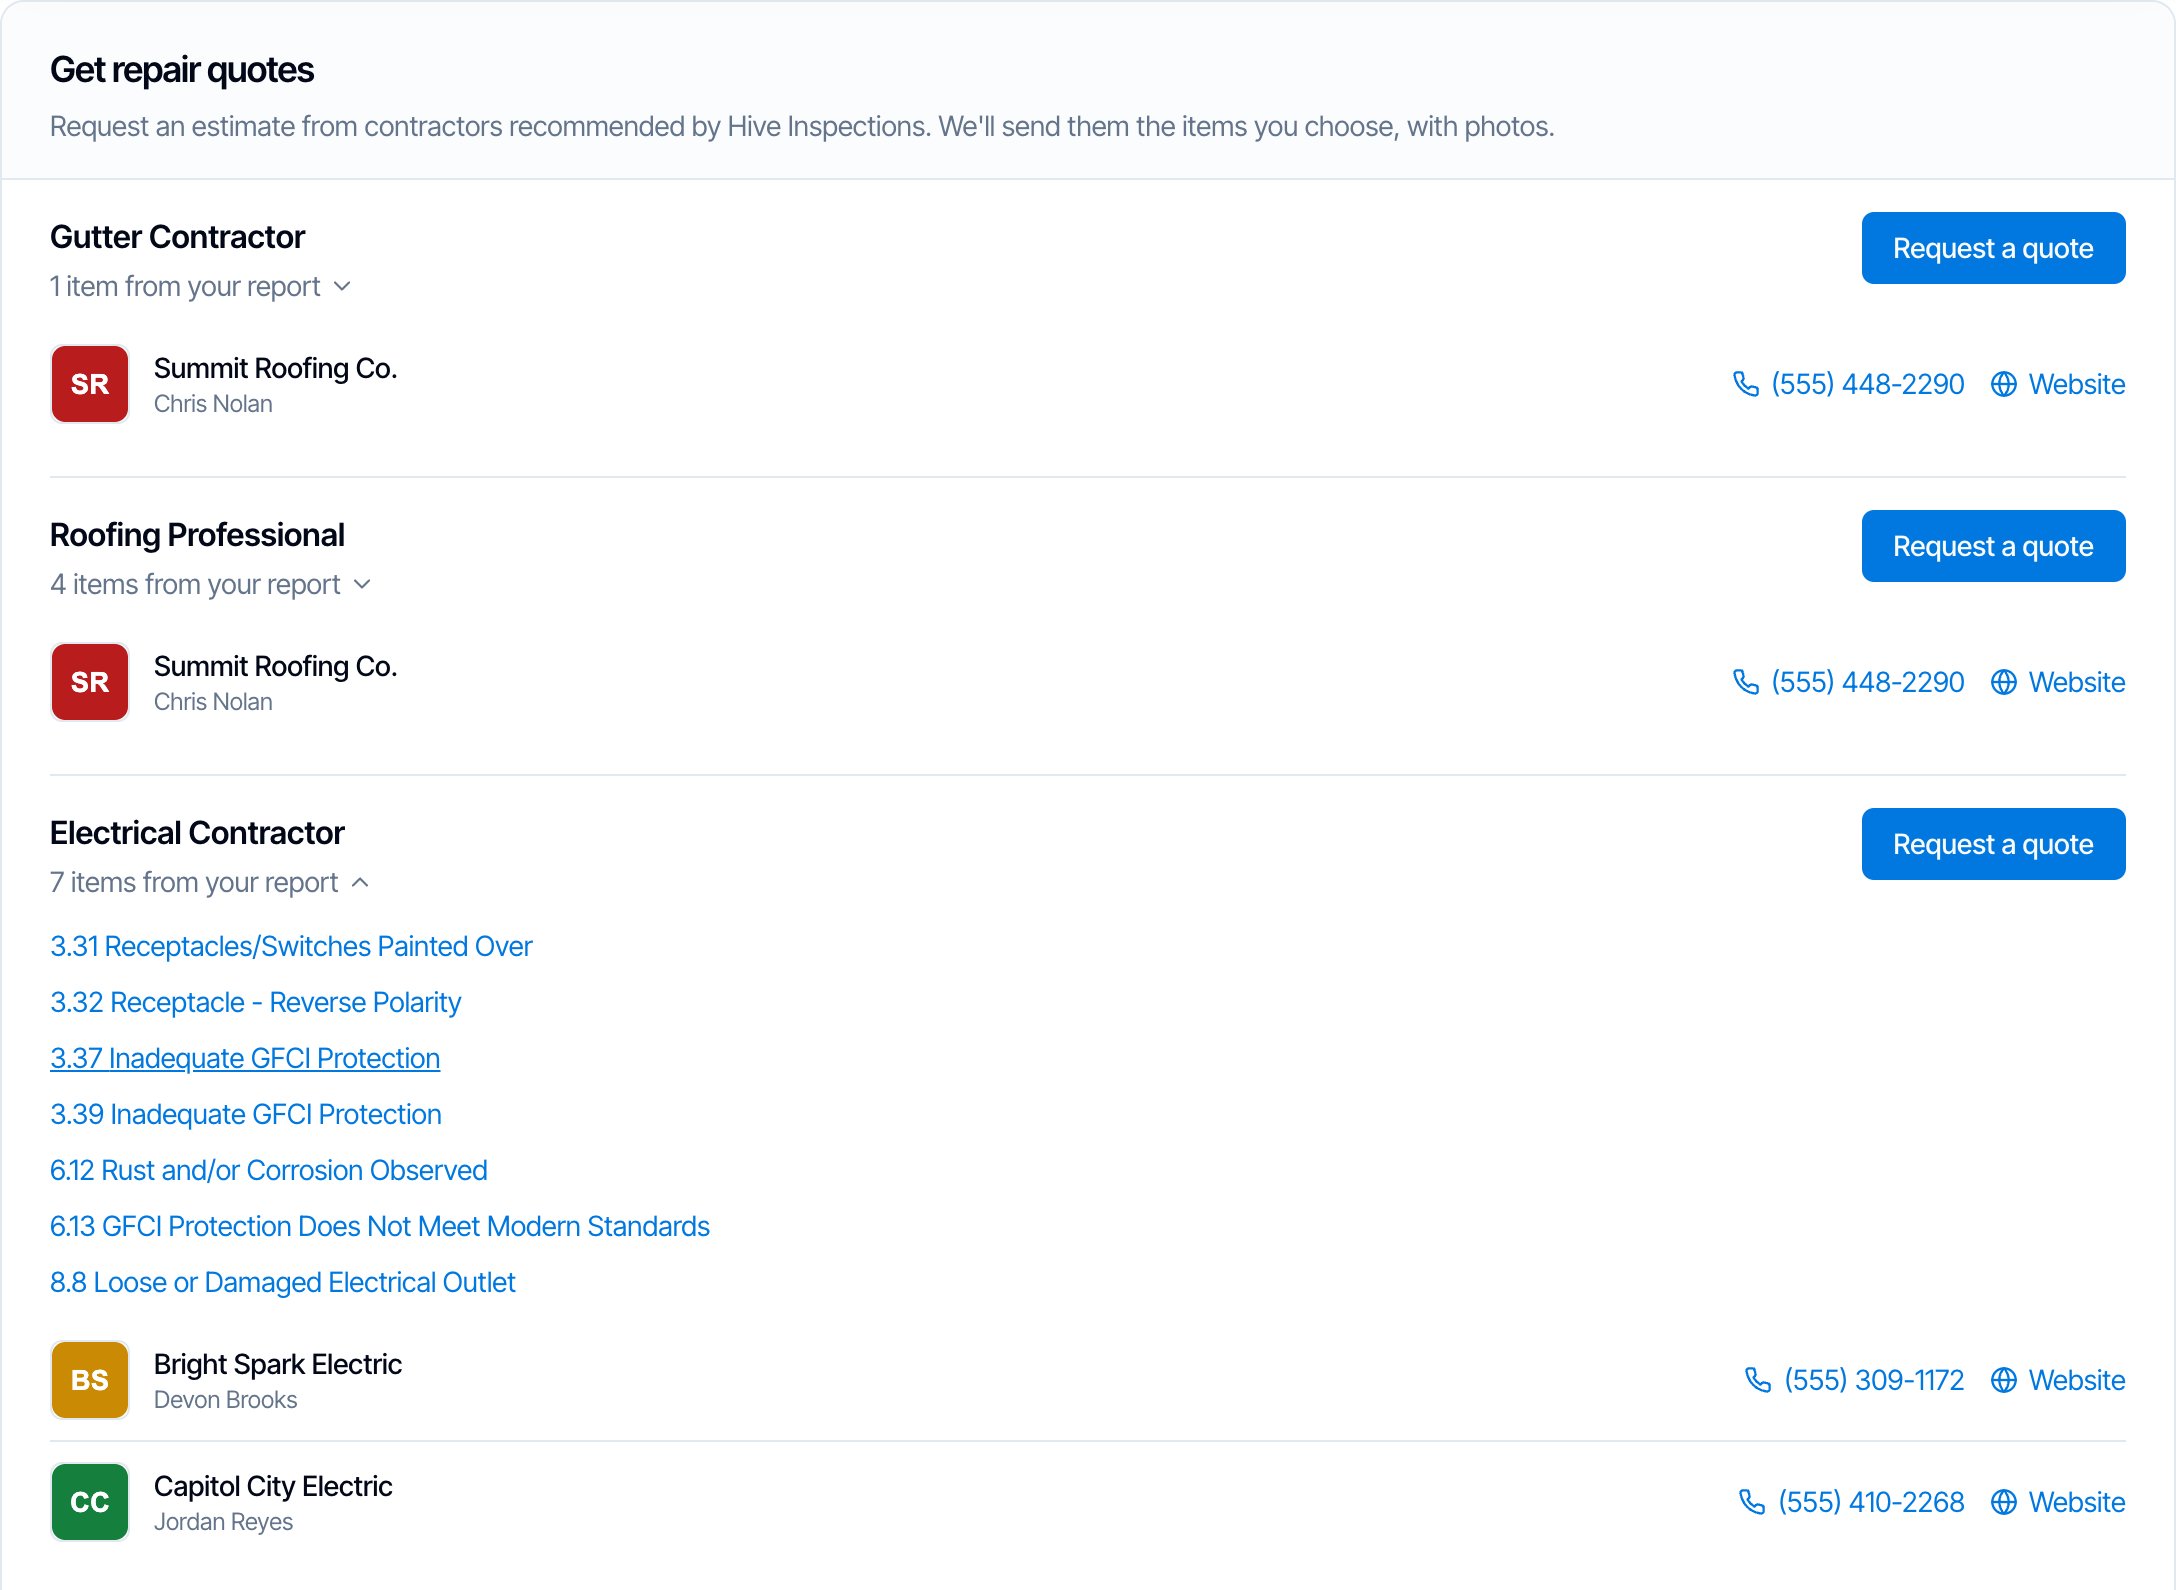
- the service and how many items from the report need it. Click it to list the items and jump to them.
- your contractors for that service, with their phone number and a Website link
- a Request a quote button, if at least one of the contractors has an email
How a client requests a quote
Pick the items
The client clicks Request a quote on a service. Every item from the report with that service is ticked. They untick anything they don’t want quoted, and choose which contractors to send it to under Send to. Then they click Next.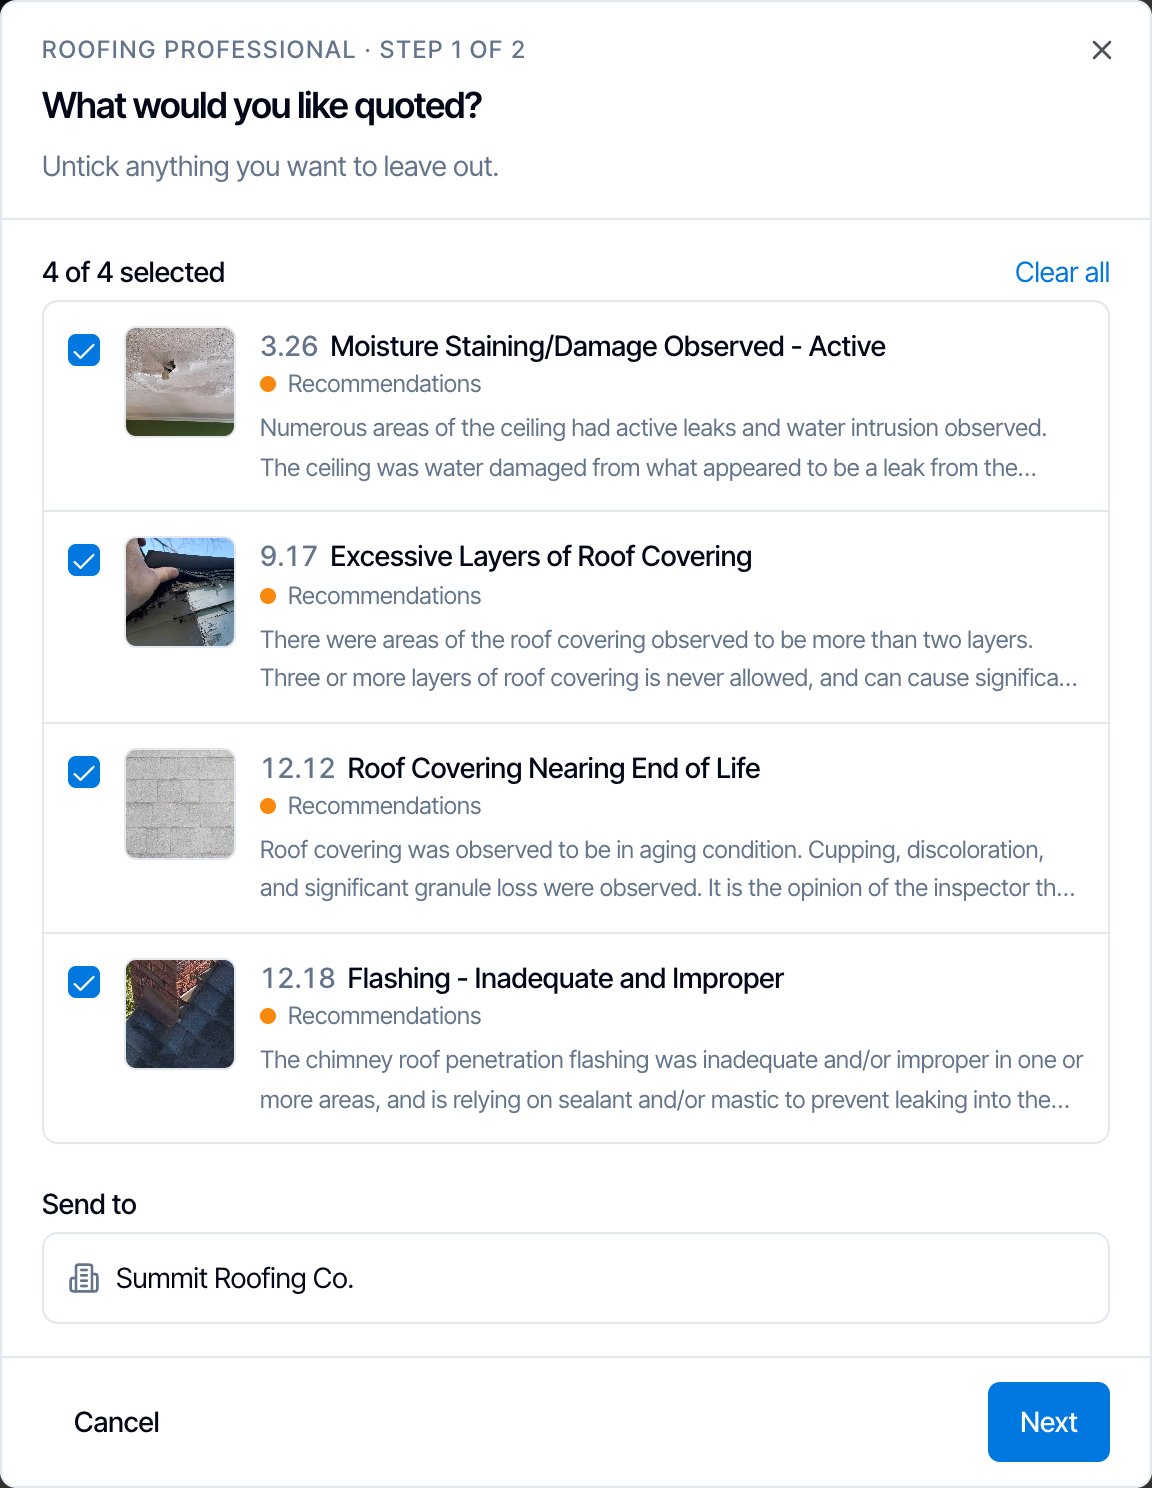
Add contact details
The client fills in their name, email and phone, picks the Best way to reach you (Email, Call or Text), adds an optional note, and clicks Send request. Hive fills in their details when it knows them.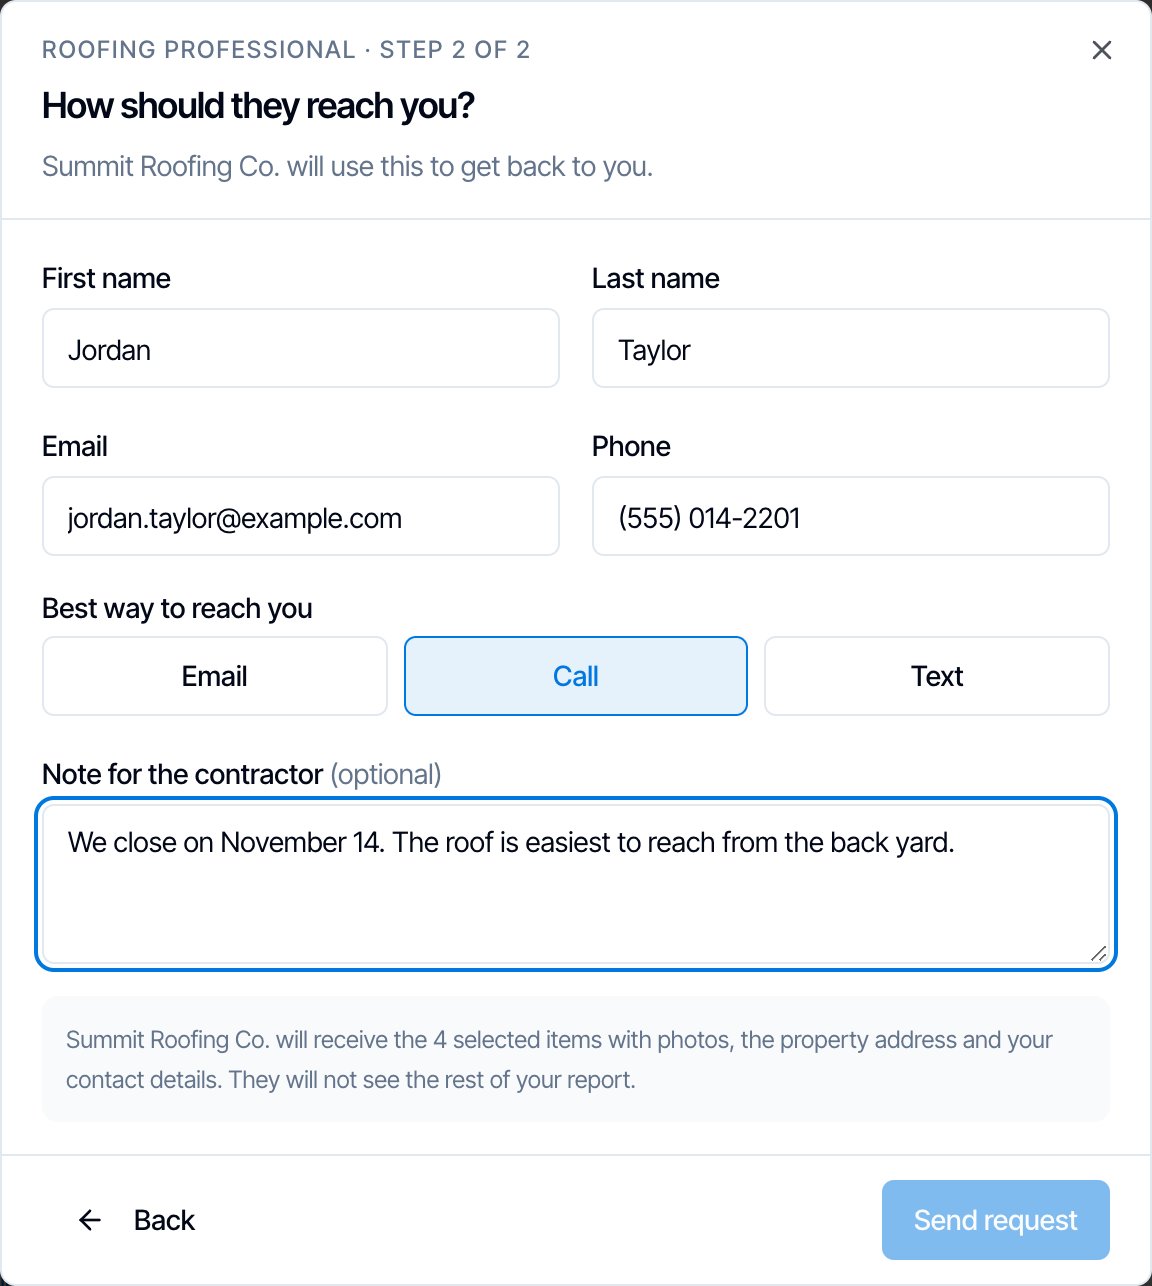
The contractor gets an email
Each chosen contractor gets an email titled Quote request: with the property address and the number of items. It links to a page with only the chosen items, their photos, the address and the client’s contact details. The contractor doesn’t see the rest of the report.The client sees Request sent and gets a copy by email. The button then reads Send again, with the date of the request.
When repair quotes are shown
The Get repair quotes section and the Request a quote buttons appear when:- at least one defect in the report has a service that one of your active contractors offers
- the report isn’t a re-inspection or a sample report
- Hide recommendation service in customer view is off for the report
Where contractors show up
Edit, pause or delete a contractor
- Edit: click Edit on the contractor’s card, change anything, and click Save Changes. Changes show in reports straight away, including reports already sent, because reports look up your current contractors each time they’re opened.
- Pause: click Edit and switch off Active. The card shows Inactive and the contractor disappears from every report until you switch it back on. Use this when a contractor is booked up or you’re not sure about them.
- Delete: click the red trash button and confirm Delete. The contractor is removed from every report, including old ones. This can’t be undone.
Hide contractors from clients
There’s no separate on/off switch for the whole feature. You can:- Hide one contractor: switch off Active.
- Hide them on one report or template: turn on Hide recommendation service in customer view in Report Tools or Template Tools. The service labels, Find a pro and Get repair quotes all disappear. See Hide the service from your client.
- Hide them on one defect: set the defect’s service to No Recommendation.
Who can manage contractors
Team members who can open Business Tools can add, edit, pause and delete contractors. See Team permissions. The list belongs to your company, so every inspector’s reports show the same contractors.Common questions
Why doesn't a defect show Find a pro?
Why doesn't a defect show Find a pro?
Check these in order:
- The defect has a service, and it isn’t No Recommendation. Open the defect in the report editor to see it.
- A contractor has that exact service under Service Types. Electrical Contractor and Licensed Electrician are different services.
- The contractor is Active.
- Hide recommendation service in customer view is off in Report Tools.
Do clients only see contractors near the home?
Do clients only see contractors near the home?
No. Service Areas are only for display. Every active contractor with the right service shows on every report. Add a note to the Description if a contractor only works in some areas.
Why doesn't my client see Request a quote?
Why doesn't my client see Request a quote?
None of the contractors for that service has an email address, the report hasn’t been released yet, or it’s a re-inspection or sample report. Add an email on the contractor’s card.
Are contractors in the PDF?
Are contractors in the PDF?
No. The PDF shows the service on each defect (for example Service: Plumbing Contractor), but not your contractors. Clients find them in the digital report.
Do I need to add contractors to each report?
Do I need to add contractors to each report?
No. Contractors belong to your company. Every report shows them on matching defects automatically, including reports you sent before you added the contractor.
Can I choose a different contractor for one report?
Can I choose a different contractor for one report?
No. Every report shows all your active contractors for each service. To leave one out, pause them, or change that defect’s service.
Do I get a copy of quote requests?
Do I get a copy of quote requests?
No. The request goes to the contractor, and the client gets a copy. Ask your contractors to let you know how referrals go.
Is a recommended contractor the same as a Sub Contractor contact?
Is a recommended contractor the same as a Sub Contractor contact?
No. A Sub Contractor is a contact you add to an inspection, such as a radon tester working the job with you, and you can email them with automations. Recommended contractors are the pros you suggest to clients for repairs. They live under Business Tools and only show in the digital report. See Subcontractor emails.
I renamed or deleted a service. Are my contractors still linked?
I renamed or deleted a service. Are my contractors still linked?
Yes. A rename shows the new name on the contractor, and they stay matched. A deleted service stays on contractors already tagged with it, and they keep showing on defects that use it. See Recommendation Services.